WHR
Pont Cae'r Gors to Hafod Ruffydd Halt
V4.1 updated 8/10/06
Images updated from 1/10/06
Click here for Laurence Armstrong's latest WHR North map
Click here for Steve Harris' Phase 4 gradient profiles
Click here for Steve Harris' Phase 4 TWA maps
Click here for Chainages and OS Map References
Locations
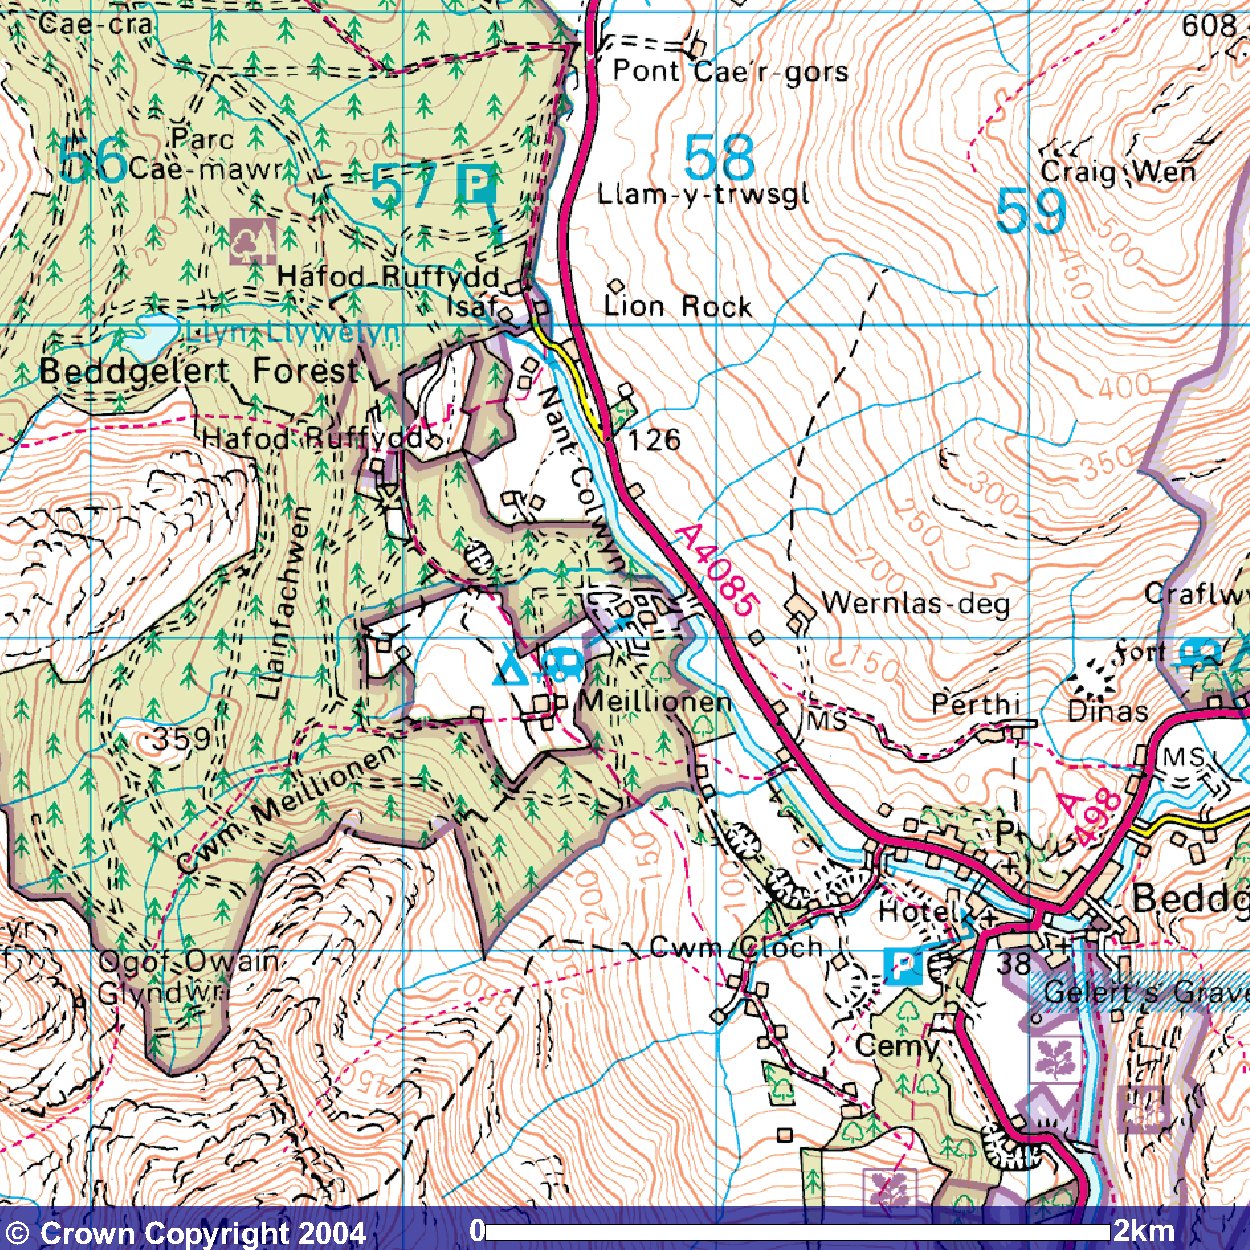
The above OS map shows the route through the Beddgelert Forest. Click on the image to enlarge. Image produced from the Ordnance Survey Get-a-map service. Image reproduced with kind permission of Ordnance Survey and Ordnance Survey of Northern Ireland.
Click here to use the free OS Get-a-map service
The railway alignment runs south-east along the east side of the A4085 on an embankment from Rhyd Ddu station to Pitt's Head Halt. The halt is named after the large rock on the west side of the railway by the road bridge OB123 which is said the resemble the 19th Century Prime Minister's head as viewed from the north.
A track and gate lead to the site of the halt at LC68 (Ch. 15650) near Cerrig Cyllau. The railway now runs into a cutting before curving under the bridge to cross to the west side of the A4085. The cutting has become flooded and is heavily overgrown. A public footpath joins the road from Ffridd Uchaf farm making a circular walk from Rhyd Ddu possible.
The alignment now runs due south through the summit bog. A wet cutting passes under a former cattle overbridge (OB124) and then reaches the summit of the WHR (197m or 646 ft.) at Ch.16180. This cutting can be seen from the parallel A4085. The trackbed runs downhill now on a shallow embankment to Pont Cae'r-Gors where it meets the public access to Beddgelert Forest car park and a forestry track at LC70 (Ch.16560). The cutting at LC20 has been filled in and resumes immediately south of the level crossing.
From this point the railway begins its steep descent of the Nant Colwyn Pass to Beddgelert. For a while the railway keeps close on the west side of the forestry track, the Afon Colwyn and the A4085. Already the railway is effectively high on an embankment above the road as the road and river drop steeply in just 2 miles to Beddgelert. The railway doubles this distance, through use of S curves and a loop into a side valley, to keep the gradient down to a manageable 1 in 40.
The alignment now curves west into the side valley of the Afon Cwm-Du, which it crosses in a horseshoe curve at UB131 (Ch.17570). There permissive paths on this section in Beddgelert Forest.
Forest Enterprise (ex Forestry Commission) has produced a map available free to residents of the campsite at Beddgelert Forest. It covers a number of way-marked paths, some of which appear to be on the WHR trackbed. These are permitted paths.
Click here for map of Walks in Beddgelert Forest.
There is a car park (from Pont Cae'r-Gors follow way-marks 51, 52, 54 and 56) and numerous walks, though the car park toilet has been demolished. One of the way-marked walks (way-marks 53, 57, 80 and 81) is nominated along the trackbed to Hafod Ruffydd.
All trees were felled on this section to Hafod Ruffydd Halt in 1998 and excellent views will be had for several years until the new planting obscures the view again (sadly before trains run in 2009).
After Cwm-Du bridge the railway resumes its southerly course and crosses a Forestry Track at LC71 (Ch.17940) which was the site of Hafod Ruffydd Halt. The alignment now runs on an embankment across pasture below Hafod Ruffydd Ganol farm where a public bridleway crosses at LC72 (Ch.18140). Shortly after the farm the route re-enters the Beddgelert Forest in an area of mature trees followed by new planting.
There is a deeply flooded cutting starting at Ch. 18550 caused by a Forestry track crossing the route at Ch. 18650. At Ch. 18600, the railway begins the first of its two famously tight S curves to loose height as it approaches the Afon Meillionen and its adjacent forestry track. The railway turns from south to north over the 300m from Ch. 18600 to Ch.18900, moving from cutting to a high embankment.
The route now moves into pasture land, passing Weirglodd-isaf cottage before encountering the second part of the S curve at Ch.19100. Over the next 300m, the railway curves through cutting from north to south and onto a shallow embankment alongside the Afon Colwyn.
The alignment re-enters Beddgelert Forest running south at Ch.19600 and crosses the Afon Meillionen via UB150 at Ch.19760. A new Forestry crossing is required here at Ch.19760. The railway now crosses the Beddgelert Forest Campsite in a shallow cutting, passing under a footbridge OB171 (Ch.19940).
There was no halt here in the previous history of the WHR but as this large and popular Forest Campsite has developed from the 1950s, it is likely to be a large source of traffic and income for the WHR from tourists travelling to Porthmadog or Caernarfon. The Beddgelert Forest Halt will be located on a straight length of trackbed at Ch.20000, the end of this section of the website.
Gradients
The railway climbs ands falls with rapidly changing grades, mostly shallow, from Rhyd Ddu to the site of Pitt's Head Halt. All the heights are within two metres and this switchback section could be made even with ballast or fill from the Rhyd Ddu stockpile.
From the A4085 road bridge the gradient steepens to 1 in 76 then finally to 1 in 46 on the climb to the short level summit section around Ch.16200. The route then drops at 1 in 104 towards Pont Cae'r-Gors.
The descent proper begins at Pont Cae'r-Gors where the gradient steepens to 1 in 40, the ruling grade for the line. The gradient is eased to 1 in 46 through the Cwm-Du curve before resuming the 1 in 40 to Hafod Ruffydd. Here there is a short easing to 1 in 46 before another 1 in 40 section. The S curve is eased to 1 in 48 and 1 in 44 with a short 1 in 40 section in the middle. Beddgelert Forest Halt is graded at 1 in 44 but the route changes to 1 in 40 again south of the halt.
Pont Cae'r-Gors
From Summit Cutting the railway now goes downhill towards LC70 at Pont Cae'r Gors. The trackbed briefly approaches the main road then swings into the Beddgelert Forest.
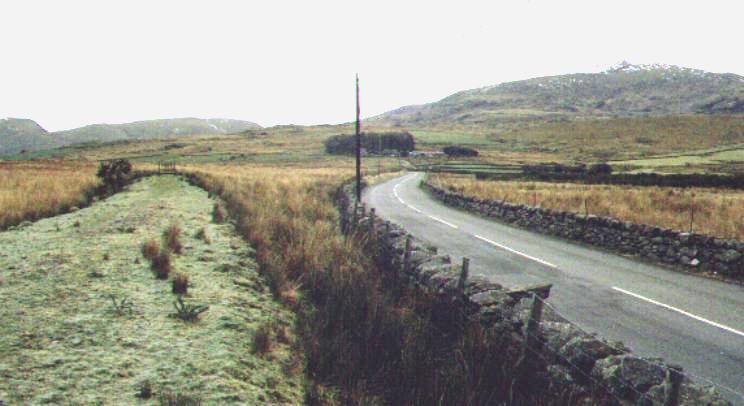
This northerly archive view (2000?) from Ch.16500 approx. at Pont Cae'r Gors shows the trackbed rising at 1 in 64 towards the short Summit Cutting. A light covering of snow is visible on Yr Wyddfa (Snowdon). Click on the image to enlarge. This image is copyright B.W.Hughes. Slide scan technology utilised is Olympus ES10 & iPhoto Plus4. Slide scanned at 200dpi.
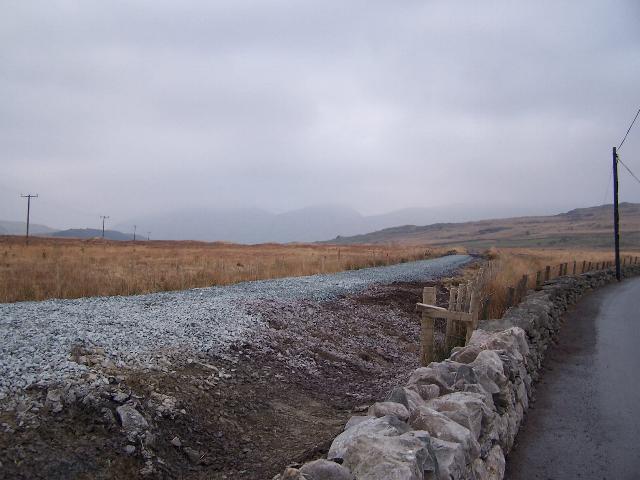

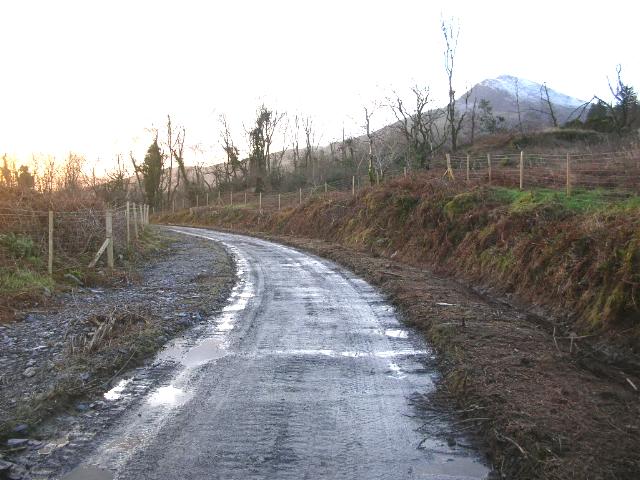
These northerly views (30/4/05, 12/11/05, 5/2/06 and 25/6/06) from Ch.16500 approx. at Pont Cae'r-Gors show the trackbed looking north towards Rhyd Ddu from the same viewpoint as the archive view above. The trackbed is rising at 1 in 64 towards Summit Cutting, which is half way along this straight section. These views were taken from the A4085. The first view shows the trackbed cleared and fenced. The second view shows ditching taking place. The third view shows the ballasting and roadside walling complete. The fourth view shows tracklaying approaching UB125. Click on the image to enlarge. These images are copyright B.W.Hughes. Images taken on a Kodak DX6490 digital camera. Images post processed using iPhoto Plus4 and displayed at 96dpi.
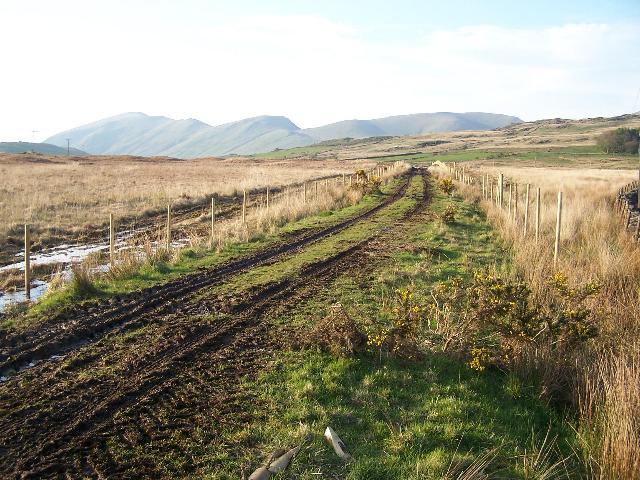
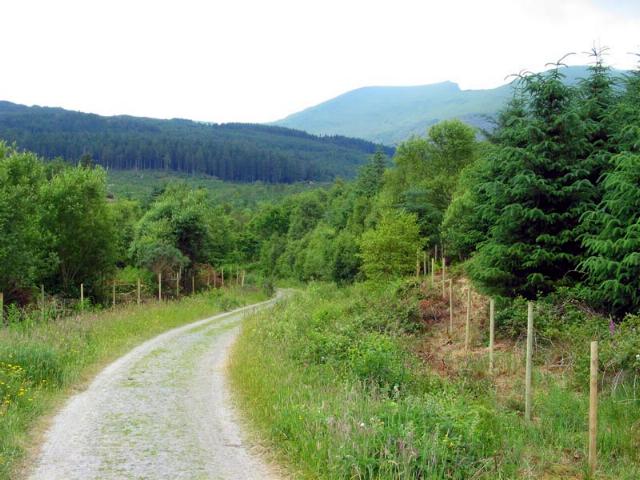
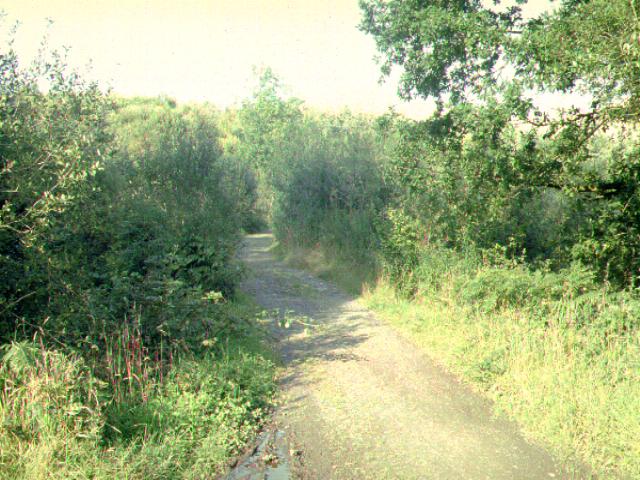
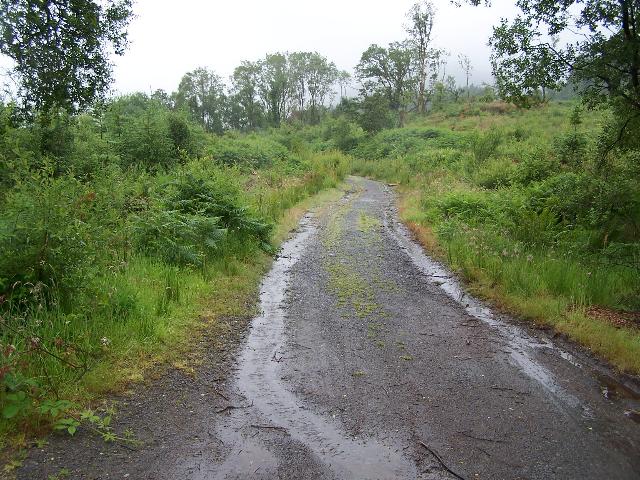
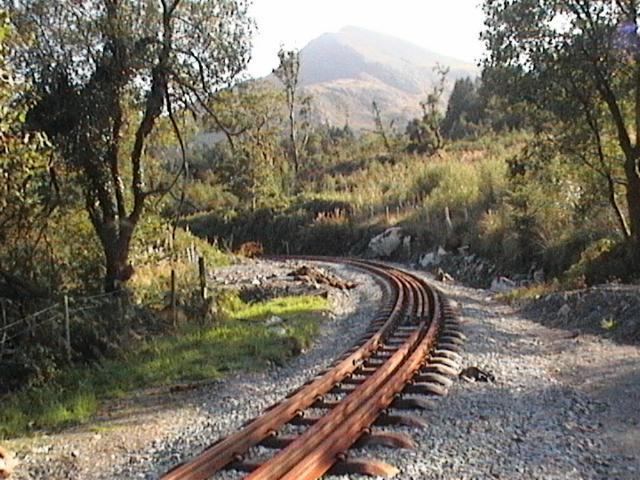
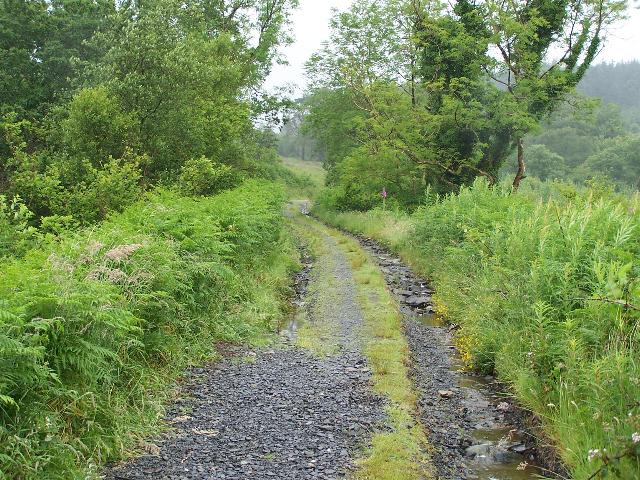
This southerly view (19/5/01) shows the trackbed at Ch.16450 where it enters the Beddgelert Forest at Pont Cae'r Gors at the end of Phasey's contract. The trackbed angles right in the trees and begins the steady 1 in 40 downgrade at this point. It enters a cutting after crossing a stream but the cutting had been filled in by a Forestry track beyond there for a short length. Click on the image to enlarge. This image is copyright B.W.Hughes. Slide scan technology utilised is Olympus ES10 & iPhoto Plus4. Slide scanned at 200dpi. Image post processed using iPhoto Plus4 and displayed at 96dpi.

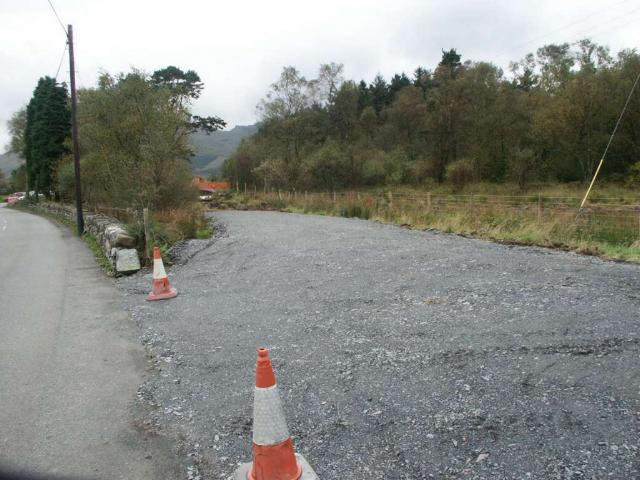

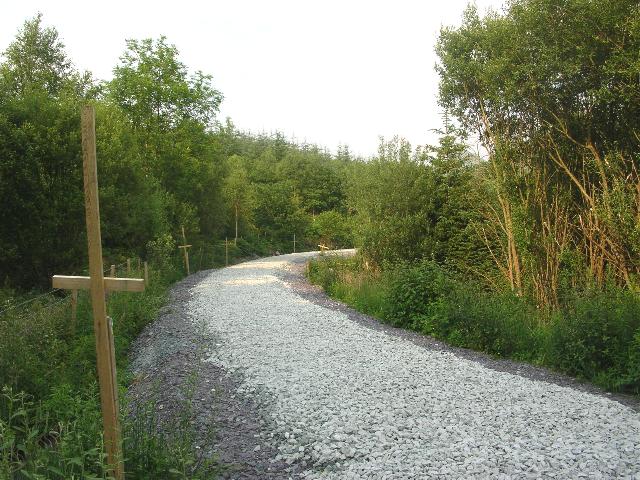
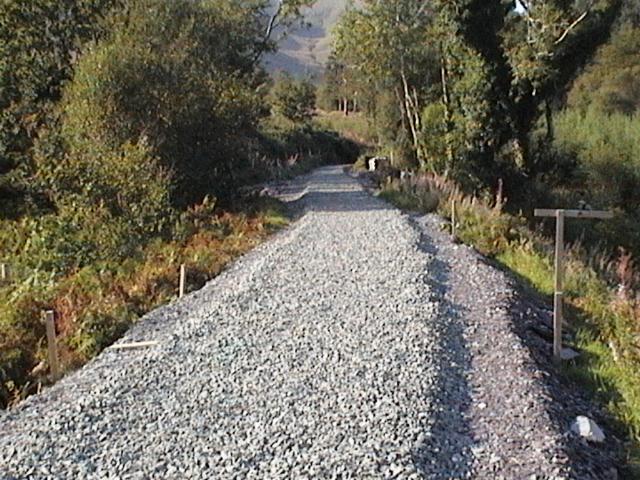
These southerly views (14/5/05, 9/10/05, 5/2/06 and 23/7/06) show the trackbed at Ch.16450 where it enters the Beddgelert Forest at Pont Cae'r Gors at the end of Phasey's contract. The trackbed angles right, passing to the right of the cars in the distance, and begins the steady 1 in 40 downgrade at this point. It enters a cutting after crossing a stream but the cutting had been filled in by a Forestry track beyond there for a short length. The fourth view shows the trackbed ballasted. Click on the images to enlarge. The first and third images are copyright B.W.Hughes and were taken on a Kodak DX6490 digital camera. Second image courtesy Ben Fisher taken on a digital camera. Images post processed using iPhoto Plus4 and displayed at 96dpi.

These northerly views (26/3/05, 30/4/05 and 16/7/06) of UB125 at Pont Cae'r Gors show the rotten girders that will be replaced, probably with a concrete deck. Beyond are the trees recently cut down by Achnashean. In the second view, taken from the same location, the fencing contract is visible nearing completion. Fencing work at this stage had not proceeded into the Pont Cae'r Gors plantation. In the third view the bridge is seen complete. Click on the image to enlarge. These images are copyright B.W.Hughes and were taken on a Kodak DX6490 digital camera. Images post processed using iPhoto Plus4. Images displayed at 96dpi.
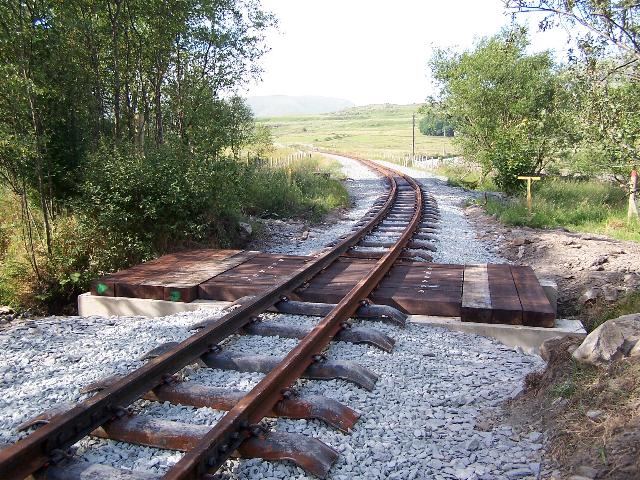
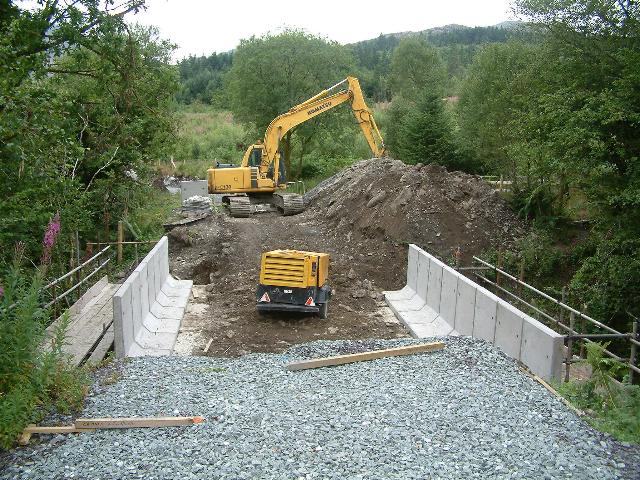
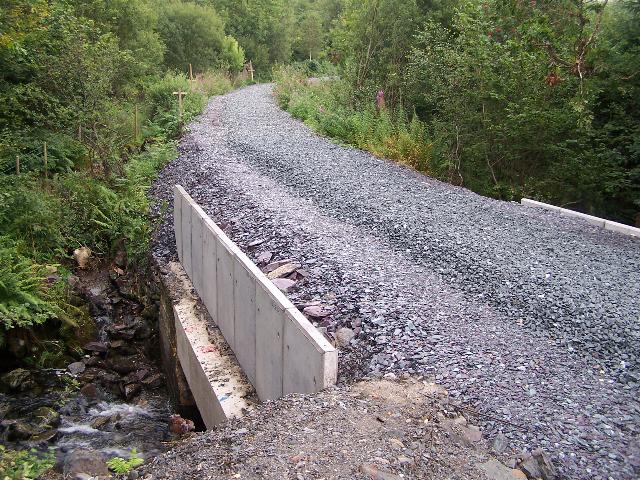
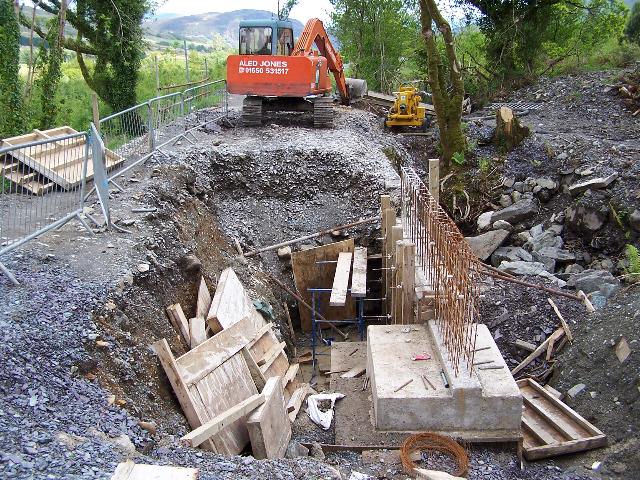
This southerly view (3/7/06) shows UB125 with LC70 and Pont Cae'r Gors Cutting beyond. The waybeams have reinforcing rods threaded through holes drilled in them, which will lock them in place. By 8/7/06, formwork had been erected ready for the concrete pour. It is planned to have this bridge ready for tracklaying by 15/7/06. Click on the image to enlarge. This image is courtesy Mike Hart and was taken on a digital camera. Image post processed using iPhoto Plus4 and displayed at 96dpi.
This westerly view (16/7/06) shows the cast concrete lintels on the abutments of UB125. The sleeper deck has been screwed down but the track is a bit high so the rails will need to be tamped down before the chairs can be screwed in. This image is copyright B.W.Hughes and was taken on a Kodak DX6490 digital camera. Image post processed using iPhoto Plus4. Image displayed at 96dpi.


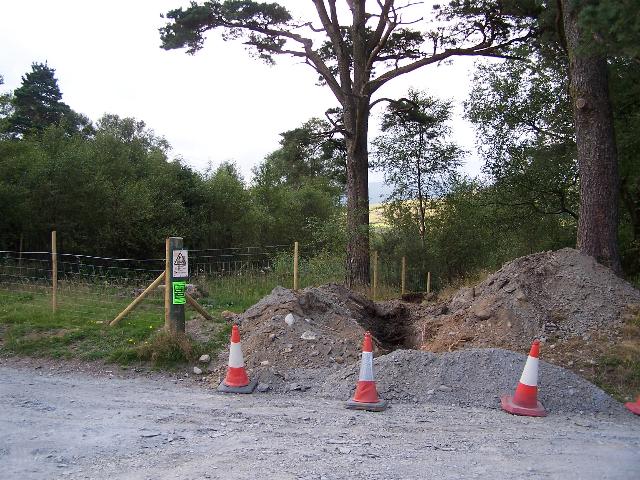
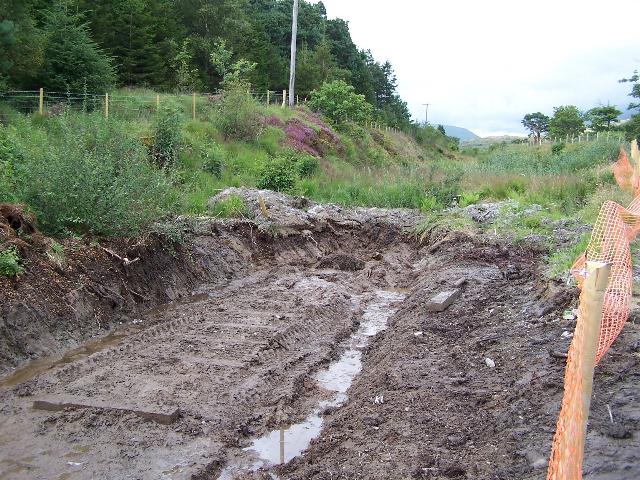
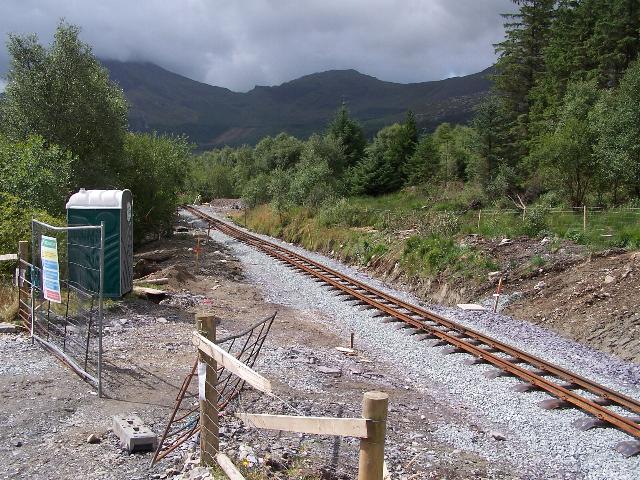
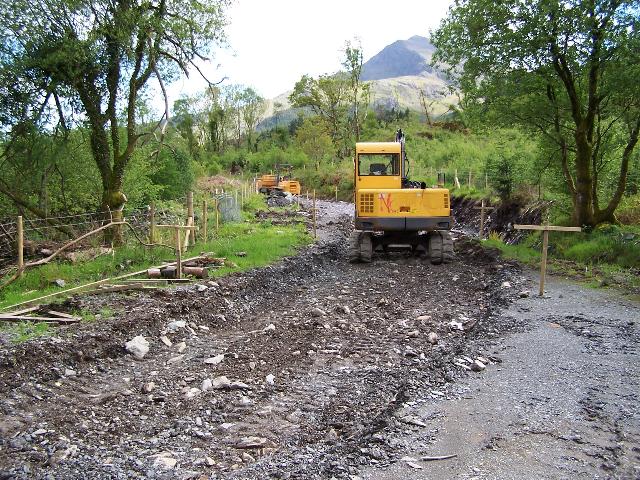
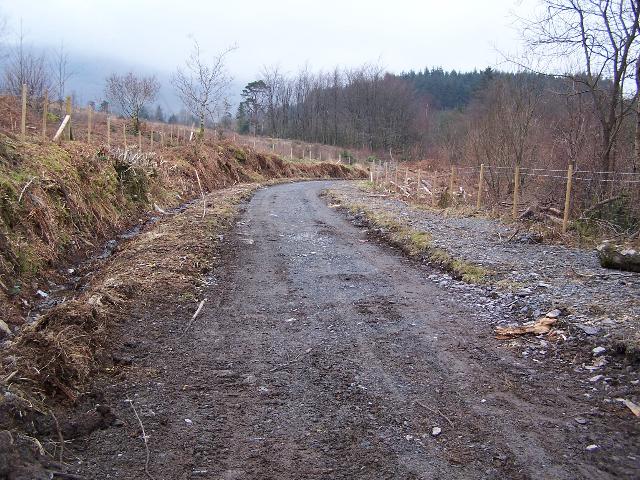
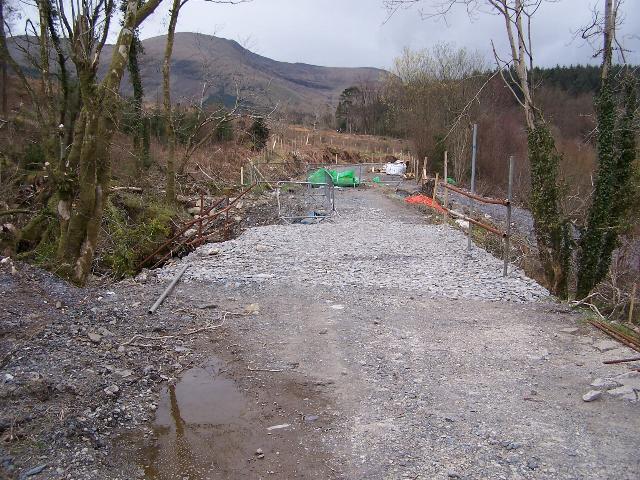
These northerly views (14/2/05, 27/10/05, 15/7/06 and 16/7/06) show the clearance for Environmental and Topological surveys at Pont Cae'r-Gors (LC70 at Ch.15560), which started in late 2004. A red surveyor's peg has been knocked into the ground out of view to the left. The third view shows work underway at the south end of the Rhyd Ddu-Pont Cae'r Gors contract but the power line still not diverted. The fourth view shows ballast and sleepers laid in the cutting prior to tracklaying the following day and the fifth view shows progress across the level crossing at the end of that weekend's tracklaying. Click on the images to enlarge. These images are copyright B.W.Hughes and were taken on a Concord 3340z/Kodak DX6490 digital camera. Images post processed using iPhoto Plus4. Images displayed at 96dpi.
This easterly view (2/6/06) shows sleepers and ballast stacked in the Beddgelert Forest near LC70 as there is little room there. Click on the image to enlarge. This image is copyright B.W.Hughes and was taken on a Kodak DX6490 digital camera. Image post processed using iPhoto Plus4 and displayed at 96dpi.
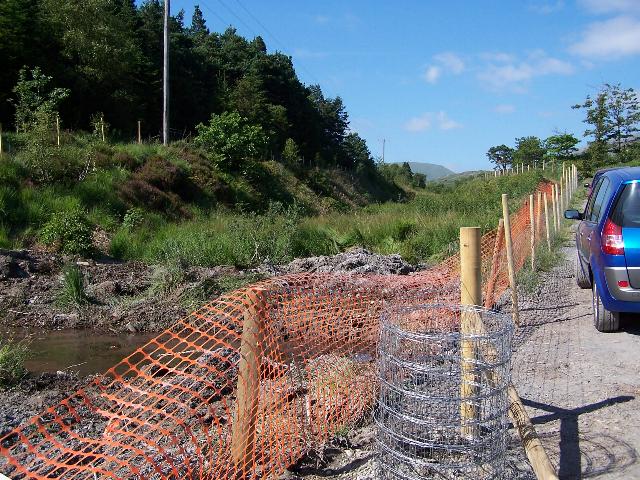
These northerly views (16/7/05 and 11/8/05) show the fencing of both sides of the approaches to LC70 at Pont Cae'r Gors and the subsequent work by Scottish Power to divert the electricity supply lines. Click on the images to enlarge. These images are copyright B.W.Hughes and were captured on a Kodak DX6490 digital camera. Images post processed using Iphoto+4 and displayed at 96dpi.
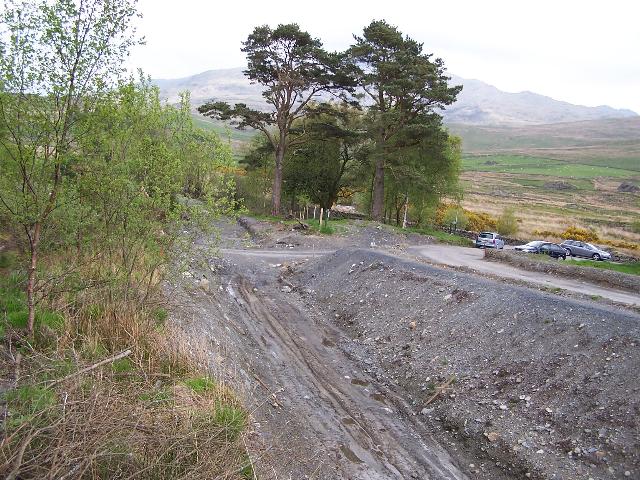
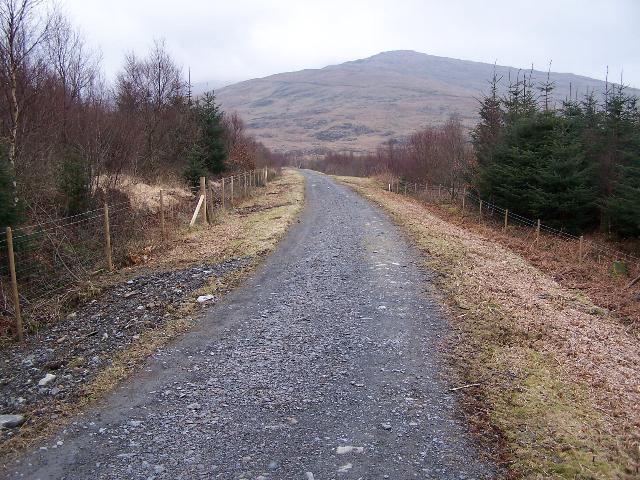
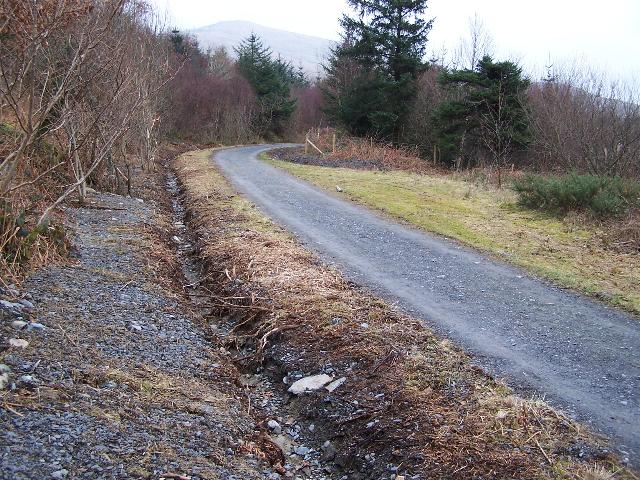
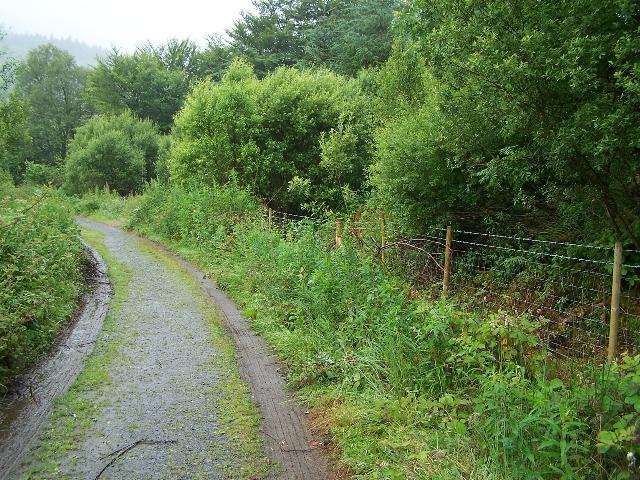
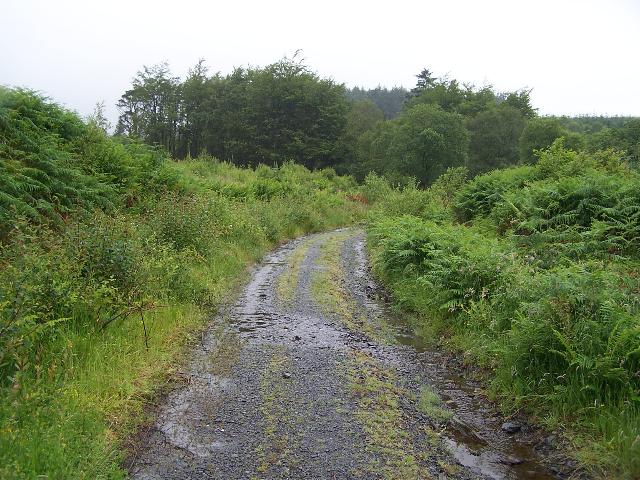
These northerly views (27/10/05, 14/5/06 and 23/7/06) show the trackbed is lower than the forest track at this point as it is dropping towards the point of view so the forest track has been graded to a lower level in the first view. The second view shows the parallel forest track and cutting side regraded before final alterations took place in May/June. The third view shows the track completed across the level crossing. Click on the images to enlarge. These images are copyright B.W.Hughes and were captured on a Kodak DX6490 digital camera. Images post processed using Iphoto+4 and displayed at 96dpi.
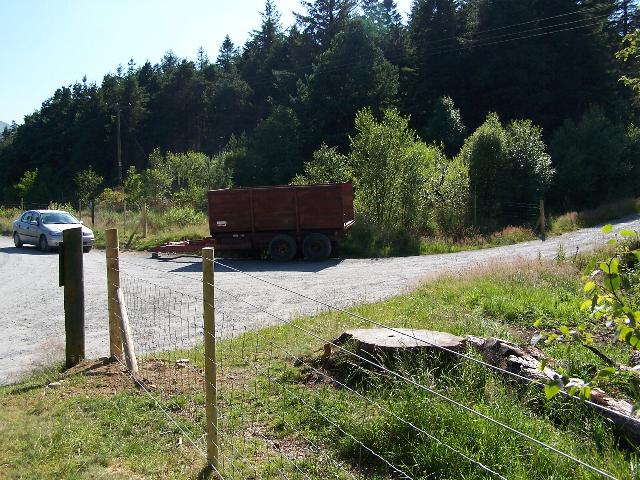
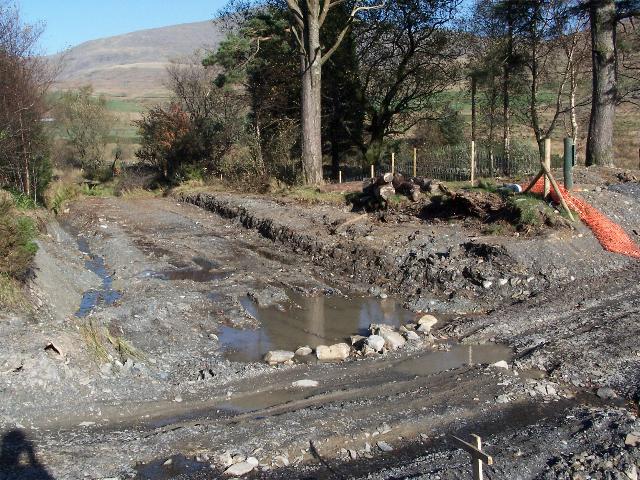
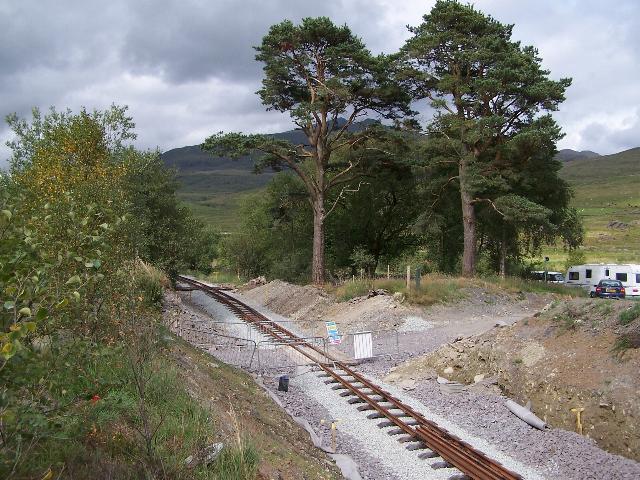
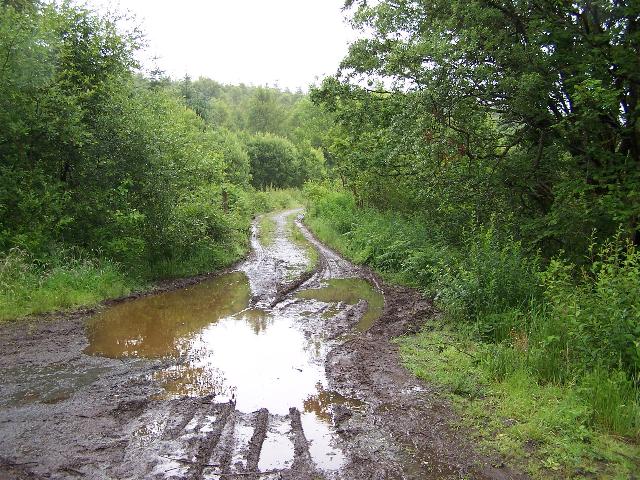
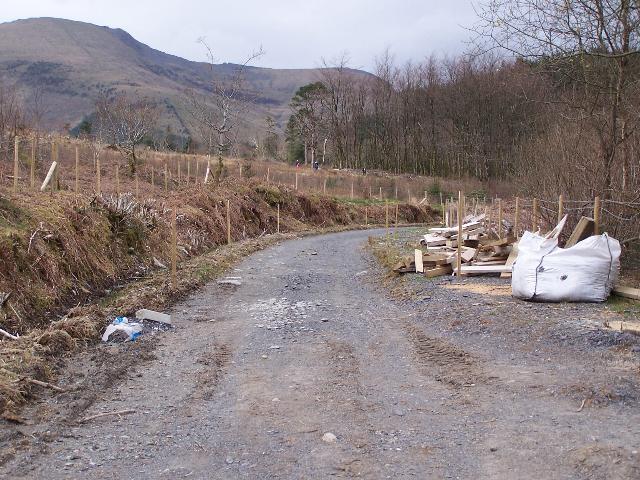
These southerly views (16/7/05, 24/10/05, 15/7/06 and 16/7/06) show LC70 at Pont Cae'r Gors. The sharp dogleg in the alignment here is being retained. The trailer parked on the level crossing had been present for several weeks. In the second view the cutting has been excavated through the level crossing and the forest track re-graded some 2m lower to permit a level crossing. The third view shows ballast and sleepers laid in the cutting ready for tracklaying on the Sunday and the fourth view shows the tracklaying complete into the cutting at the end of the weekend's tracklaying. Click on the images to enlarge. These images are copyright B.W.Hughes and were taken on a Kodak DX6490 digital camera. Images post processed using iPhoto Plus4 and displayed at 96dpi.
At Pont Cae'r-Gors, there was a permissive track on Forestry land to a car park about a kilometre south. The railway runs above this track to the west on an embankment. Another forestry track has filled in the start of the cutting at LC70. There is a small car park at this location. The track alongside the railway leads to a larger car park.
The permissive path on the trackbed was closed by late August with signs advising walkers and cyclists that the railway was under construction. The diversion of the power line at Pont Cae'r Gors was the next task as it crosses to the west and recrosses to the east over a length of some 400m. Contractors for Scottish Power undertook the construction of a trench to bury the wires in the adjacent forest track during August but the actual rewiring remained to be completed in December. The contractors uncovered several WHR sleepers buried under a metre of peat when they excavated the southern end of Pont Cae'r Gors cutting for access to the electricity poles. The electricity route had still not been diverted on 5/2/06.
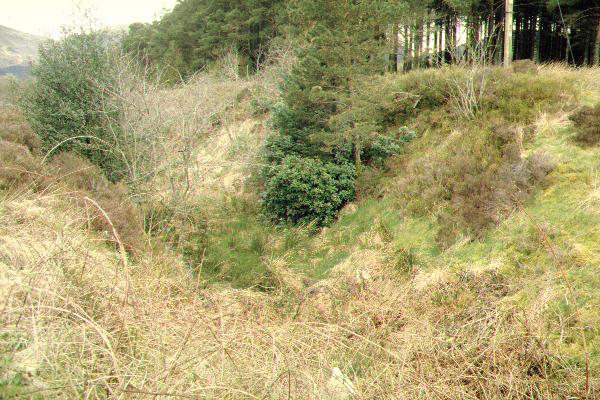
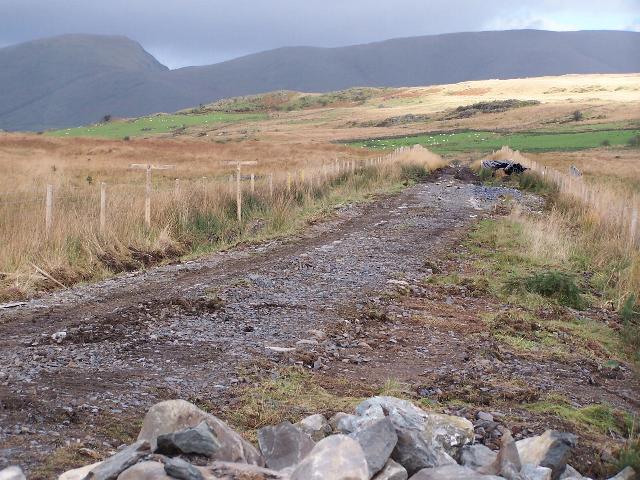
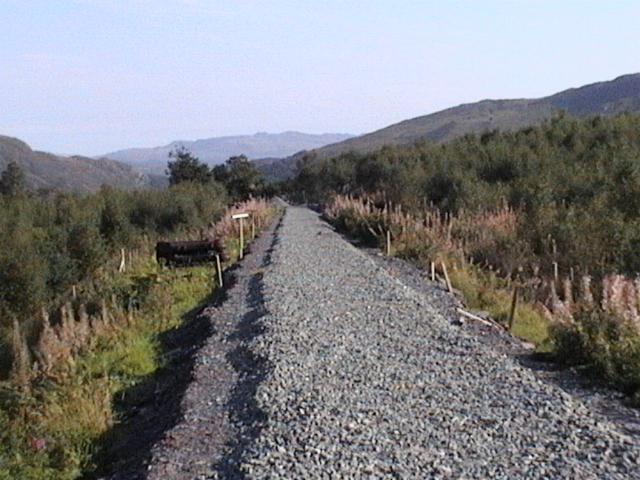
This southerly view (29/4/01) from Pont Cae'r-Gors forest access LC70 shows the filled in cutting at this point. The cutting is 2-3 metres deep and the railway is rising at 1 in 40 towards the viewpoint. Click on the image to enlarge. This image is copyright B.W.Hughes. Slide scan technology utilised is Olympus ES10 & iPhoto Plus4. Slide scanned at 200dpi.
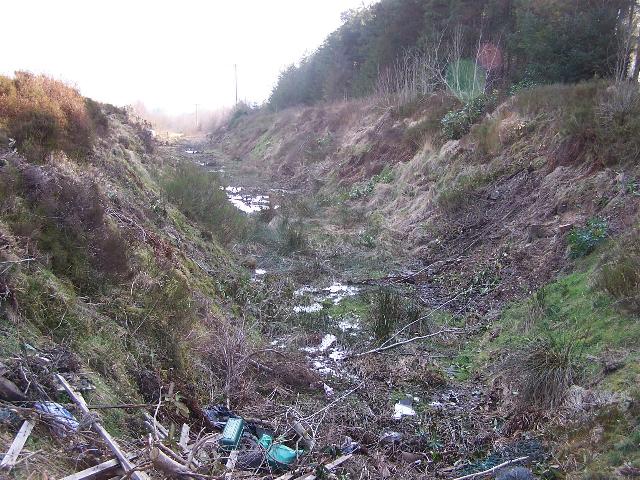

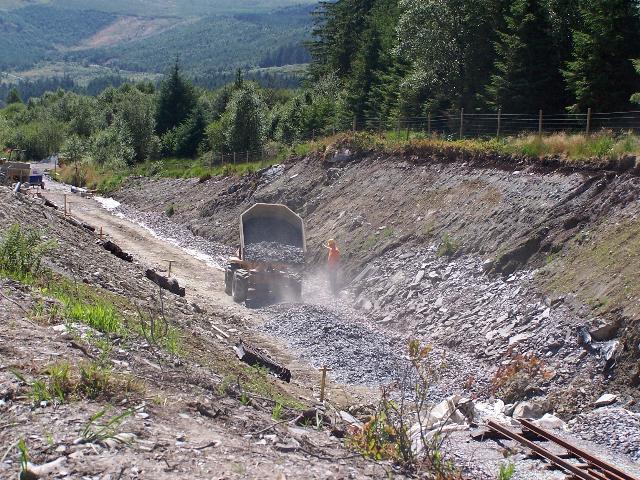
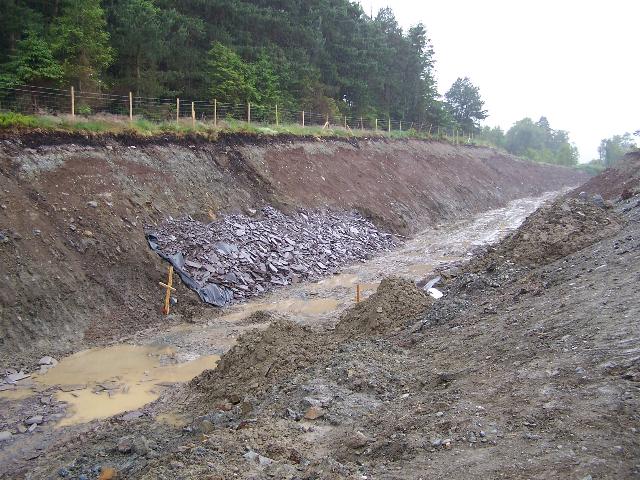
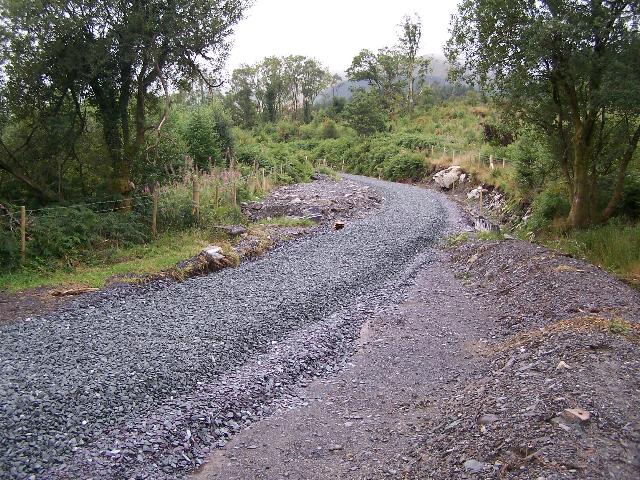
These southerly views (19/3/05, 1/10/05 and 2/6/06) at Pont Cae'r Gors Cutting show full tree clearance has now occurred in the first view and the cutting rough excavated in the second view. The sleepers were at first left in place. In the fourth view, James Cyf has been working to re-contour the cutting sides to a more stable angle of rest. Sleepers were visible right up to the level crossing. Click on the image to enlarge. These images are copyright B.W.Hughes and were captured on a Kodak DX6490 digital camera. Images post processed using Iphoto+4 and displayed at 96dpi.


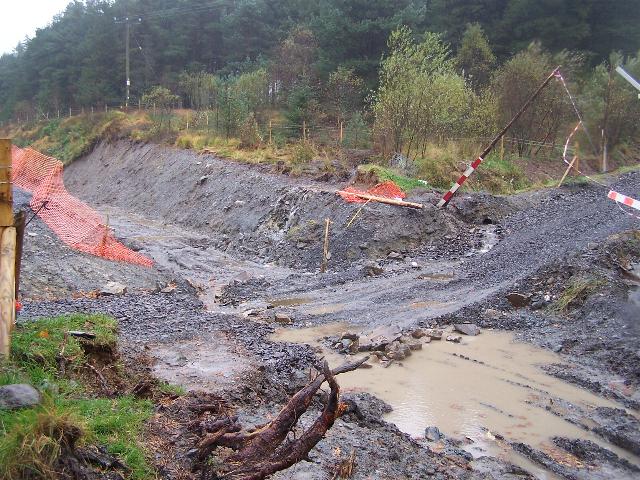
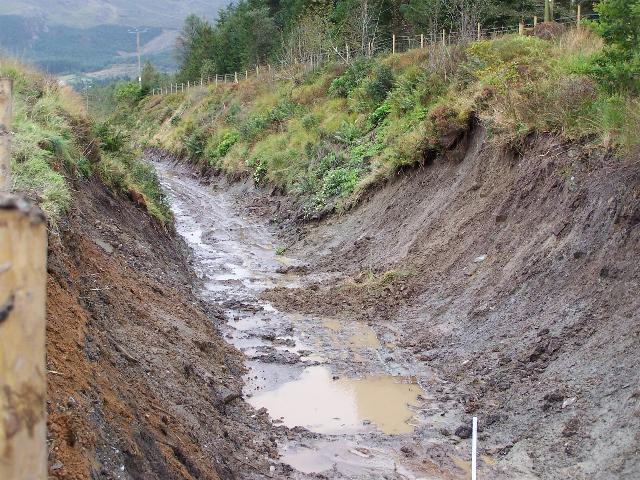
This southerly view (12/11/05 and 25/6/06) at Pont Cae'r Gors Cutting from LC70 shows firstly the completed excavation with sleepers still in position. Some slumping of the cutting sides has occurred as the drainage from the forest track has not yet been completed. The second view shows the steep sided boulder clay cutting now trimmed back to make the slopes more stable. A seeded mixture has been applied to the cutting sides to promote growth of vegetation. Click on the images to enlarge. These images are copyright B.W.Hughes and were taken on a Kodak DX6490 digital camera. Images post processed using iPhoto Plus4. Image displayed at 96dpi.

This westerly view (24/10/05) shows the excavations required to re-grade the forest track by some 2m at LC70. Click on the image to enlarge. This image is copyright B.W.Hughes and was taken on a Kodak DX6490 digital camera. Image post processed using iPhoto Plus4. Image displayed at 96dpi.
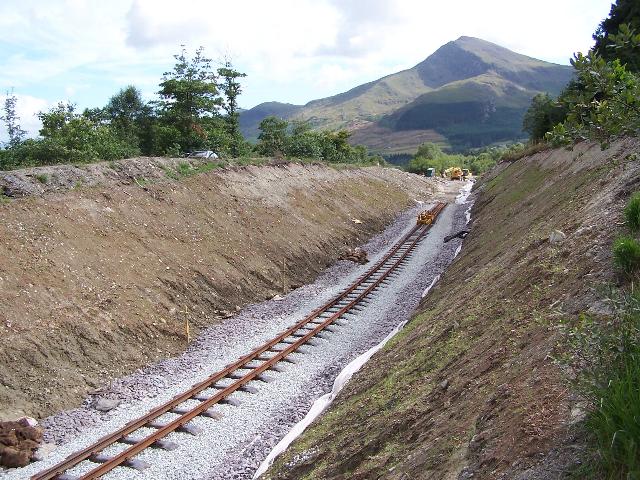
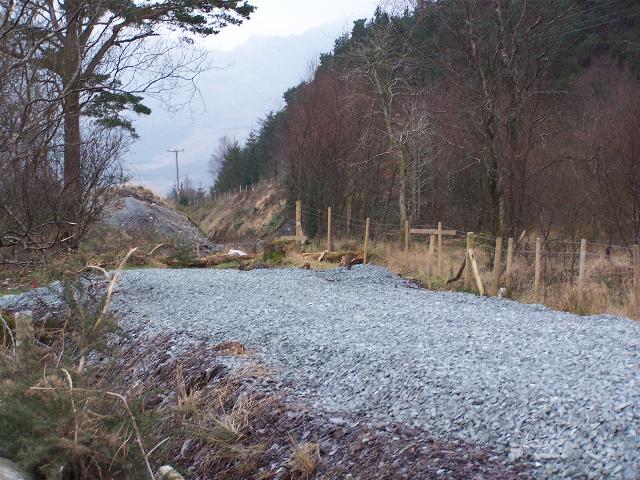
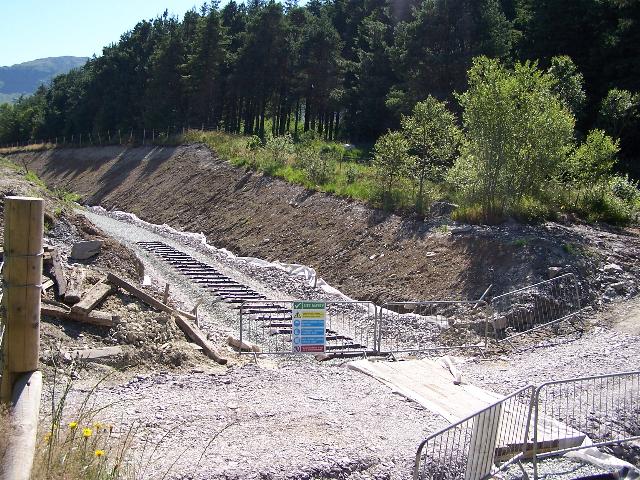
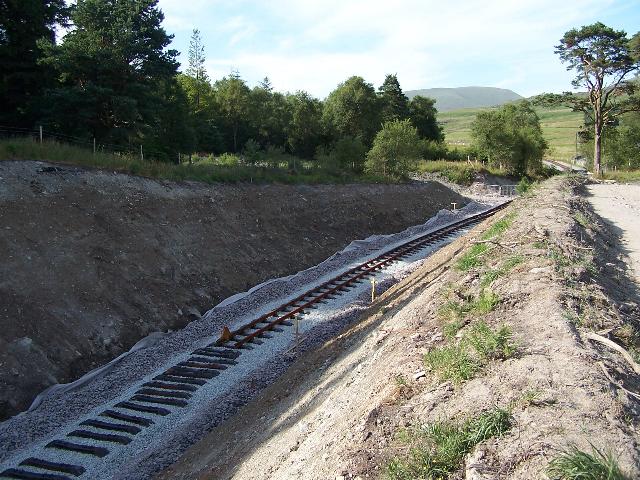
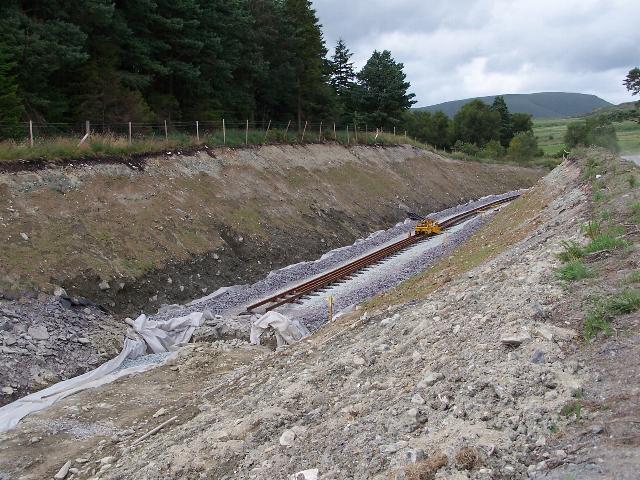
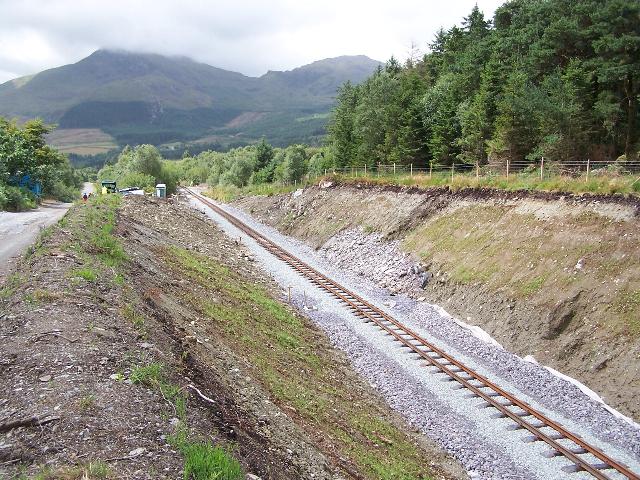
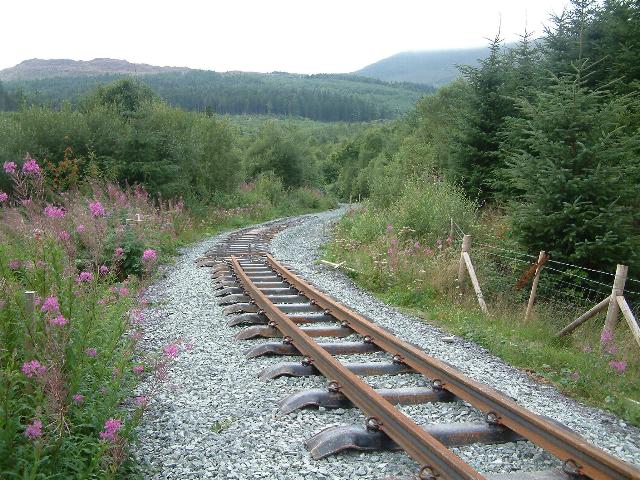
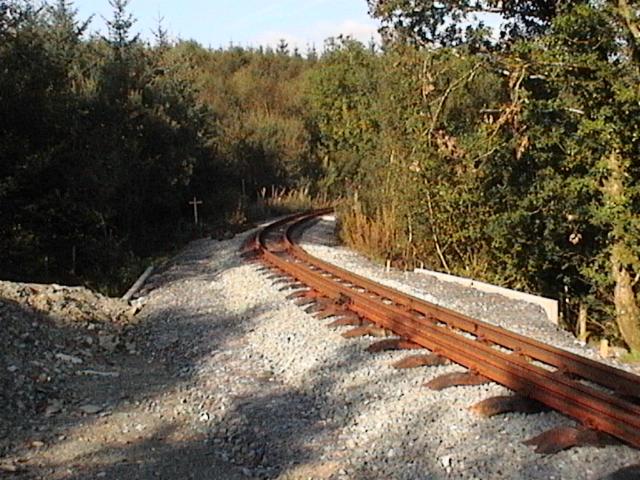
These southerly views (14/5/06 and 23/7/06) show the trackbed excavated down to the original bare rock through the north end of Pont Cae'r Gors Cutting and the track laid on the ballast bed. Click on the images to enlarge. These images are copyright B.W.Hughes and were taken on a Kodak DX6490 digital camera. Images post processed using iPhoto Plus4 and displayed at 96dpi.


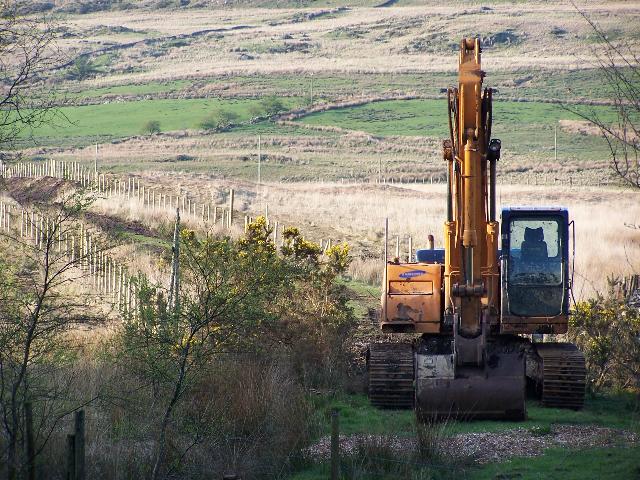
These northerly views (27/10/05, 20/2/06, 2/6/06, 25/6/06, 15/7/06 and 16/7/06) show the excavations complete at the north end of Pont Cae'r Gors Cutting (courtesy of Phasey's large excavator) including the re-grading/realignment of both forest tracks. The second view shows the clearance of the cutting at the north end following some minor slumping. Excavators are also visible redirecting the drainage on the hillside above the cutting to the west, hopefully to reduce the slumping. The third view shows James Cyf has re-contoured the sides of the cutting to make a more stable angle of rest. The fourth view shows the excavation largely complete with a growth promotion layer added to the bare boulder clay sides of the cutting. The embankment alongside the forest track has been built up to prevent cars veering over the cutting edge. The fifth view shows ballast laid preparatory to the following day's tracklaying and the sixth view, the Head of Steel at the end of that weekend's tracklaying. Click on the images to enlarge. These images are copyright B.W.Hughes and were taken on a Kodak DX6490 digital camera. Images post processed using iPhoto Plus4 and displayed at 96dpi.

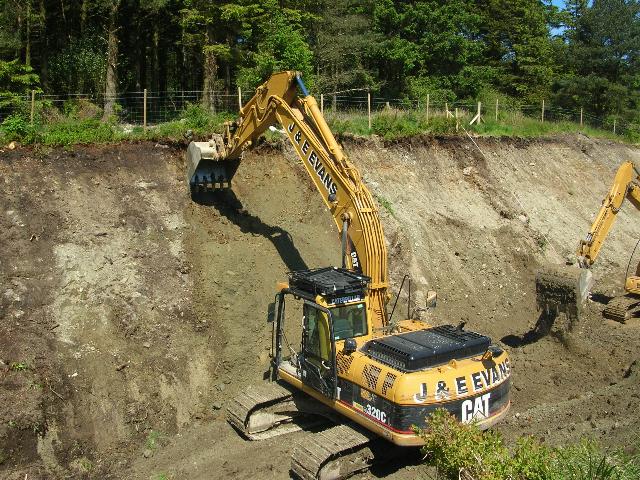
These views (3/6/06) show the James excavators making short work of Pont Cae'r Gors Cutting. The first (northerly) view shows the side facing the forest track being scraped back to the recommended angle of rest. The second (westerly) view shows a little more attention being given to the completed westerly side of the cutting. James have just three weeks to finish the cutting and have already worked on a Saturday! Click on the images to enlarge. These images are copyright Mike Hart and were taken on a digital camera. Images post processed using iPhoto Plus4 and displayed at 96dpi.


These northerly views (19/3/05, 16/7/05, 12/8/05 and 1/10/05) at Pont Cae'r Gors Cutting (Ch.16750) show tree clearance has taken place in the cutting revealing the overlarge width of the cutting at this location. Presumably, the spoil was used to make the embankments south from this point. In the second view, fencing is being erected on both sides of the cutting and some excavation has taken place, presumably to find the ballast bed. The third view shows a set of perfectly preserved sleepers uncovered from 1m below the peat during that day's excavations, presumably by Scottish Power's contractors. Access is needed to remove power lines and poles which will become inaccessible when the railway is opened. The final view shows quick progress on Phasey's contract to excavate the cutting. Clearly this area will provide a favoured photographic location for trains working up the last of the hard 1 in 40 slog from Beddgelert. Click on the images to enlarge. These images are copyright B.W.Hughes and were captured on a Kodak DX6490 digital camera. Images post processed using Iphoto+4 and displayed at 96dpi.
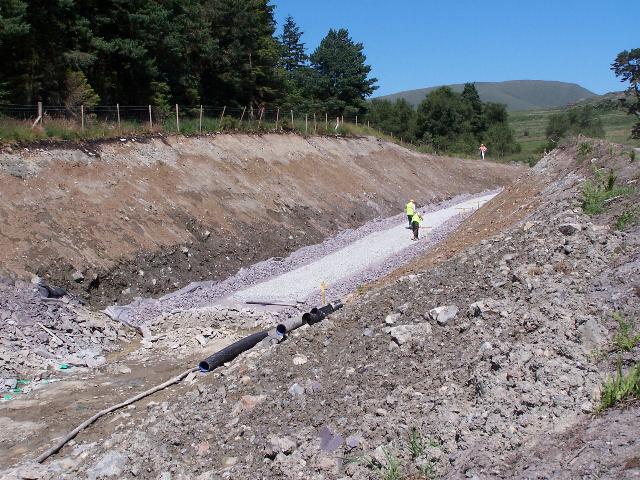
Once the cutting was fully excavated and the sides re-contoured to a stable angle of rest, it was found that the bottom 1m or so of the cutting on the west side tended to slump. A temporary solution has been to cut out the decayed boulder clay and place a toe weighting of slate waste on geotextile. Several lengths of the cutting have been marked out for this treatment.
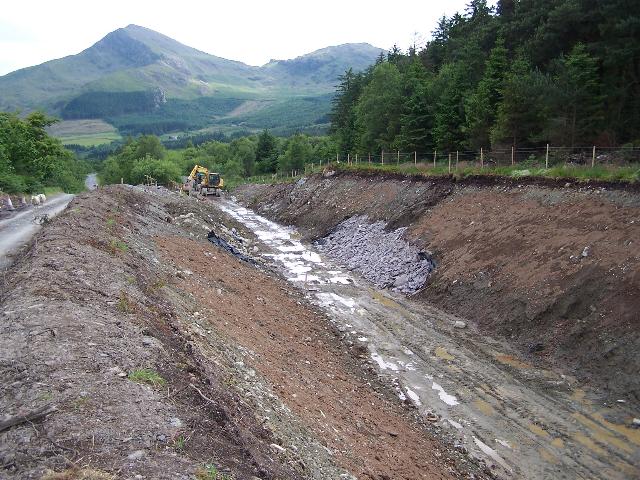

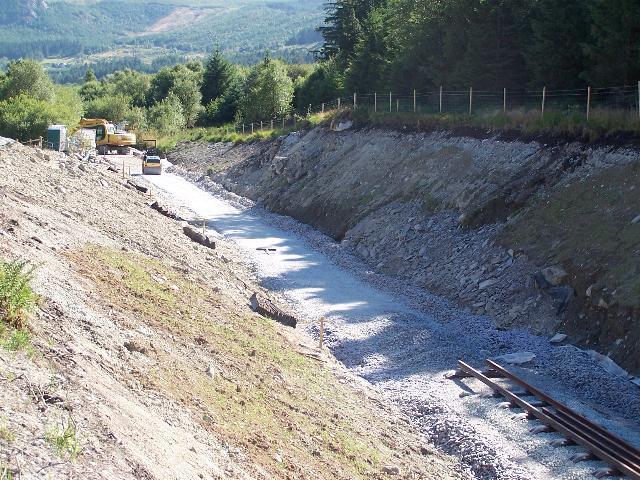
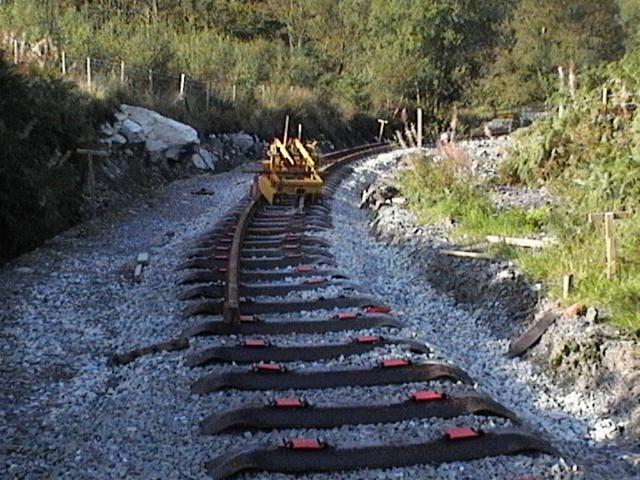
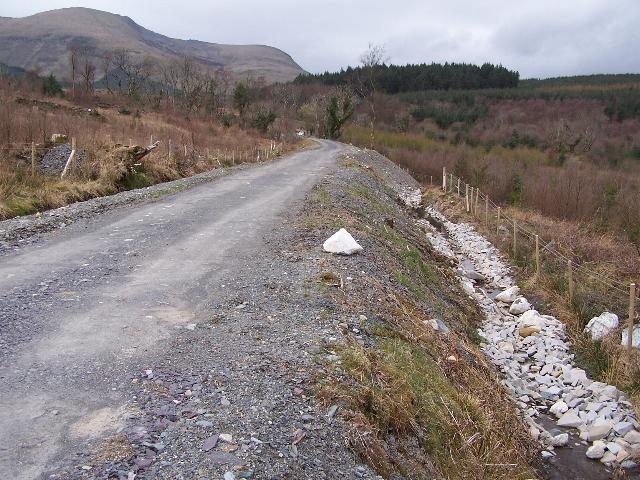
These northerly views (25/6/06, 23/7/06 and two from 24/7/06) show that the west side of Pont Cae'r Gors Cutting is having slate waste treatment to the base of the slope to prevent slumping. The second view shows the track laid right to the end of the available ballast bed and the installation of a drain on the west side. The third view shows the laying of the sub base and the fourth view shows the rolled sub base ready for ballasting. Click on the images to enlarge. These images are copyright B.W.Hughes and were taken on a Kodak DX6490 digital camera. Images post processed using iPhoto Plus4 and displayed at 96dpi.
This southerly view (22/8/06) shows the heavy rainfall during the unusually wet August and water seeping from the cutting sides has washed away some of the recent growth on the seeded western side of the cutting. Click on the image to enlarge. This image is copyright B.W.Hughes and was taken on a Kodak DX6490 digital camera. Image post processed using iPhoto Plus4 and displayed at 96dpi.
This westerly view (20/7/06) shows the completion of drainage in the cutting. Minutes later the excavator was withdrawn as the contractors needed to place the drains. Click on the image to enlarge. This image is copyright Noel Walley and was taken on a digital camera. Image post processed using iPhoto Plus4 and displayed at 96dpi.

These northerly views (2/6/06, 25/6/06, 15/7/06 and 23/7/06) at Ch.16750 shows the work in progress on Pont Cae'r Gors Cutting. The first view shows surveyors' sighting poles and re-contouring work underway on the steep cutting sides to provide a stable angle of rest. The second view shows some of the decayed boulder clay removed and replaced with slate waste on geotextile. The third shows the ballast bed laid for that day's tracklaying. The fourth view shows track laid right up to the end of the ballast bed (and beyond!). Click on the images to enlarge. These images are copyright B.W.Hughes and were captured on a Kodak DX6490 digital camera. Images post processed using Iphoto+4 and displayed at 96dpi.

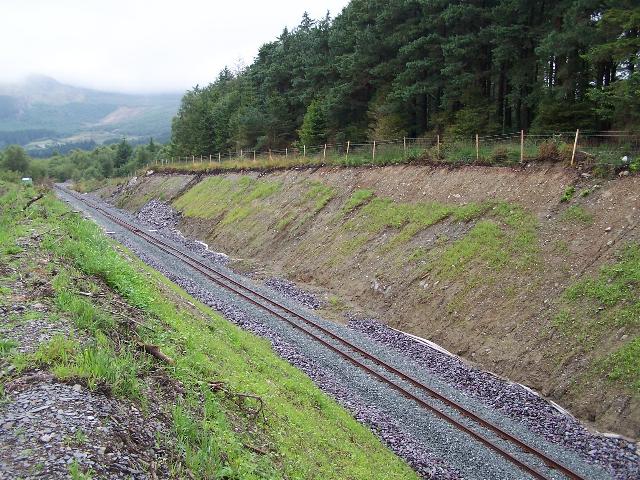
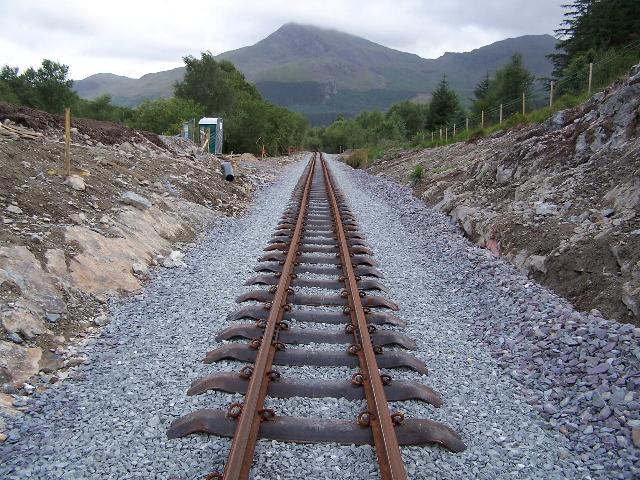
This northerly view (30/7/06) shows the track completed through Pont Cae'r Gors Cutting. Click on the image to enlarge. This image is copyright B.W.Hughes and was taken on a Kodak DX6490 digital camera. Image post processed using iPhoto Plus4 and displayed at 96dpi.
GH Jones discovered another problem at the south end of Pont Cae'r Gors Cutting. The PBSSR and 1922 track had been laid directly on rock without an adequate ballast bed due to the extreme hardness of the rock. The WHRCL contractor was instructed to excavate the cutting to provide a level bed of sub base as well as the ballast bed whilst trying to maintain the 1 in 40 gradient at this location.
However, the hard band of rock at the south end of the cutting wore out the contractor's toughened manganese steel rock picks in half an hour and the decision was made to concentrate on excavating the ditch on the west side of the cutting only so as not to delay tracklaying unduly. A few weeks of track laying were in fact lost but good progress was then made. The decision to leave the band of hard rock resulted in a slight increase in gradient leading up to the location from the south worked out over the 400m from Ch.17000 approx. and an easing of gradient in the north end of the cutting.
Pont Cae'r Gors Cutting also suffers from wetness on the west side and a tendency of the cutting side to slump. It has been decided to go back later and provide a low retaining wall (possibly sawn slate blocks as in Pitt's Head Cutting) against the west side of the cutting where the problem is acute.
This southerly view (30/7/06) shows the band of hard rock at the southern end of the cutting that caused so much difficulty. Click on the image to enlarge. This image is copyright B.W.Hughes and was taken on a Kodak DX6490 digital camera. Image post processed using iPhoto Plus4 and displayed at 96dpi.
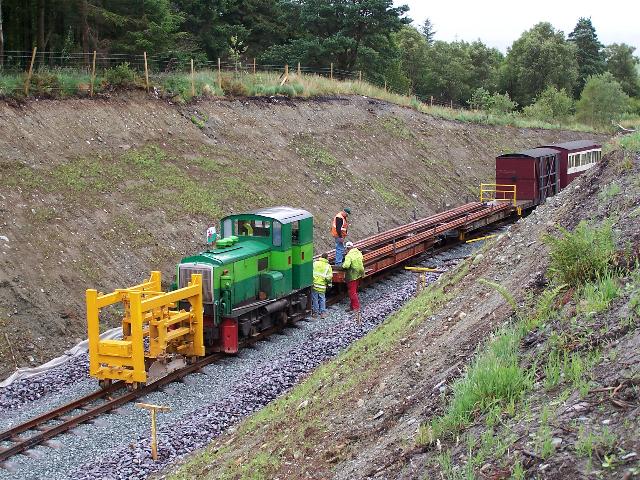
This northerly view (31/7/06) shows Upnor Castle unloading rails in Pont Cae'r Gors Cutting. Click on the image to enlarge. This image is copyright B.W.Hughes and was taken on a Kodak DX6490 digital camera. Image post processed using iPhoto Plus4 and displayed at 96dpi.
This southerly view (30/7/06) shows track complete through Pont Cae'r Gors Cutting. Click on the image to enlarge. This image is copyright B.W.Hughes and was taken on a Kodak DX6490 digital camera. Image post processed using iPhoto Plus4 and displayed at 96dpi.

This southerly view (5/8/06) shows coach No.1000 (formerly FR Obs No.100) and the SAR brakevan No.3172, in use at Pont Cae'r Gors Cutting as Phase 4 Mess Coach and Tool Van respectively. The cutting is starting to green over following the addition of seeded mulch in late June. A cross drain has received concrete surrounds and galvanised metal covers. Click on the image to enlarge. This image is copyright B.W.Hughes and was taken on a Kodak DX6490 digital camera. Image post processed using iPhoto Plus4 and displayed at 96dpi.
This northerly view (6/8/06)shows Upnor Castle with the brakevan and coach No.1000 to the rear at the south end of Pont Cae'r Gors Cutting. Click on the image to enlarge. This image is copyright B.W.Hughes and was taken on a Kodak DX6490 digital camera. Image post processed using iPhoto Plus4 and displayed at 96dpi.

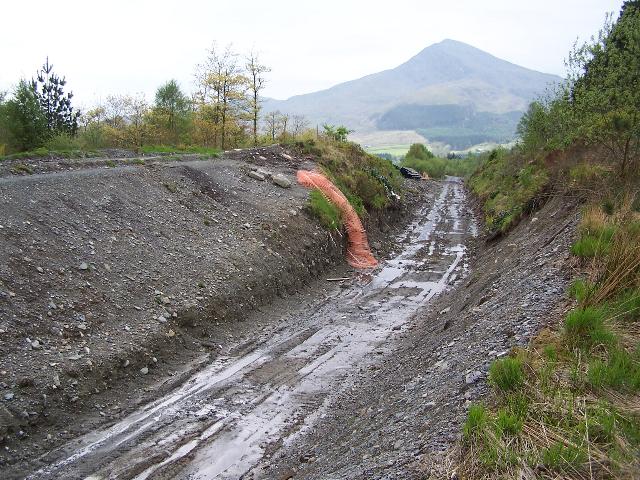
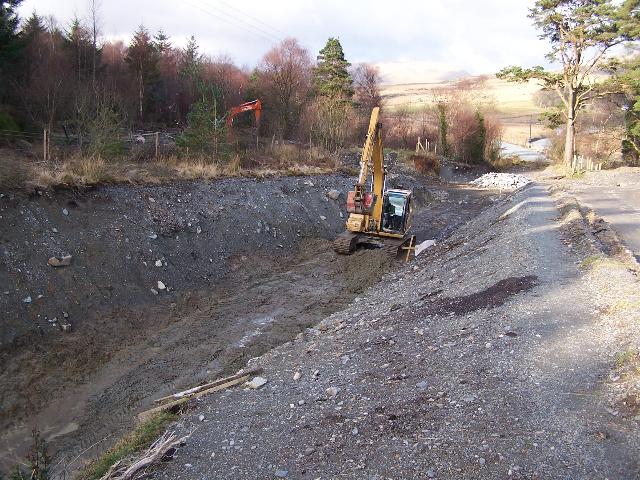
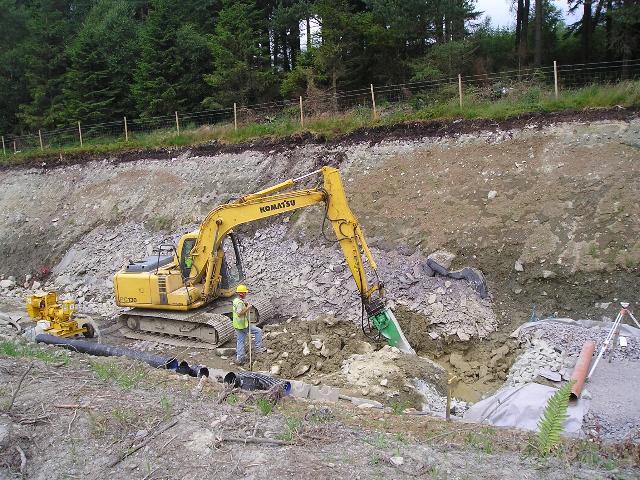
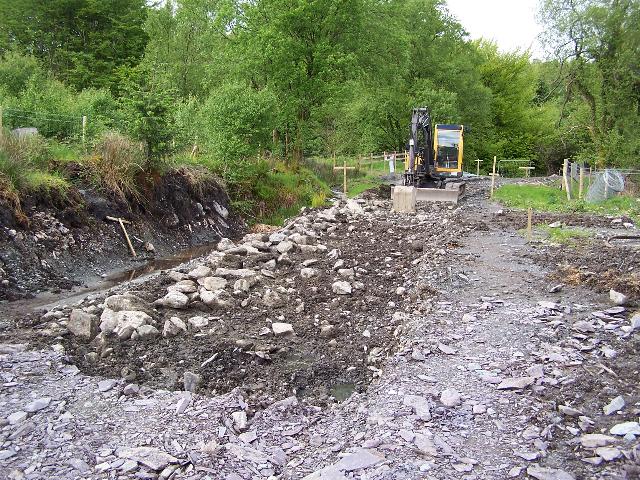
These southerly views (12/8/05, 16/4/06, 21/4/06 and 30/7/06) show the excavations at the south end of Pont Cae'r Gors Cutting. A deep drainage ditch has been dug on the west side of the railway behind the excavator to drain the cutting. After Easter 2006, the trackbed was hardened up and rolled slate fines added to create the final formation levels. The track was finally laid in late July. Click on the images to enlarge. These images are copyright B.W.Hughes and were taken on a Kodak DX6490 digital camera. Images post processed using iPhoto Plus4 and displayed at 96dpi.

This westerly view (23/10/00) was taken from the A4085. As the road and the Afon Colwyn drop steeply down the Nant Colwyn Pass, the railway curves away on an embankment high on the western side of the valley. Click on the image to enlarge. This image is copyright B.W.Hughes. Slide scan technology utilised is Olympus ES10 & iPhoto Plus4. Slide scanned at 200dpi.
The forest track drops steeply downhill alongside of the railway, which is now running on a high embankment to the west.
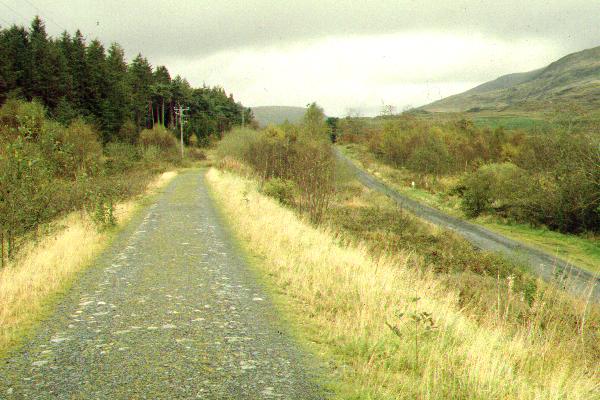
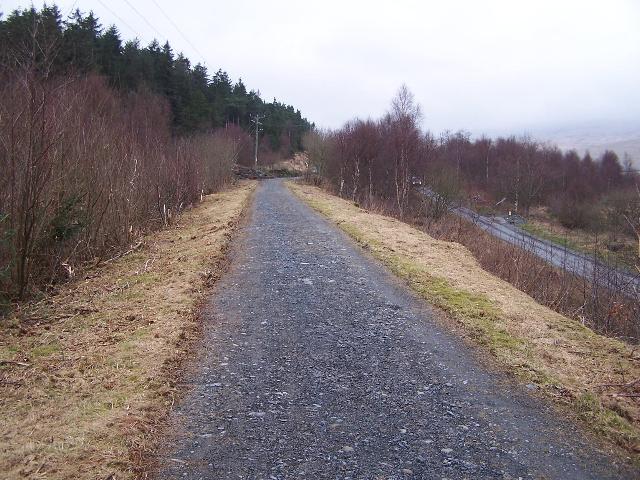

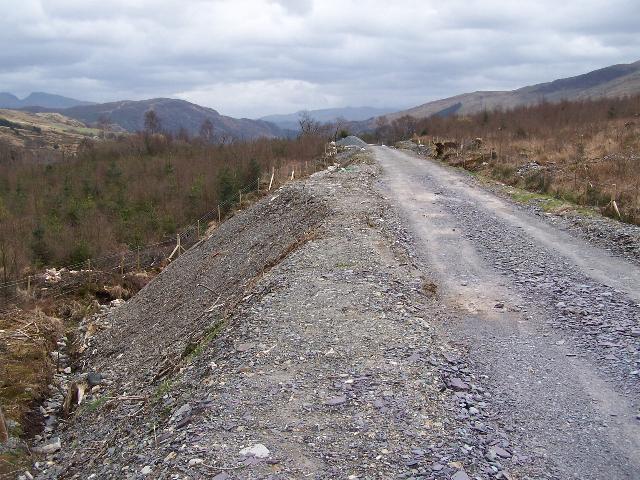
These northerly views (archive, 5/2/06 and 14/5/06) at Ch.16800 from the (now closed) permissive path on the trackbed show the embankment approaching Pont Cae'r Gors. The Forestry track is dropping steeply to the right. Visible at this location, from west to east, the railway, forest track, river and main road are all climbing for the narrow gap at the summit of the Nant Colwyn Pass. The second view is by kind permission of Mike Hart and shows the trackbed has been scraped and fenced and the vegetation cleared. The third view shows the north end of the current levelling works with surveyors' sighting levels erected and Pont Cae'r Gors Cutting beyond. Click on the images to enlarge. These images are copyright B.W.Hughes. Slide scan technology utilised is Olympus ES10 & iPhoto Plus4. Slide scanned at 200dpi. Other images taken on a Kodak DX6490 digital camera. Images post processed using iPhoto Plus4 and displayed at 96dpi.

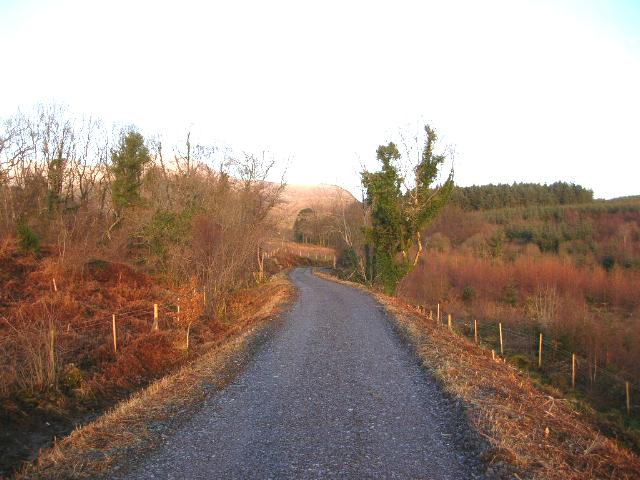
This southerly archive view shows the trackbed at Ch.16800 approx. with Moel Hebog in the backdrop. Until work started there was a permissive path on the railway trackbed. At this time the railway had unobstructed views to the east (left) but it seems trees have grown in recent years. Click on the image to enlarge. This image is copyright B.W.Hughes. Slide scan technology utilised is Olympus ES10 & iPhoto Plus4. Slide scanned at 200dpi.

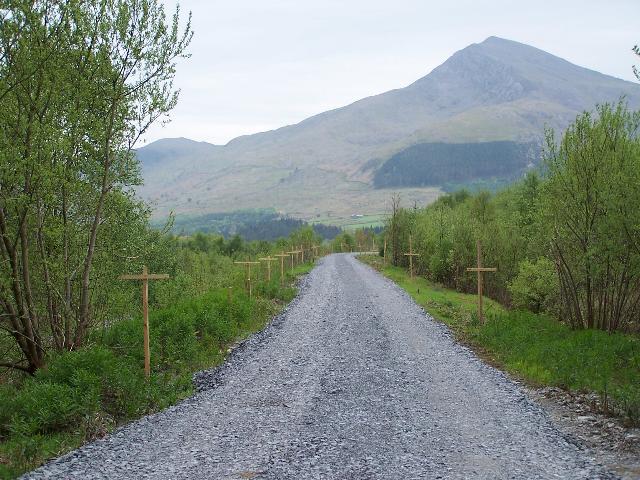
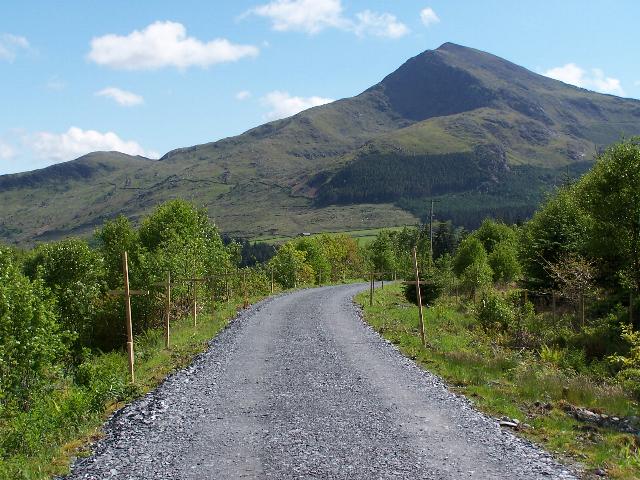
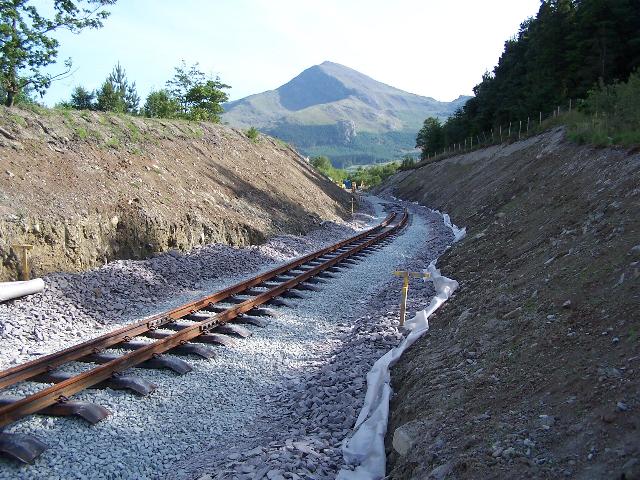
These southerly views (5/2/06, 14/5/06, 29/5/06 and 25/6/06) at Ch.16800 show the trackbed at the same location as the view above with Moel Hebog dominating the background. The line is dropping at 1 in 40 towards Beddgelert and curves right into the Cwm-du side valley to lose height. The forest track is to the left and increasing tree growth on the embankment side is reducing the fine views to the east. Little work is needed here other than renewing fencing, culverts and trackside drainage before ballasting and track can be laid. The second view (with kind permission of Mike Hart) shows the trackbed fenced and scraped with some work done on sidelong ditches and culverts. The third view shows the trackbed levelled at surveyors' sighting levels erected every 10m. The fourth view shows ballast laid north from UB131 appearing around the corner at Ch.17000 approx. Click on the images to enlarge. These images are copyright B.W.Hughes. Slide scan technology utilised is Olympus ES10 & iPhoto Plus4. Slide scanned at 200dpi. Second image taken on a Kodak DX6490 digital camera. Images post processed using iPhoto Plus4 and displayed at 96dpi.

These views (30/7/06) show the Head of Steel at Ch.16900 after that weekend's Rest of the World Gang tracklaying. The first is to the north and the second to the south. Click on the images to enlarge. These images are copyright B.W.Hughes and were taken on a Kodak DX6490 digital camera. Images post processed using iPhoto Plus4 and displayed at 96dpi.
The route curves into the Afon Cwm-du side valley near the Forestry Commission car park. Unfortunately the toilets here disappeared in 1998. This section was built in 1901-6 by the PBSSR in association with the NWNGR. Wood trains operated over the stub from the Beddgelert Forest to Rhyd Ddu station during the First World War.
These northerly view (5/2/06 and 6/8/06) show the track at Ch.17100. The first shows the work in progress to divert the overhead power line at this location. The powerline will be buried alongside the forest track from here to Pont Cae'r Gors rather than criss-crossing the railway. The second shows track laid with Dolgarrog in the distance. Click on the images to enlarge. These images are copyright B.W.Hughes and were captured on a Kodak DX6490 digital camera. Images post processed using Iphoto+4 and displayed at 96dpi.

These westerly views (5/2/06, 29/5/06, 24/6/06 and 6/8/06) at Ch.17100 show the trackbed scraped, fencing erected and vegetation removed. James Cyf. has also started work on sidelong drains and culverts. The second view shows the trackbed levelled and surveyors' sighting posts erected ready for ballasting. The final image shows the track laid. Click on the images to enlarge. These images are copyright B.W.Hughes and were taken on a Kodak DX6490 digital camera. Images post processed using iPhoto Plus4 and displayed at 96dpi.

These easterly views (5/2/06, 29/5/06, 24/6/06 and 9/8/06) at Ch.17200 shows the trackbed scraped, fencing erected and vegetation removed. The second view shows the surveyors' sighting levels erected and the surface ready for ballasting. James Cyf. has also started work on sidelong drains and culverts. The third view shows the trackbed ballasted and the fourth, track laid by the Tuesday Gang. Click on the images to enlarge. These images are copyright B.W.Hughes and were taken on a Kodak DX6490 digital camera. Images post processed using iPhoto Plus4 and displayed at 96dpi.
This westerly view (5/2/06) at Ch.17300 shows the trackbed scraped, fencing erected and vegetation removed. James Cyf. has also started work on sidelong drains and culverts. This image is copyright B.W.Hughes and was taken on a Kodak DX6490 digital camera. Image post processed using iPhoto Plus4. Image displayed at 96dpi.
These westerly views (24/6/05 and 13/8/06) show the erection of fence posts underway at Ch.17350 as the trackbed curves into the Afon Cwm-Du side valley. It appears enough land has been left on the right side at this location for a future cycleway if the SNPA can organise this. The second view shows the Head of Steel after the Rest of the World gang used pre-curved rails on this sharp right hand rails. Click on the images to enlarge. The first image is copyright D. Waldren and was taken on a digital camera. The second image is copyright Tim Evans and was taken on a digital camera. Images post processed using iPhoto Plus4. Image displayed at 96dpi.

This westerly view (22/8/06) shows the short gauge widened section with bolted ex-SAR sleepers near Ch.17300. Click on the image to enlarge. This image is copyright B.W.Hughes and was taken on a Kodak DX6490 digital camera. Image post processed using iPhoto Plus4 and displayed at 96dpi.
This easterly view (5/2/06) at Ch.17400 shows the trackbed scraped, fencing erected and vegetation removed. James Cyf. has also started work on sidelong drains and culverts. This image is copyright B.W.Hughes and was taken on a Kodak DX6490 digital camera. Image post processed using iPhoto Plus4. Image displayed at 96dpi.

This easterly view (22/8/06) shows the Head of Steel on that date with the furthest of the staggered rails at Ch.17440 after the Tuesday Gang had made progress with the staggered joints into the curve towards the recently completed Afon Cwm Du bridge (UB131). Click on the image to enlarge. This image is copyright B.W.Hughes and was taken on a Kodak DX6490 digital camera. Image post processed using iPhoto Plus4 and displayed at 96dpi.

This westerly view (22/8/06) shows the Head of Steel for the start of tracklaying by the Tuesday Gang on 29/8/06. Click on the image to enlarge. This image is copyright B.W.Hughes and was taken on a Kodak DX6490 digital camera. Image post processed using iPhoto Plus4 and displayed at 96dpi.
This easterly view (5/2/06) at Ch.17500 shows the trackbed scraped, fencing erected and vegetation removed. James Cyf. has also started work on sidelong drains and culverts. This image is copyright B.W.Hughes and was taken on a Kodak DX6490 digital camera. Image post processed using iPhoto Plus4. Image displayed at 96dpi.
This westerly view (2/7/05) at Ch.17500 shows the fencing contract approaching the Afon Cwm Du bridge. Click on the image to enlarge. This image is copyright B.W.Hughes and was taken on a Kodak DX6490 digital camera. Image post processed using iPhoto Plus4. Image displayed at 96dpi.
This northerly view (3/7/06) shows the ballasted trackbed just north of UB131. Click on the image to enlarge. This image is courtesy Mike Hart and was taken on a digital camera. Image post processed using iPhoto Plus4 and displayed at 96dpi.
Cwm-du bridge UB131
The Cwm-du bridge is a reinforced concrete structure of WHR origin with an embankment built up on it. James Cyf. intended rebuilding the bridge in June 2006.
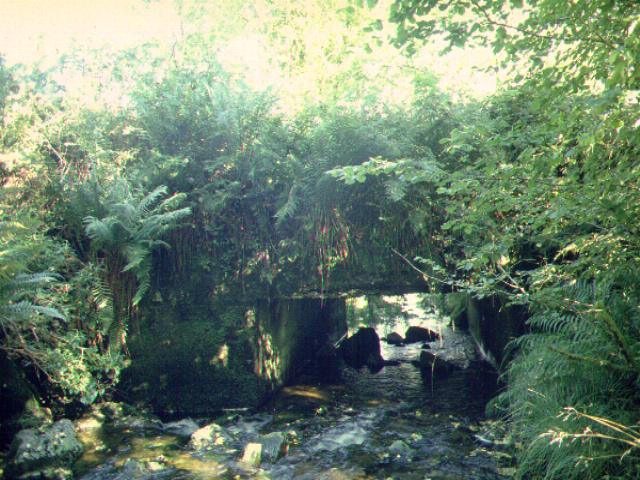
These easterly views (archive and 29/5/06) show the concrete bridge across the Afon Cwm-du at Ch.17560. An embankment is built across it. The second view shows the exposed ends of the rails used as reinforcing bars. Click on the images to enlarge. This image is copyright B.W.Hughes. Slide scan technology utilised is Olympus ES10 & iPhoto Plus4. The second image was captured on a Kodak DX6490 digital camera. Images post processed using Iphoto+4 and displayed at 96dpi.
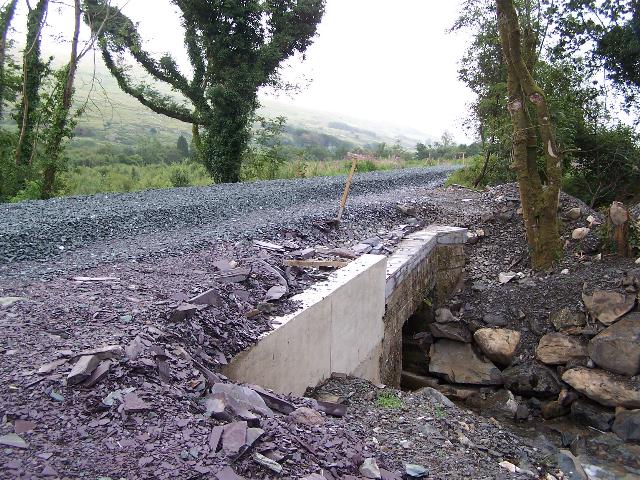
This northerly view (3/7/06) shows UB131 with its new concrete deck. The trackbed has been built up on the deck to the correct height. The end of the ballast bed can be seen immediately north of the bridge. With work now finished in this area, ballast will soon be laid south towards the site of Hafod Ruffydd Halt. Click on the image to enlarge. This image is courtesy Mike Hart and was taken on a digital camera. Image post processed using iPhoto Plus4 and displayed at 96dpi.
This northerly view (30/7/06) shows the deck of UB131 now exposed with the ballast bed from Pont Cae'r Gors visible on the far side. This bridge will probably have a new cast deck in the next week or so. Click on the image to enlarge. This image is copyright B.W.Hughes and was taken on a Kodak DX6490 digital camera. Image post processed using iPhoto Plus4 and displayed at 96dpi.

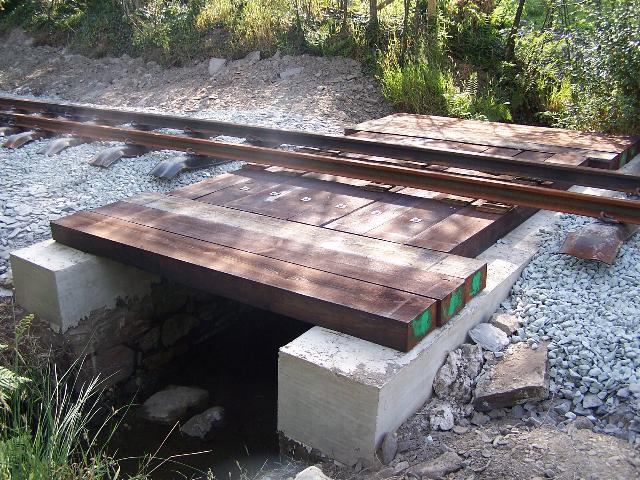
These southerly views (13/8/06 and 22/8/06) shows the bridge deck of UB131 has now received a reinforced concrete slab. Pre-cast concrete L sections have been placed to retain the fill across the bridge. The scaffolding will allow the WHRCL's stonemason to add a sawn slate finish to the exterior. Click on the images to enlarge. These images are copyright Tim Evans and B.W.Hughes respectively and were taken on a digital cameras. Image post processed using iPhoto Plus4 and displayed at 96dpi.
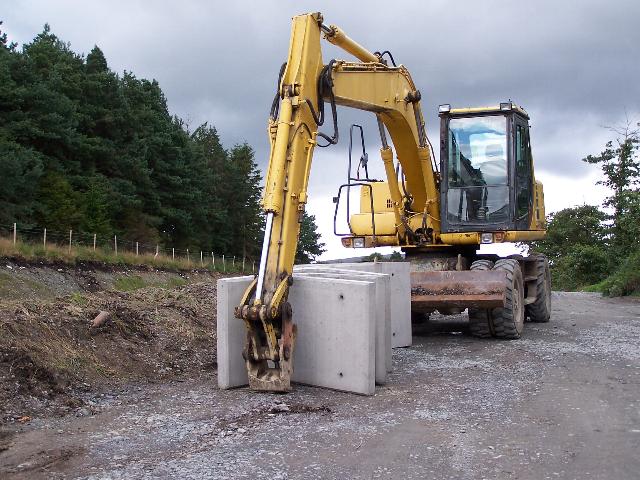
This northerly view (10/8/06) shows the L-shaped pre-cast concrete sections delivered to Pont Cae'r Gors for UB131. Click on the image to enlarge. This image is copyright B.W.Hughes and was taken on a Kodak DX6490 digital camera. Image post processed using iPhoto Plus4 and displayed at 96dpi.
These northerly views (22/8/06 and 16/9/06) show the recently completed Afon Cwm Du bridge (UB131). L-shaped pre-cast concrete sections stand on the cast bridge beam to retain the fill. The outside of the curve requires eight of these sections while the inside seven. The Head of Steel is out of view round the curve. The second view shows the track laid over the bridge. Click on the images to enlarge. The images are copyright B.W.Hughes and were taken on a Kodak DX6490 digital camera and a snapshot JVC camcorder. Images post processed using iPhoto Plus4 and displayed at 96dpi.
The end of the PBSSR works was just south of the Afon Cwm-du bridge. A passing loop was established here for the wood traffic into Rhyd Ddu.

These northerly views (archive, 2/7/05 and 5/2/06) show the route curving across the Afon Cwm-du at Ch.17600. An embankment is built across the bridge. A forestry track diverges to the left. The third view shows James Cyf. has cleared the now trackbed. Click on the images to enlarge. These images are copyright B.W.Hughes. Slide scan technology utilised is Olympus ES10 & iPhoto Plus4. Other images taken on a Kodak DX6490 digital camera. Images post processed using Iphoto+4 and displayed at 96dpi.
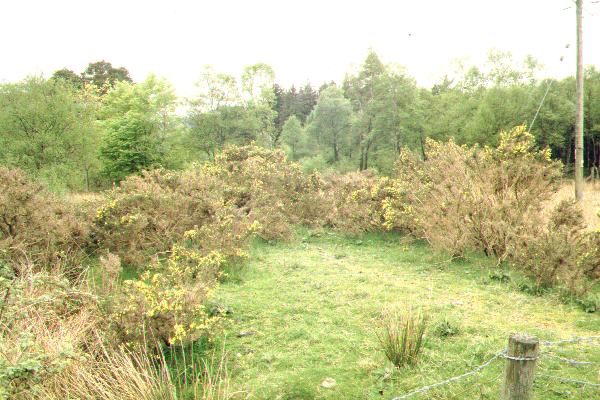
These southerly views (2/7/05, 18/11/05, 29/5/06 and 22/8/06) at Ch.17600 just south of the Afon Cwm-du bridge show the forest re-growing after clear felling in the late 1990s. This is the site of the Parry wood tramway terminal loop utilising the abandoned works of the PBSSR. The wood operation ran to a siding in Rhyd Ddu station. Little of the PBSSR was built south of here until Ty'n-y-coed at Ch.20700. The second view shows the snow-clad Moel Hebog rising the trackbed recently finished by Jones Cyf. The third view shows the trackbed excavated to provide a firmer base and the fourth the ballast laid Click on the images to enlarge. The first and third images are copyright B.W.Hughes and was captured on a Kodak DX6490 digital camera. The second image is courtesy/copyright Mike Hart taken on a digital camera. Images post processed using Iphoto+4 and displayed at 96dpi.
This southerly view (16/9/06) shows the track laid south from UB131. Click on the image to enlarge. This image is copyright B.W.Hughes and was taken as a snapshot on a JVC camcorder. Image post processed using iPhoto Plus4 and displayed at 96dpi.
These northerly views (2/7/05, 5/2/06, 17/4/06 and 29/5/06) at Ch.17700 shows the forest re-growing after clear felling in the late 1990s. The stand of mature trees is situated close to the Afon Cwm-du bridge. The second view shows James Cyf. has cleared the fenced trackbed and started to provide sidelong drainage. The third view shows surveyors' sighting posts up on this section. The fourth view shows the trackbed excavated to harden the surface ready for ballasting. Click on the image to enlarge. This image is copyright B.W.Hughes and was captured on a Kodak DX6490 digital camera. Image post processed using Iphoto+4 and displayed at 96dpi.

These northerly views (22/8/06 and 16/9/06) show the ballasted trackbed north of UB133 and the Head of Steel with staggered rails. Click on the images to enlarge. These images are copyright B.W.Hughes and were taken on a Kodak DX6490 digital camera and a snapshot JVC camcorder. Images post processed using iPhoto Plus4 and displayed at 96dpi.


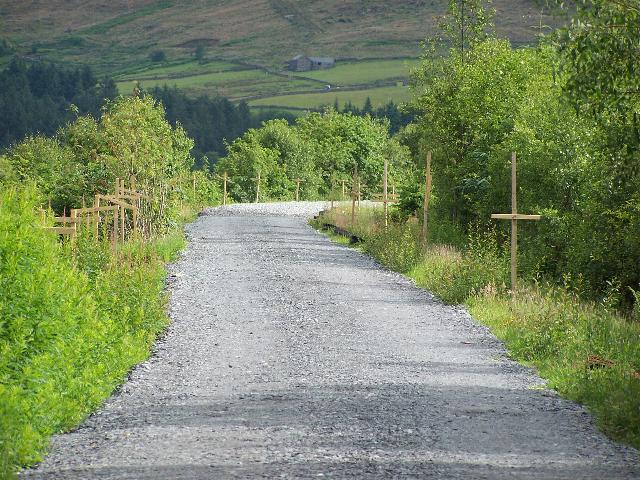
This southerly views (2/7/05 and 16/9/06) at Ch.17700 just north of the Afon Hafod Ruffydd-Isaf bridge (UB133) shows the random nature of the plantation in this area. The long straight leads onto a more open shelf near the site of Hafod Ruffydd Halt. The second view shows the Head of Steel. Click on the images to enlarge. These images are copyright B.W.Hughes and were captured on a Kodak DX6490 digital camera and a JVC snapshot camcorder. Image post processed using Iphoto+4 and displayed at 96dpi.
UB131 and UB133 have both been rebuilt as they are of suspect NWNGR/PBSSR construction from the abortive 1906 attempt to bridge the gap between Rhyd Ddu and Croesor Junction.
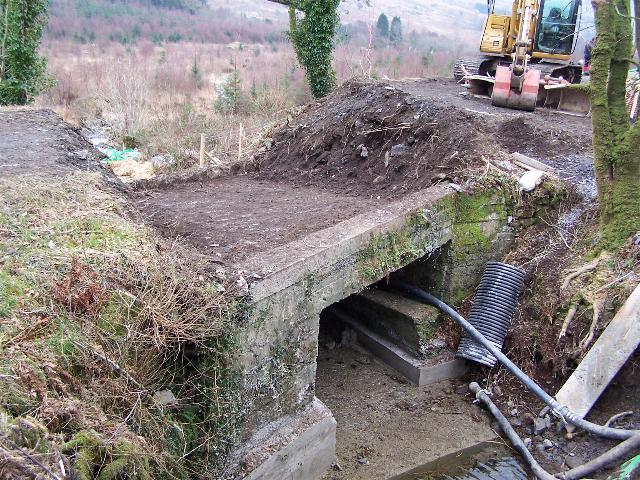
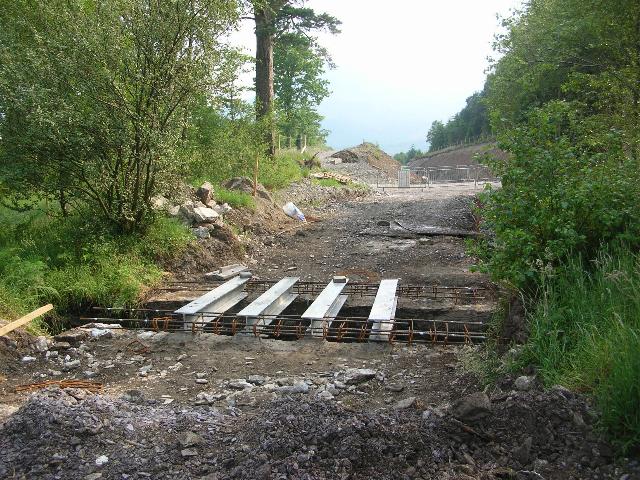
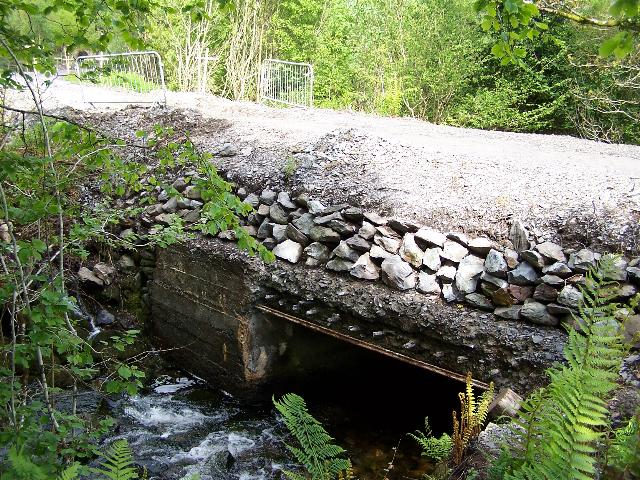
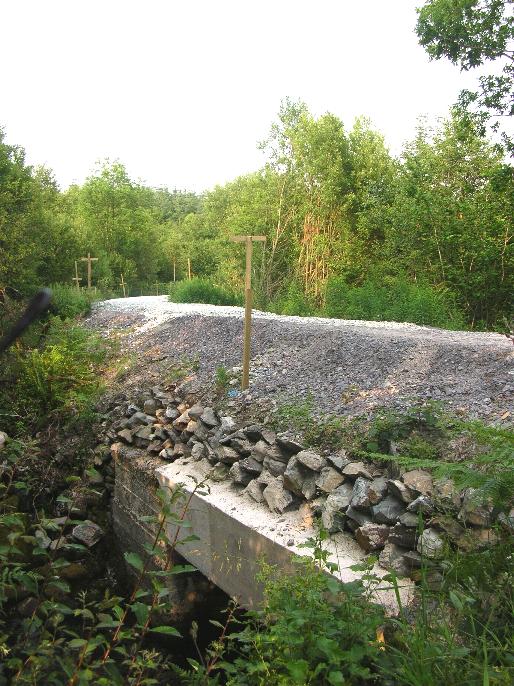
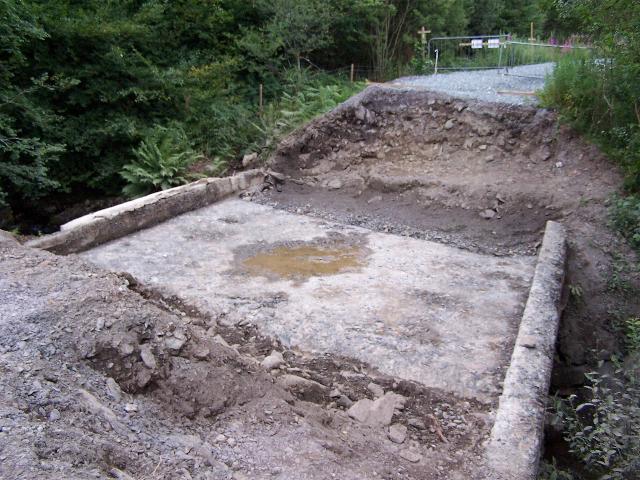
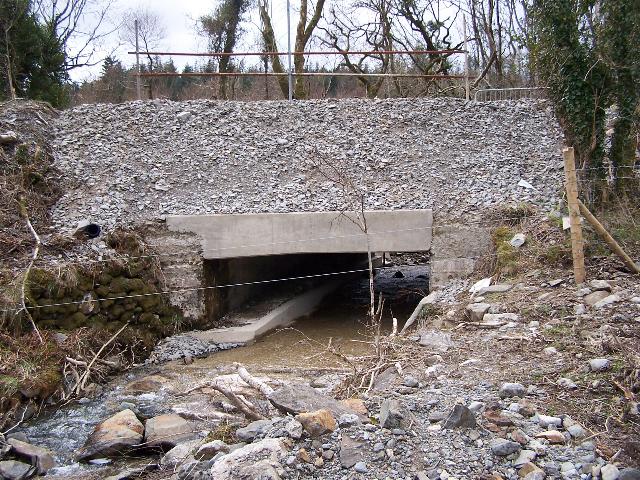
These southerly views (5/2/06, 17/4/06, 29/5/06 and 22/8/06) at UB133 shows the embankment removed and the sloping concrete deck revealed. The stream bed has acquired a concrete base to prevent scour, whilst the abutments have been clad with new concrete. The deck is also going to receive attention before the embankment is rebuilt across it. The second view shows excavations to extend the north west wing wall and the third view shows these nearly complete. The fourth view shows some sawn slate cladding has been done. Click on the images to enlarge. These images are copyright B.W.Hughes and were taken on a Kodak DX6490 digital camera. Images post processed using iPhoto Plus4 and displayed at 96dpi.

These northerly views (17/4/06 and 29/5/06) at UB133 show the embankment built across the bridge. The northerly extension to the wing wall was finished in early June. Click on the images to enlarge. These images are copyright B.W.Hughes and were captured on a Kodak DX6490 digital camera. Images post processed using Iphoto+4 and displayed at 96dpi.
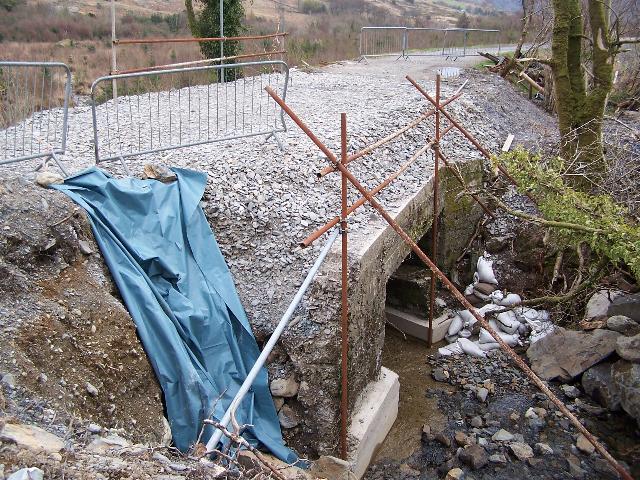
This westerly view (17/4/06) at UB133 shows the embankment built across the bridge. The latest thinking is to build a ballast retaining wall. Click on the image to enlarge. This image is copyright B.W.Hughes and was captured on a Kodak DX6490 digital camera. Image post processed using Iphoto+4 and displayed at 96dpi.

This westerly view (2/7/05) at Ch.17720 shows the waterfalls at Afon Hafod Ruffydd-Isaf bridge UB133. Maps show a borrow pit to the northwest of this location presumably for the embankment towards Hafod Ruffydd Halt. Click on the image to enlarge. This image is copyright B.W.Hughes and was captured on a Kodak DX6490 digital camera. Image post processed using Iphoto+4 and displayed at 96dpi.
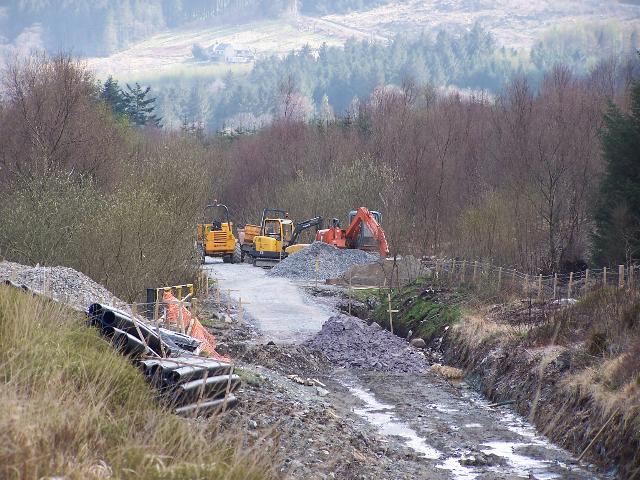
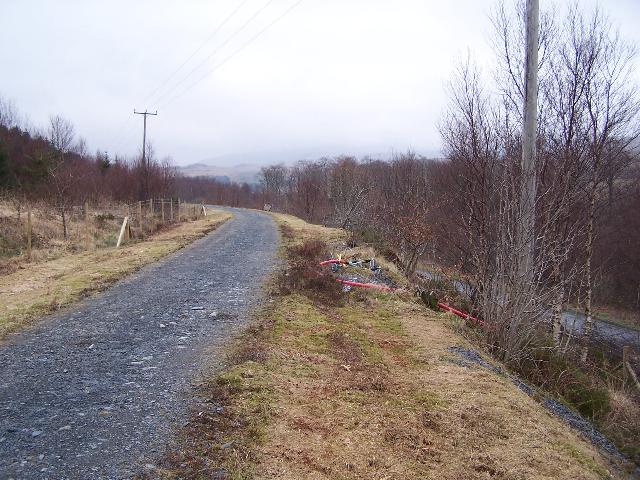
These northerly views (2/7/05, 18/12/05 and 16/9/06) at Ch.17800 just south of the Afon Hafod Ruffydd-Isaf bridge (UB133) show the trackbed curving left then right towards the Afon Cwm-du bridge. The second view shows the fenced trackbed completed with sub base ready to receive ballast and the third view, the trackbed ballasted. Click on the images to enlarge. The first image is copyright B.W.Hughes and was captured on a Kodak DX6490 digital camera. The second image is courtesy/copyright Mike Hart and was taken on a digital camera. The third image is copyright B.W.Hughes and is a snapshot from a JVC camcorder. Images post processed using Iphoto+4 and displayed at 96dpi.

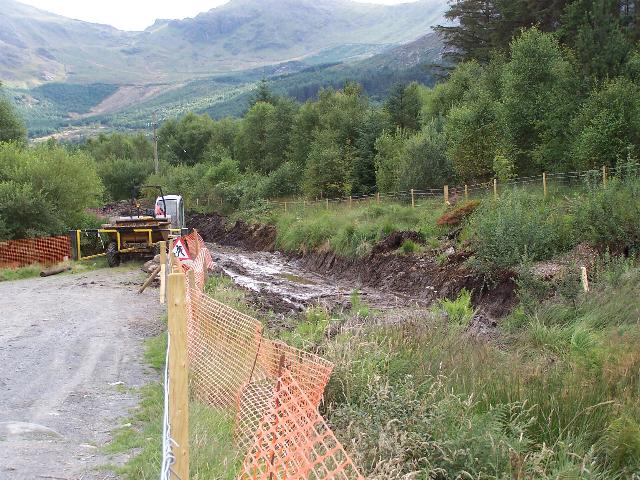
These southerly views (2/7/05, 17/4/06 and 16/9/06) at Ch.17800 approx. just north of the Afon Hafod Ruffydd Halt, show the landslip that has undermined the trackbed on the east side for some 30m. The land has slipped over 2m at the southern end and required massive support and new drainage. The slip has doubled in depth since the view earlier this year below. A stream coming off Forestry tracks and running along ruts on the trackbed has not helped. However, it does reveal that the embankment was constructed from local boulder clay in this area. Click on the images to enlarge. These images are copyright B.W.Hughes and were captured on a Kodak DX6490 digital camera and thirdly a snapshot JVC camcorder. Images post processed using Iphoto+4 and displayed at 96dpi.


These northerly views (18/2/05, 18/12/05 and 17/4/06) just north of Hafod Ruffydd Halt show the landslip has undermined the trackbed on the east side. The second view shows the repaired trackbed, now fenced and hardened ready to take sub base. The third view shows detail of the reinforcement and drainage put in place to ensure no further slip occurs. Click on the images to enlarge. The first image is copyright B.W.Hughes and was captured on a Kodak DX6490 digital camera and the second courtesy/copyright Mike Hart was taken on a digital camera. Images post processed using Iphoto+4 and displayed at 96dpi.
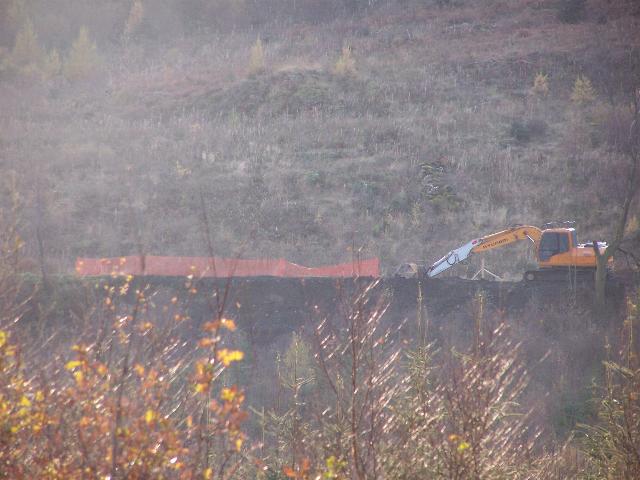
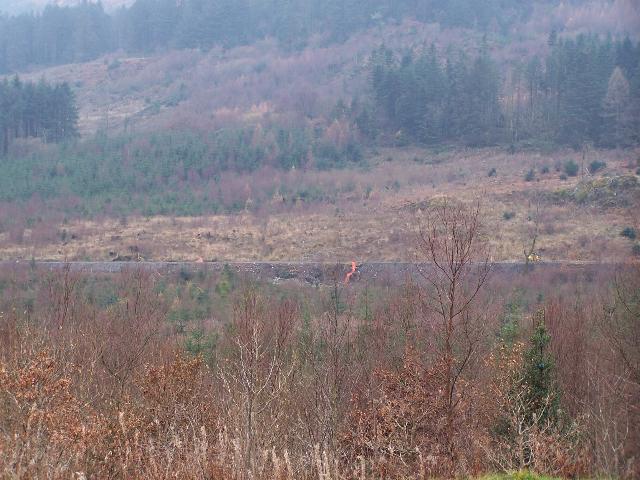
These westerly views (20/11/05 and 11/12/05) from the car park where the WW2 tank firing range was situated show work underway on the landslip just north of Hafod Ruffydd Halt. The second view shows the job nearing completion and the trackbed and embankment cleared for the whole length north from the site of Hafod Ruffydd Halt (left). Click on the image to enlarge. These images are copyright B.W.Hughes and were taken on a Kodak DX6490 digital camera. Image post processed using iPhoto Plus4 and displayed at 96dpi.
This northerly archive view shows the route curving into the side valley of the Afon Cwm-du at Ch.17900. The route of the line climbing at 1 in 40 towards the summit of the pass can be made out about halfway up the newly planted forest on the hillside to the right.. Click on the image to enlarge. This image is copyright B.W.Hughes. Slide scan technology utilised is Olympus ES10 & iPhoto Plus4. Slide displayed at 96dpi.

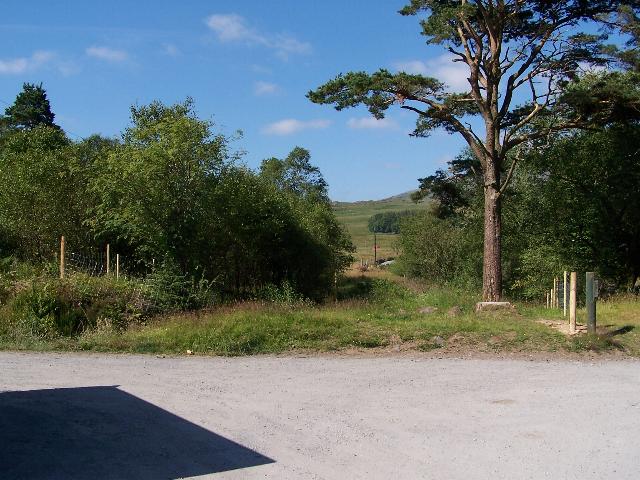
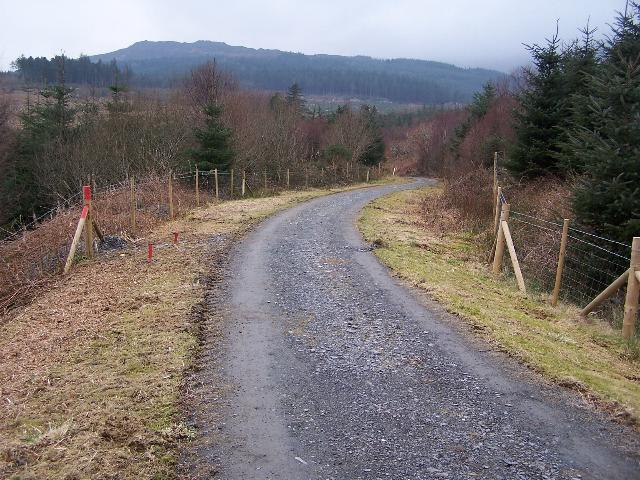
These northerly views (2/7/05 and 20/11/05) at Ch.17900 at the north of the site of Hafod Ruffydd Halt shows the fencing contract just starting from this area and working towards Afon Cwm-du bridge. Poles that have just been erected can be seen with netting still to be added. Working from two ends cuts down vehicular damage to the trackbed, something that caused major damage and additional expense on Phase 2. The long straight leads onto a more open shelf near the site of Hafod Ruffydd Halt. The second view shows works underway on the landslip. Click on the images to enlarge. These images are copyright B.W.Hughes and were captured on a Kodak DX6490 digital camera. Images post processed using Iphoto+4 and displayed at 96dpi.
Hafod Ruffydd
Hafod Ruffydd Halt was positioned at LC71 (Ch.17940). The wider formation here reveals there was a short uphill siding on the east side north of the level crossing. There was also a gravel platform with perhaps an old coach body as a shelter on the east side of the line.

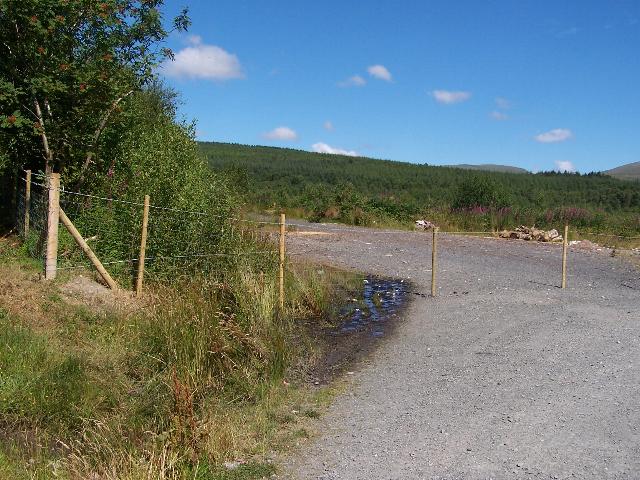
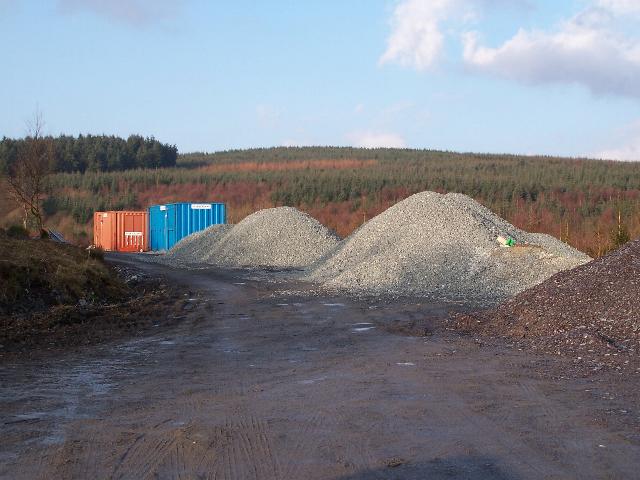
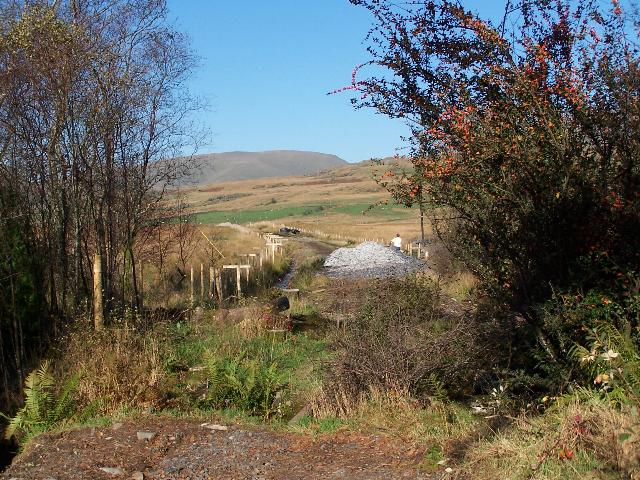
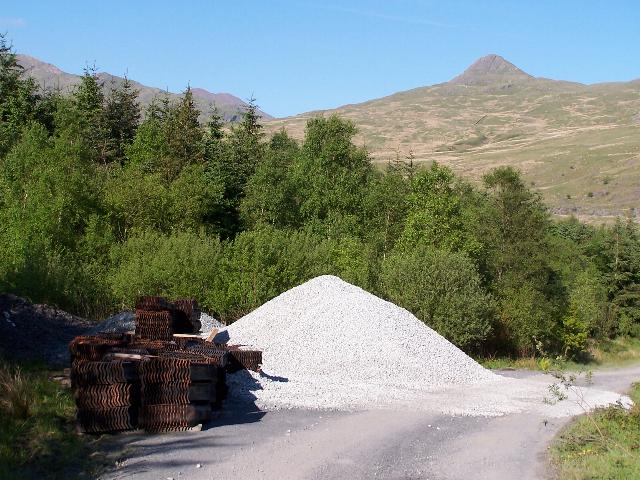
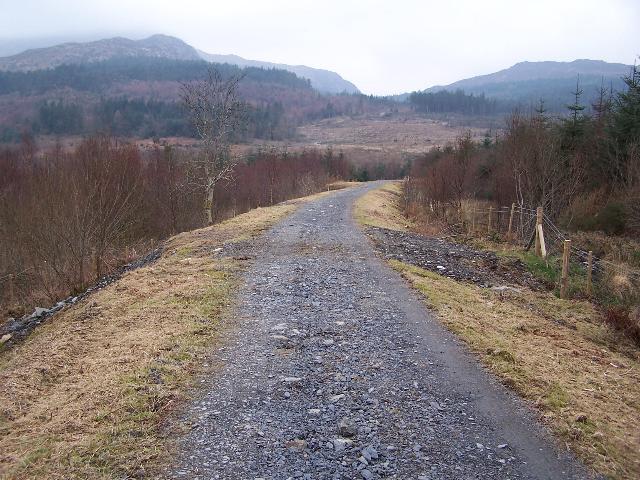
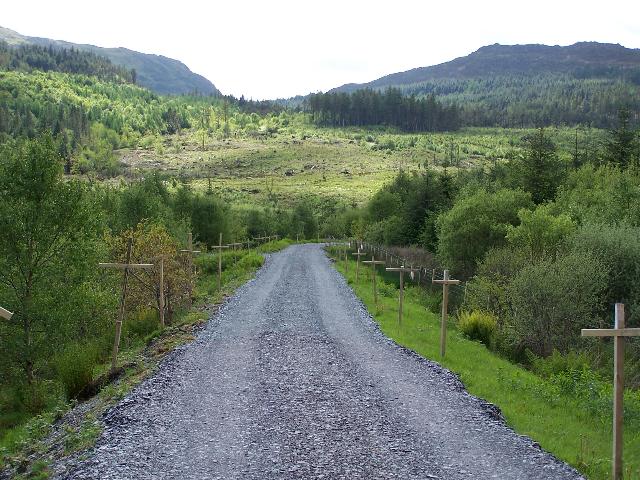
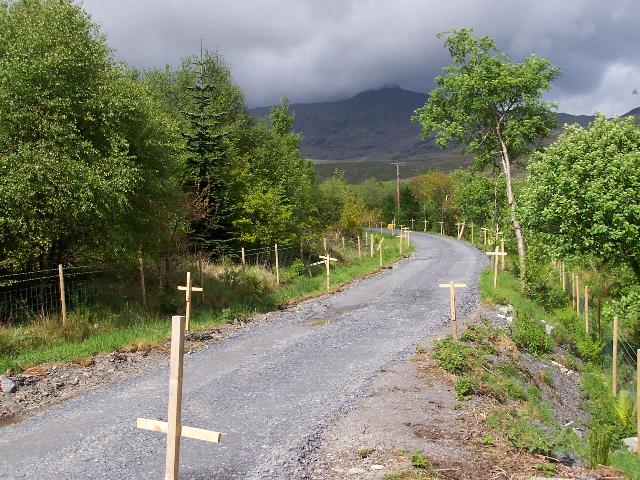
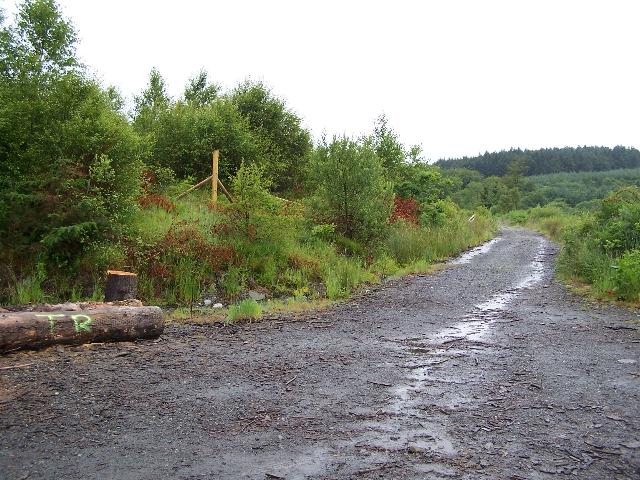
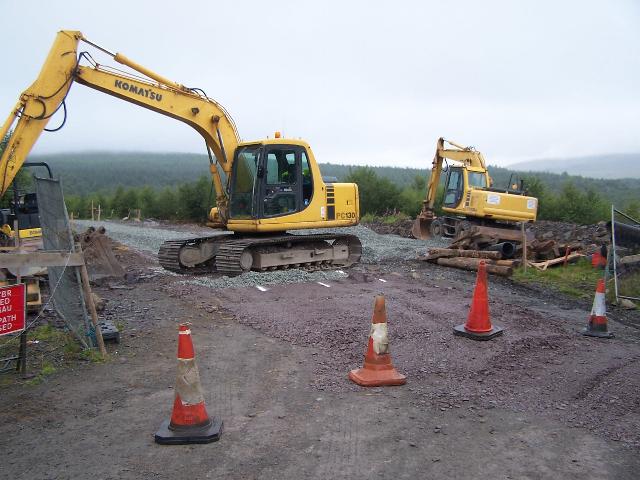
These northerly views (archive, 7/8/05, 1/10/05 and 8/1/06) show the site of Hafod Ruffydd Halt at LC71. There was short siding and a gravel platform here. An old NWNGR quarryman's coach may have been used as a shelter in the 1920s. This section of line will give excellent views of Snowdon if the route is opened before the replanted forest grows too high! In the second view, the site is shown fenced off now the fencing of the route north of here has been completed. In the third view, a large area of hard standing has been formed for plant storage/laydown for Phasey who had just won the contract for Pont Cae'r Gors to Hafod Ruffydd. In the fourth view large stores of ballast have been delivered as the trackbed nears completion. Click on the images to enlarge. These images are copyright B.W.Hughes. Slide scan technology utilised is Olympus ES10 & iPhoto Plus4. Images displayed at 96dpi.

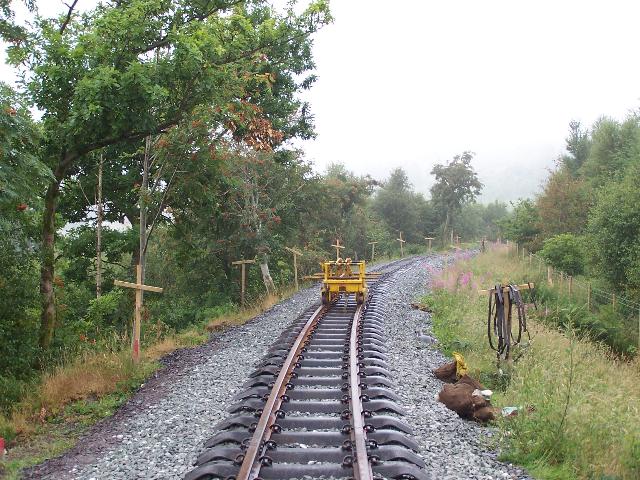
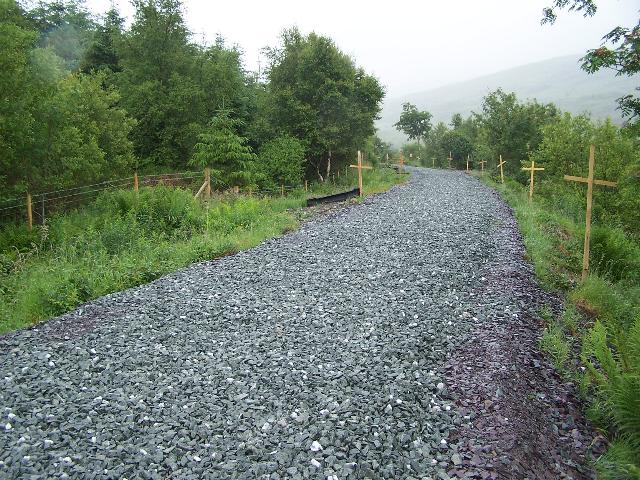
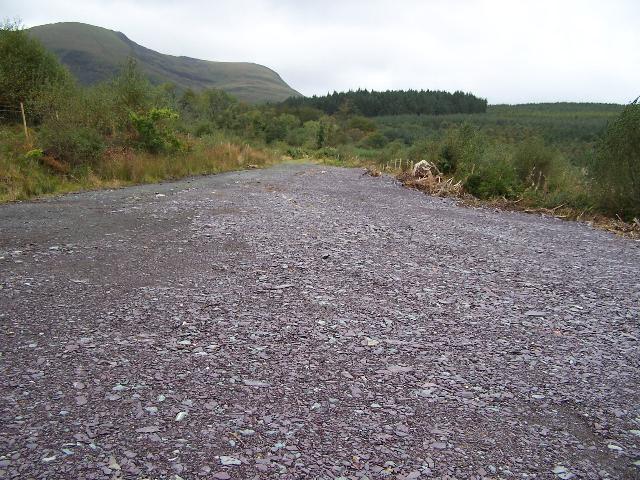
This northerly view (27/8/06) shows the ballast completed to the north of the site of the former Hafod Ruffydd Halt. Click on the image to enlarge. This image is copyright B.W.Hughes and was taken on a Kodak DX6490 digital camera. Image post processed using iPhoto Plus4 and displayed at 96dpi.

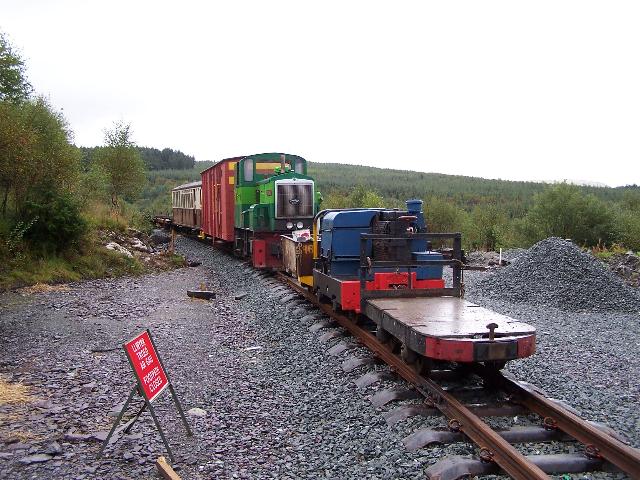
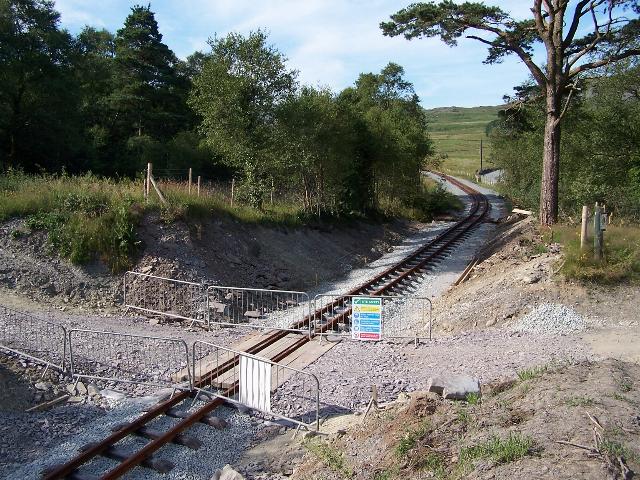
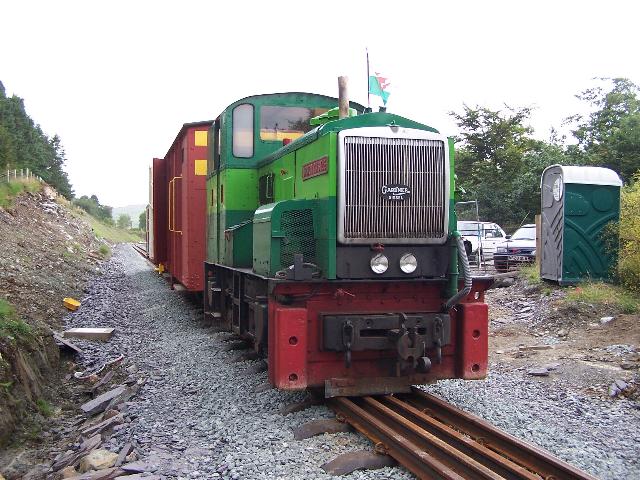
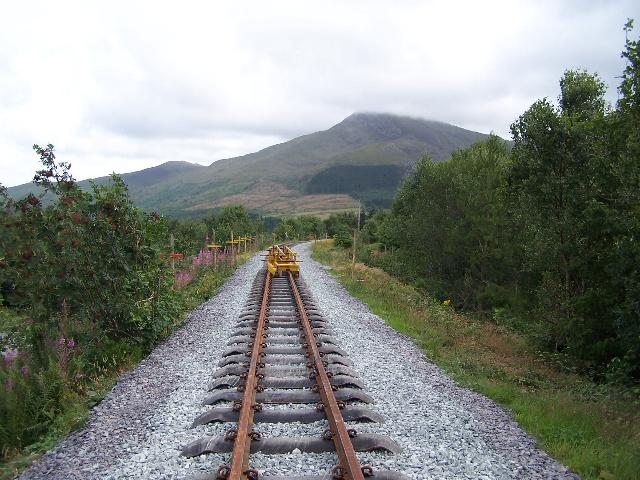
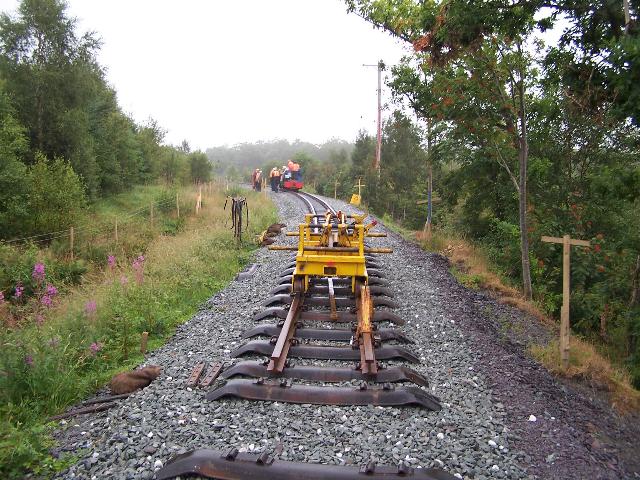
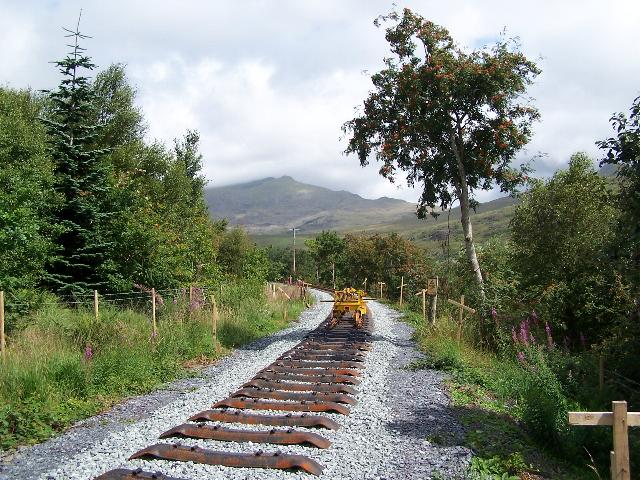
This northerly views (22/8/06, 27/8/06 and 1/10/06) show the ballasted reaching the level crossing at the site of the former Hafod Ruffydd Halt and then the completion of the crossing. James Cyf was still clearing the site at the end of August. The third view shows the Phase 4 PW train at the same location. Click on the image to enlarge. These images are copyright B.W.Hughes and were taken on a Kodak DX6490 digital camera. Images post processed using iPhoto Plus4 and displayed at 96dpi.
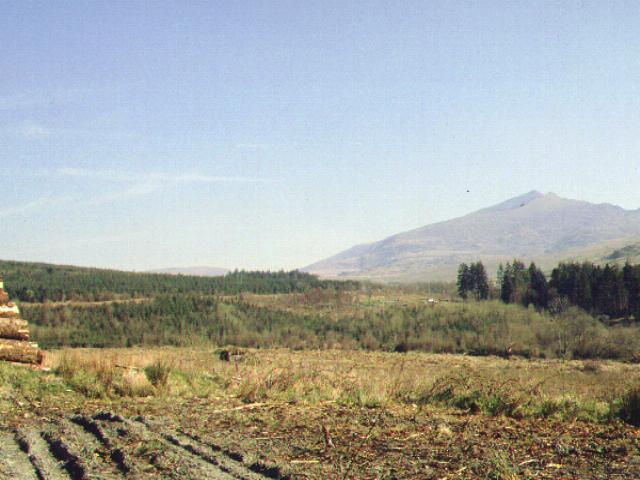
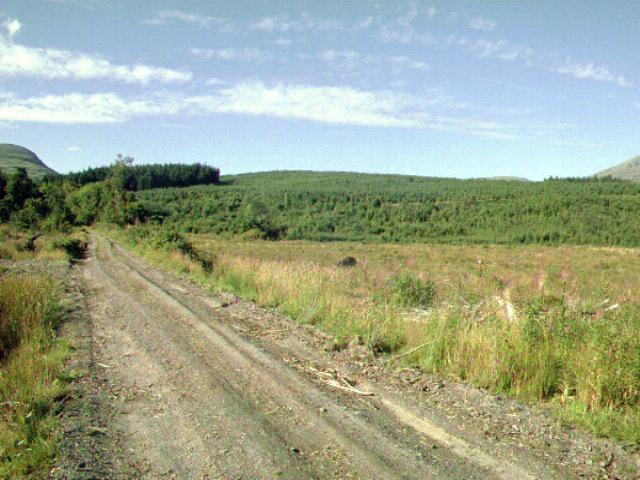
This northerly archive panoramic view shows the trackbed climbing as a yellow strip (top left) through the replanted Beddgelert Forest as seen from the location of Hafod Ruffydd Halt. Snowdon can be seen dominating the view to the right. It was hoped that the trains would reach here before the new planted forest obscures the view. The site of Hafod Ruffydd Halt was used by Forest Enterprise as a storage and collection point for logs. In future, the site could be used as a loading siding for logs to be carried on the WHR out of the National Park to Dinas for transfer if this were economically viable. Click on the image to enlarge. This image is copyright B.W.Hughes taken using a Sigma SA300 SLR. Slide scan technology utilised is Olympus ES10 & iPhoto Plus4. Slide displayed at 96dpi.

This westerly archive panoramic view shows the trackbed dropping at 1 in 40 through the Beddgelert Forest. The site of Hafod Ruffydd Halt (centre) is visible, identified by piles of logs cut by Forest Enterprise. The embankment climbing at 1 in 40, to the right is also clearly visible. The location is used by Forest Enterprise as a storage and collection point for logs. In the left background is Moel Hebog. Click on the image to enlarge. This image is copyright B.W.Hughes taken using a Sigma SA300 SLR. Slide scan technology utilised is Olympus ES10 & iPhoto Plus4. Slide displayed at 96dpi.
Click here to visit the Hafod Ruffydd Halt to Beddgelert Forest page
Click here to return to the Stop Press Page
Site Development
If you have suggestions for development of this site, please contact me by email at the address on the Stop Press page.
Comments
Please add comments in my Guestbook.
Page Version 4.1 Dated 8/10/06