WHR
Glan-yr-afon Sidings to Rhyd Ddu approaches
(part of the Glan-yr-afon to Rhyd Ddu area page)
V3.2 updated 24/6/03
New images on this page are from 16/6/03.
Click here for JC Sreeves latest construction map
Glan-yr-afon Viaduct
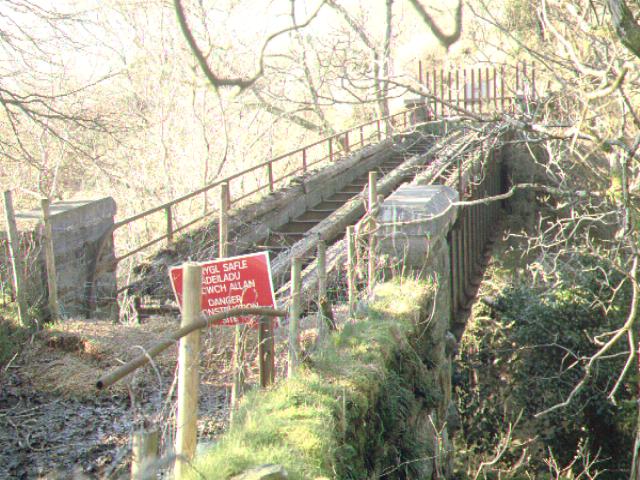
This section commences just south of Glan-yr-afon Viaduct which is part of a separate contract.
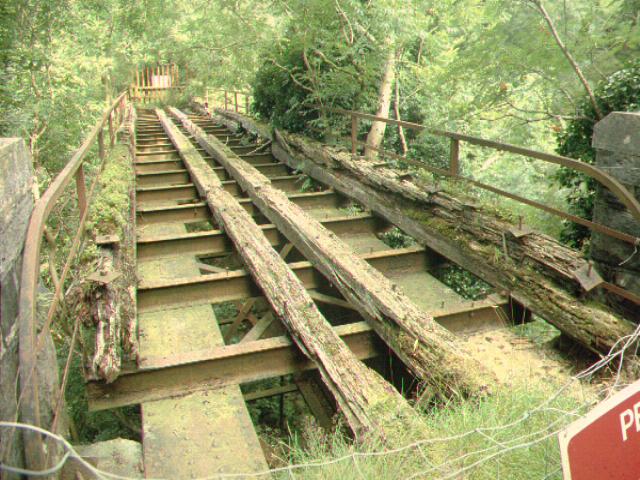
This northerly view (29/8/01) shows the Glan-yr-afon Viaduct. The main girders seem fit for re-use but the bridge may require additional strengthening. The wooden way beams are decaying. Wooden strengthening was also fitted to the bridge railings to channel any derailed train. The bridge has no walkway but this will probably be required in any rebuild. Click on the image to enlarge. This image is copyright B.W.Hughes. Slide scan technology utilised is Olympus ES10 & iPhoto Plus4. Slide displayed at 96dpi.
This northerly image (7/4/02) shows the main girders of the viaduct before the Spring foliage obscures them. The two main load bearing girders are about 2.5m deep and consist of wrought iron. The girders are formed from a top and bottom flange separated by web plates. In order to strengthen the bridge for modern heavier loadings, splicing plates that join the web plates together are to be replaced one at a time in situ. Click on the image to enlarge. This image is copyright B.W.Hughes. Slide scan technology utilised is Olympus ES10 & iPhoto Plus4. Slide displayed at 96dpi.
Contracts were signed in May 2002 for Glan-yr-afon Viaduct (OB64). The 'transom beams' are the transverse beams joining the two principle structural girders and are to be replaced. The main beams are fabricated from wrought iron. The principle components are the top and bottom flanges and the web plates which hold them apart. Because the web plate is 96ft long and 8ft high it obviously is made from several plates joined together.
In practice these plates are each about 8ft square and are joined together by two flat strips of wrought iron (splice plates) riveted either side of the join to show two vertical rows of rivet heads. In some locations one of the splice plates is replaced by a 'T' section member. These flat strips and 'T' sections are considered to be insufficiently strong and are to replaced by stronger steel members with larger rivets. The abutments will also be refurbished.
All the work to the wrought iron beams of the Glan-yr-afon viaduct will be done in situ with scaffolding platforms hung from the beams. Work is expected to start in July 2002.
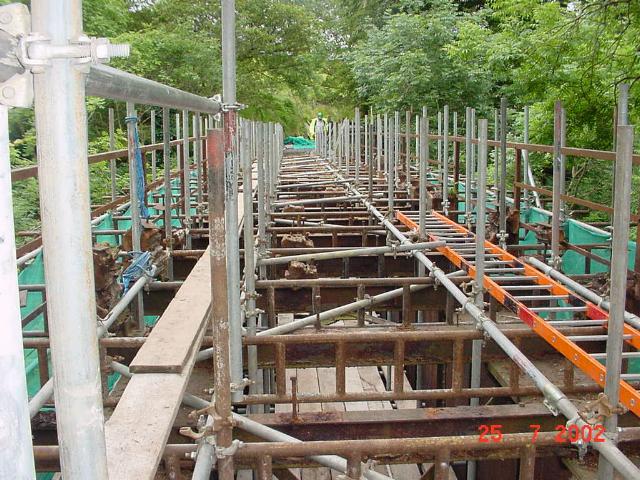
This southerly view (25/7/02) shows the completion of scaffolding across the viaduct. The lower plank access is visible giving Jones workers access to the full height of the main beams. Click on the image to enlarge. This image is copyright WHR, courtesy Jan Woods. Image post processed using iPhoto Plus4 image correction technology and displayed at 96dpi.
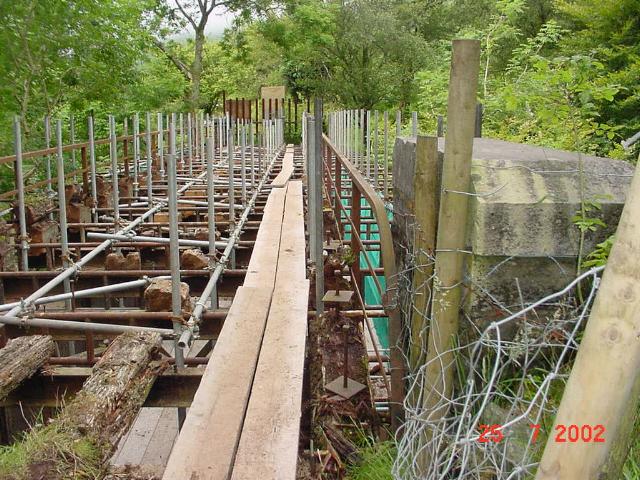
This northerly view (25/7/02) shows the completed scaffolding on the viaduct. Workers now have access to all parts of the main beams. Click on the image to enlarge. This image is copyright WHR, courtesy Jan Woods. Image post processed using iPhoto Plus4 image correction technology and displayed at 96dpi.
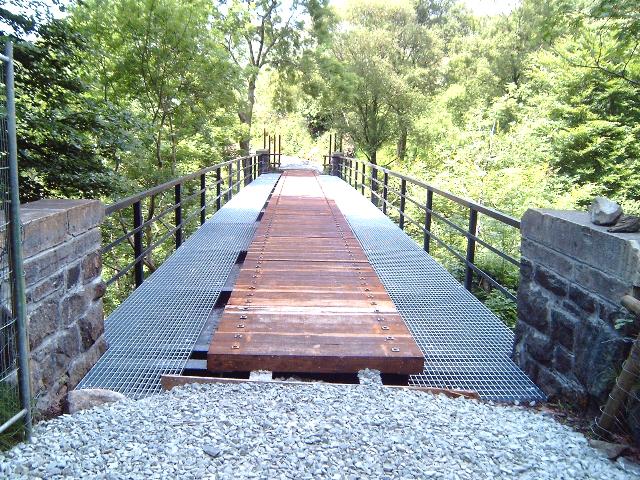
This northerly view (15/6/03) shows the sleeper deck on Glan-yr-afon viaduct completed. At the far end the grid that prevented access has been cut through. Click on the image to enlarge. This image is copyright B.W.Hughes taken on a Samsung Digimax 230 digital camera. Image post processed with iPhoto Plus4 and displayed at 96dpi.
This northerly image (7/4/02) shows the sharp curve into the Glan-yr-afon viaduct. No work other than basic clearance has been done here as outside contractors will use the trackbed to access the viaduct this Summer. Click on the image to enlarge. This image is copyright B.W.Hughes. Slide scan technology utilised is Olympus ES10 & iPhoto Plus4. Slide displayed at 96dpi.
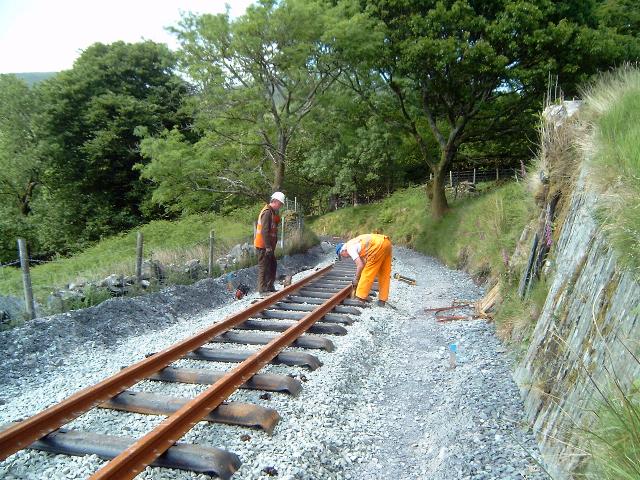
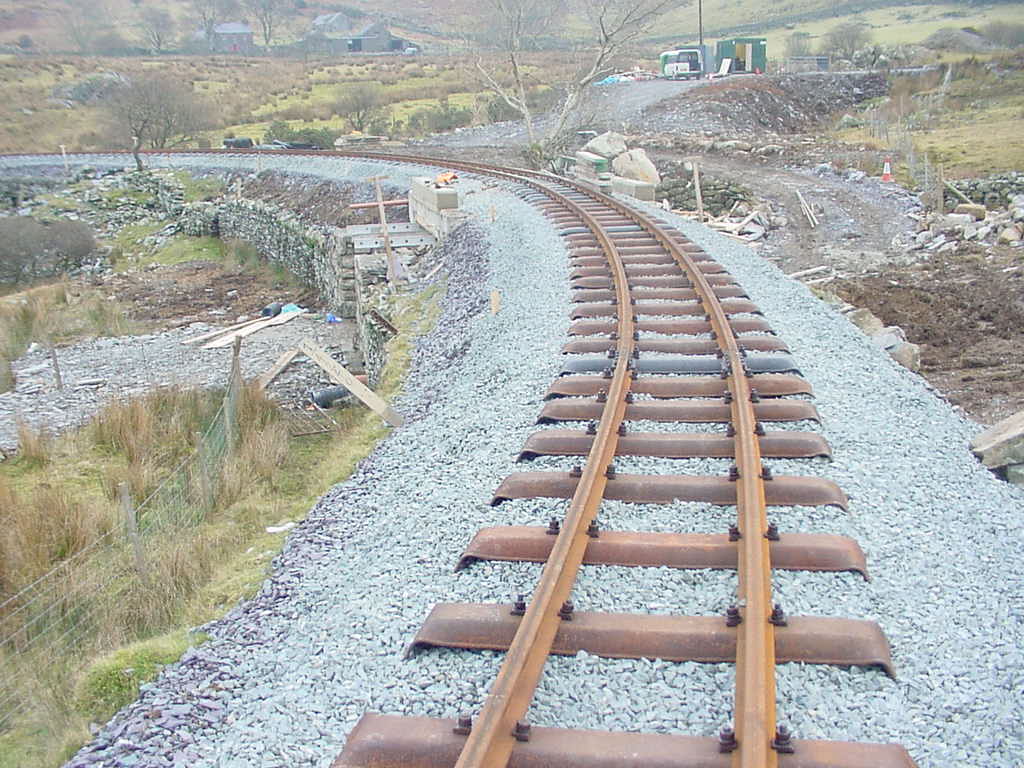
This southerly view (15/6/03) shows track laying on the final curve into Glan-yr-afon viaduct at LC57, Ch.12700. Click on the image to enlarge. This image is copyright B.W.Hughes taken on a Samsung Digimax 230 digital camera. Image post processed with iPhoto Plus4 and displayed at 96dpi.
This southerly image (7/4/02) from the same viewpoint as the previous illustration shows the sharp reverse curve between Glan-yr-afon Viaduct and Glan-yr-afon Yard. The trackbed here will be left until contractors have finished refurbishing the viaduct over the Summer. Click on the image to enlarge. This image is copyright B.W.Hughes. Slide scan technology utilised is Olympus ES10 & iPhoto Plus4. Slide displayed at 96dpi.
This southerly view (15/6/03) shows track laying on the final curve into Glan-yr-afon viaduct at LC57, Ch.12700. Click on the image to enlarge. This image is copyright B.W.Hughes taken on a Samsung Digimax 230 digital camera. Image post processed with iPhoto Plus4 and displayed at 96dpi.
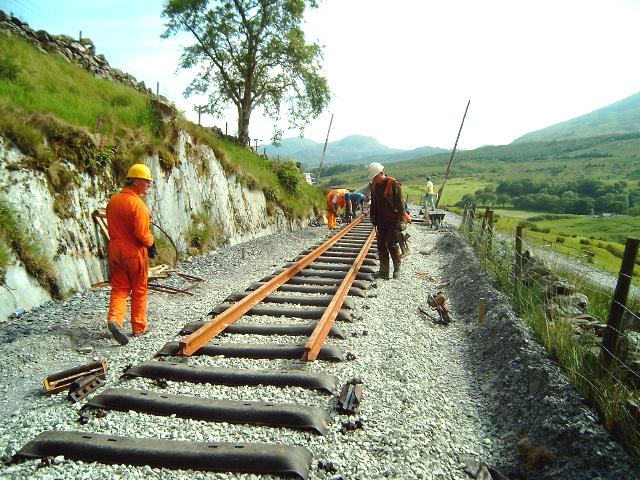
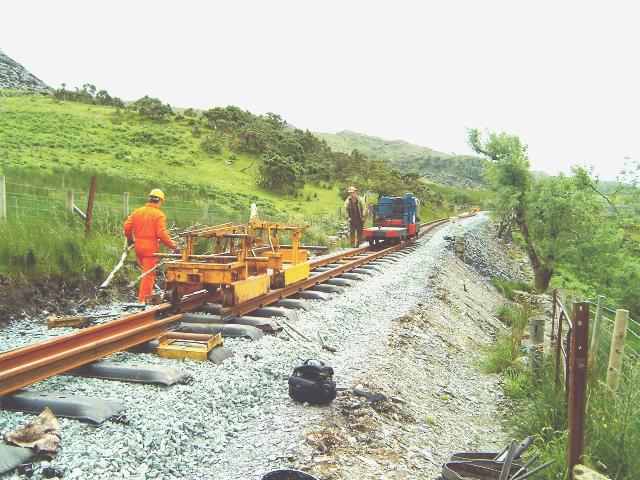
This northerly view (15/6/03) shows track laying on the curve from Glan-yr-afon to LC57, Ch.12700. RRMs are evident moving rail down the hill. Click on the image to enlarge. This image is copyright B.W.Hughes taken on a Samsung Digimax 230 digital camera. Image post processed with iPhoto Plus4 and displayed at 96dpi.
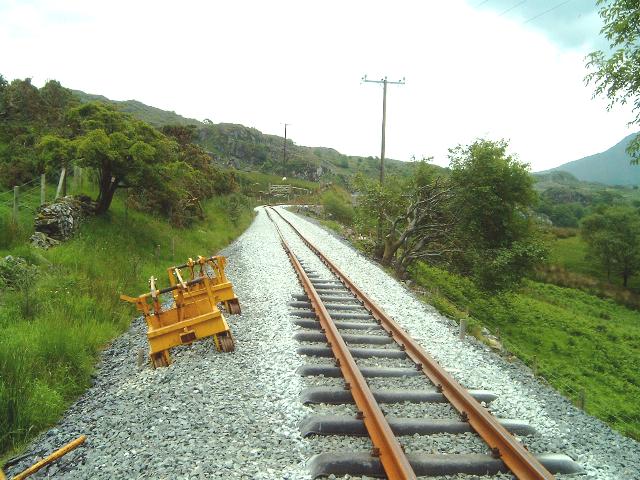
This southerly view (15/6/03) shows track laid north from Glan-yr-afon viaduct at LC57, Ch.12700. Click on the image to enlarge. This image is copyright B.W.Hughes taken on a Samsung Digimax 230 digital camera. Image post processed with iPhoto Plus4 and displayed at 96dpi.
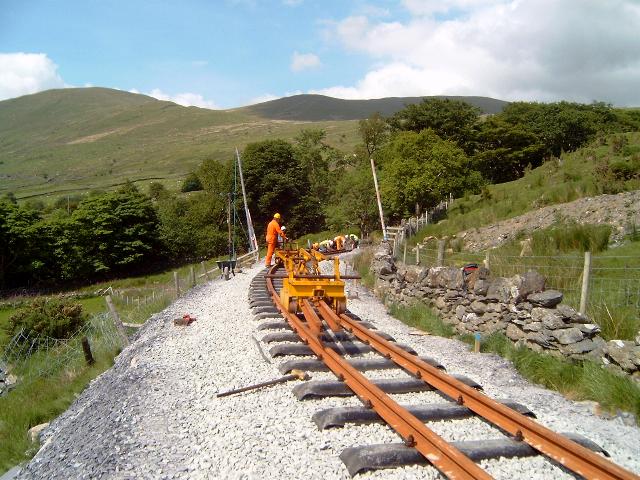
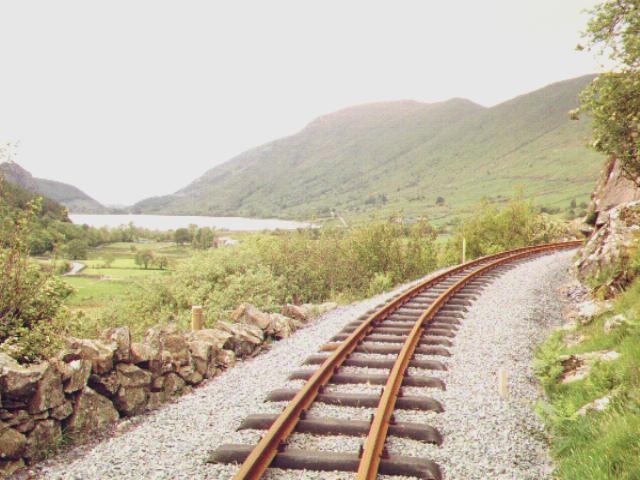
This northerly view (15/6/03) shows RRMs leaving Glan-yr-afon yard carrying rails to lay nearer the viaduct. In the background is a view of Llyn Cwellyn. Click on the image to enlarge. This image is copyright B.W.Hughes taken on a Samsung Digimax 230 digital camera. Image post processed with iPhoto Plus4 and displayed at 96dpi.
Glan-yr-afon yard
The site of the yard is located between Ch.12750 and Ch.12900. There was a halt here for quarrymen in NWNGR days. Originally there was a loop and a parallel siding. A small triangle was connected to the parallel siding and gave access to a turntable at the bottom of the dual acting incline. The quarry closed during WW1 and by 1922, all that was left was the siding.
Work began between this location and Rhosclogwyn incline in early June after the permitted path on the trackbed was closed. WHLR staff cleared wood to allow access for Achnashean Fencing.
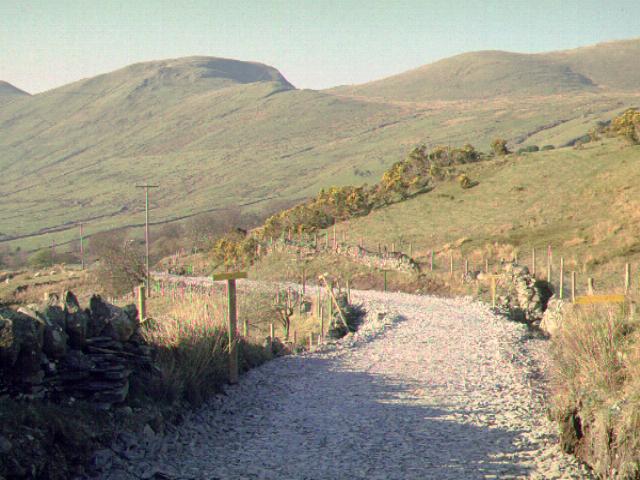
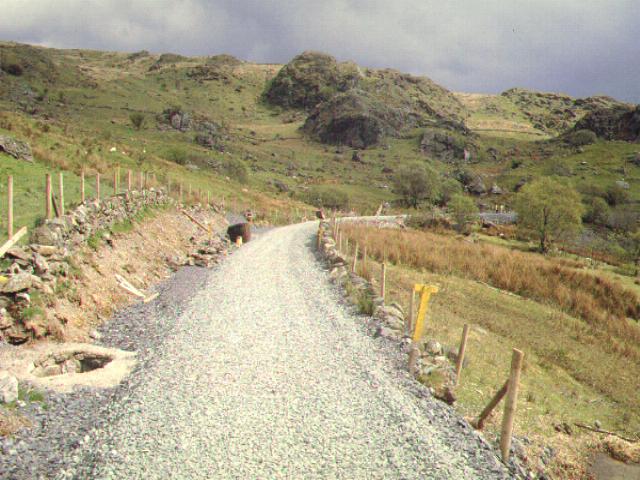
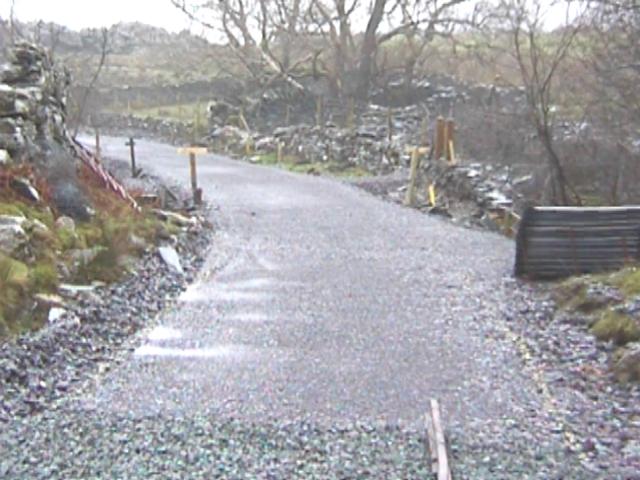
An access track has been restored up to the yard past the private residence. This was finished in rolled slate waste (20/7/01). More slate waste was delivered to the yard to stabilise the formation south of there towards Rhyd Ddu.
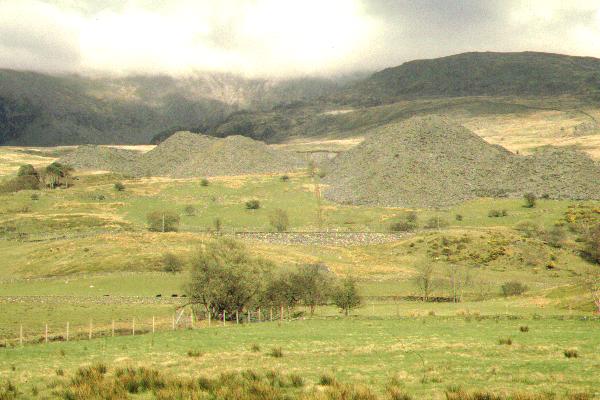
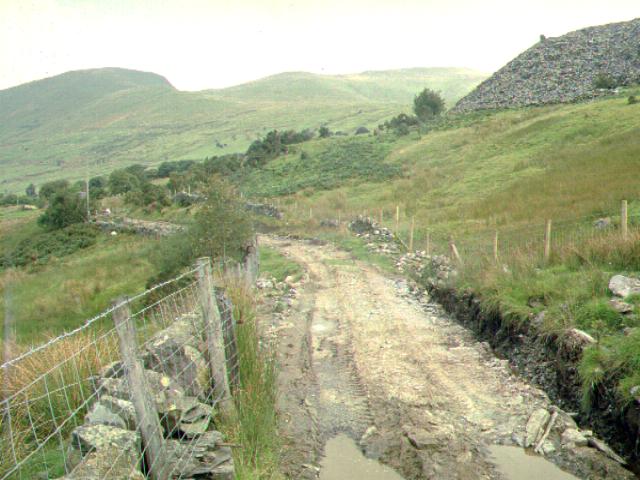
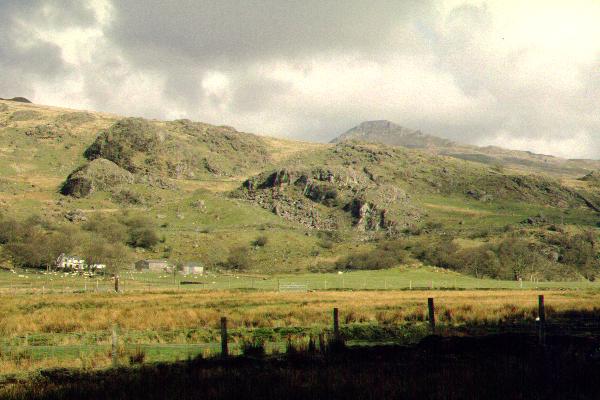
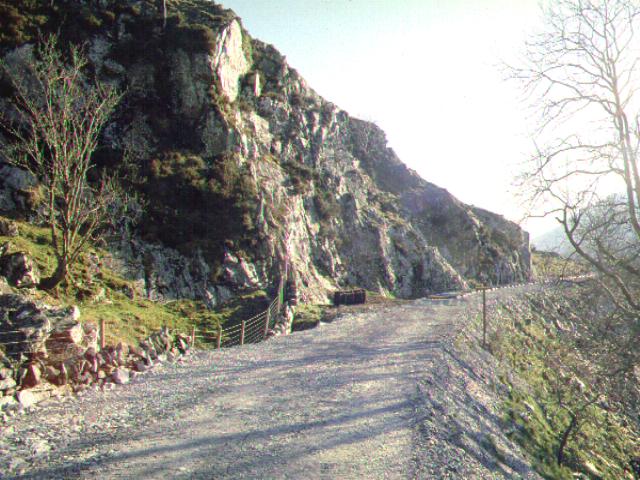
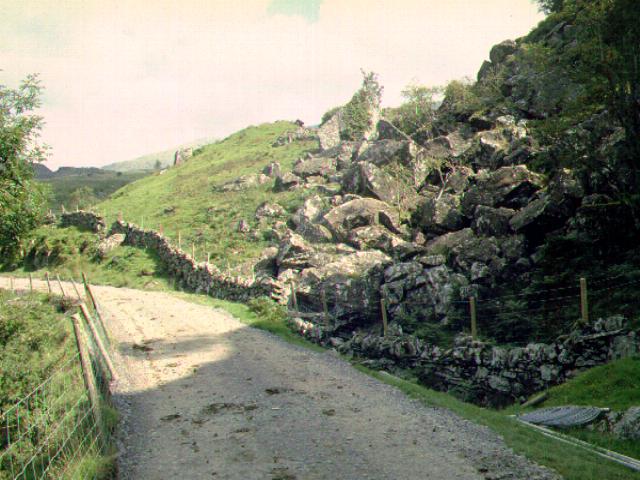
This easterly roadside view (28/4/01) shows the railway on its retaining wall beneath the slate tips. The incline points right at the summit of Snowdon (here lost in the clouds). There is a substantial yard at this site and it was also a halt for quarrymen's trains during the NWNGR days. Click on the image to enlarge. This image is copyright B.W.Hughes. Slide scan technology utilised is Olympus ES10 & iPhoto Plus4. Slide scanned at 200dpi.
This northerly view taken in early June shows the Glan-yr-afon Quarry offices and sidings with the main line beyond on the ledge identified by the light green strip. Piles of fencing posts are seen for Achnashean to install to make the line secure from animals. At this point the railway is high on a ledge with Llyn Cwellyn in the distance. The route is to be deviated towards the east, nearer to the Quarry offices. The deviation will obviate the need to strengthen the retaining wall below the line for the heavier loadings of modern trains. Click on the image to enlarge. This image was provided for WHR staff. Slide scan technology utilised is Olympus ES10 & iPhoto Plus4. Slide displayed at 96dpi.
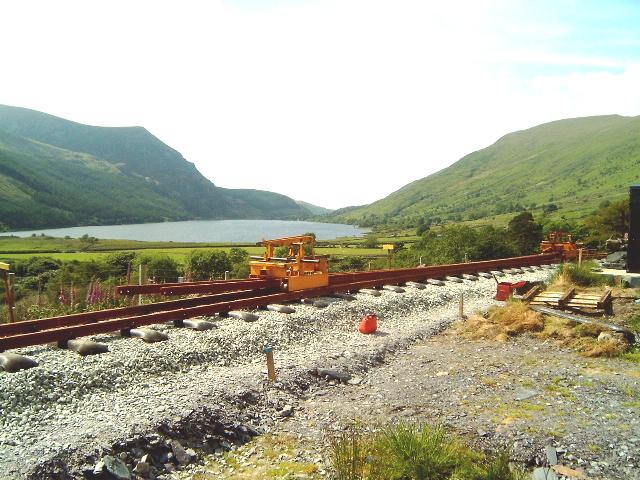
This southerly view (14/6/03) from Ch.12750 shows the track has been swung to the east away from the edge of the stone buttress that supports the yard formation. Click on the image to enlarge. This image is copyright B.W.Hughes taken on a Samsung Digimax 230 digital camera. Image post processed with iPhoto Plus4 and displayed at 96dpi.

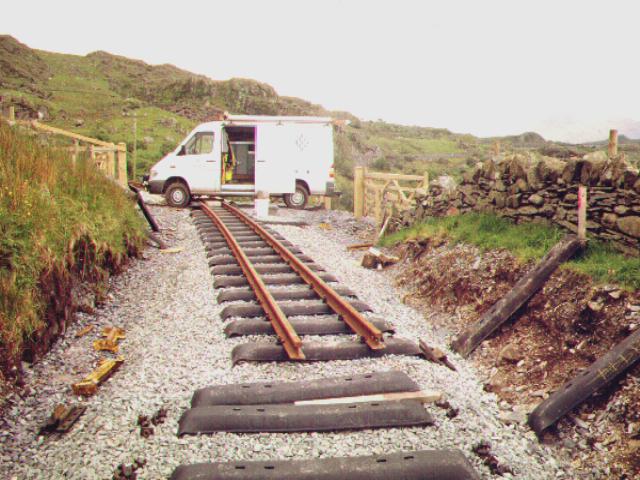
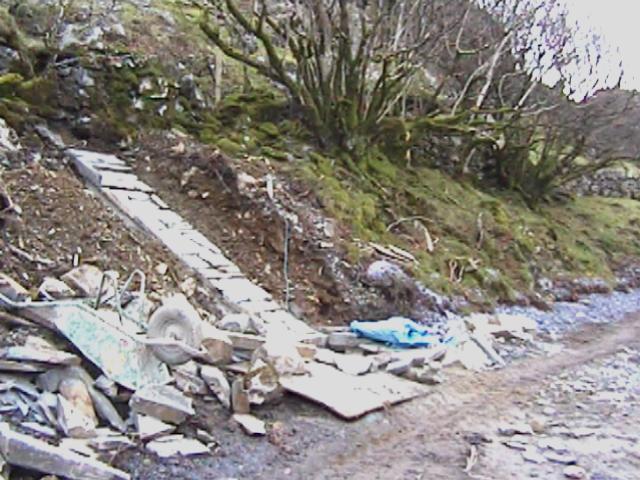
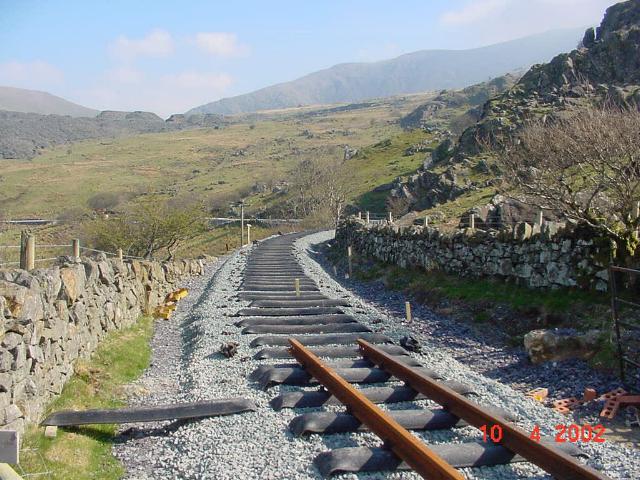
This northerly image (7/4/02) shows the Glan-yr-afon construction site. All the materials for railway construction are visible :- piles of quarry waste, ballast, slate fines, drainage pipes for culverts, earth moving equipment etc. Track will be laid from Rhyd Ddu to this point (Ch.12900) in the coming months before tracklaying switches to Bryn Gloch. The yard site itself will be left free for outside contractors to access and complete the Glan-yr-afon viaduct over the Summer. Click on the image to enlarge. This image is copyright B.W.Hughes. Slide scan technology utilised is Olympus ES10 & iPhoto Plus4. Slide displayed at 96dpi.
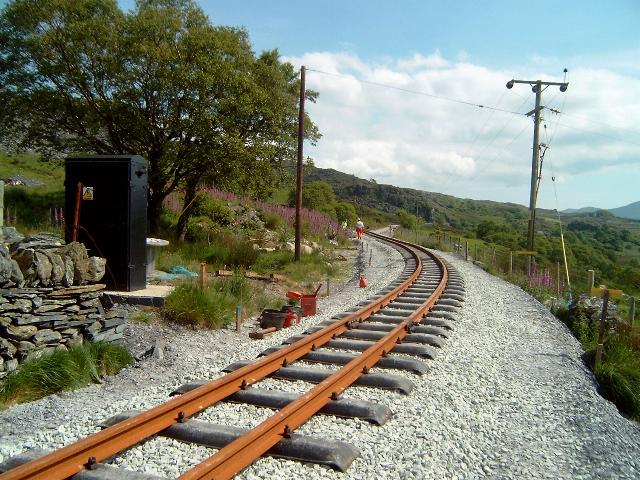
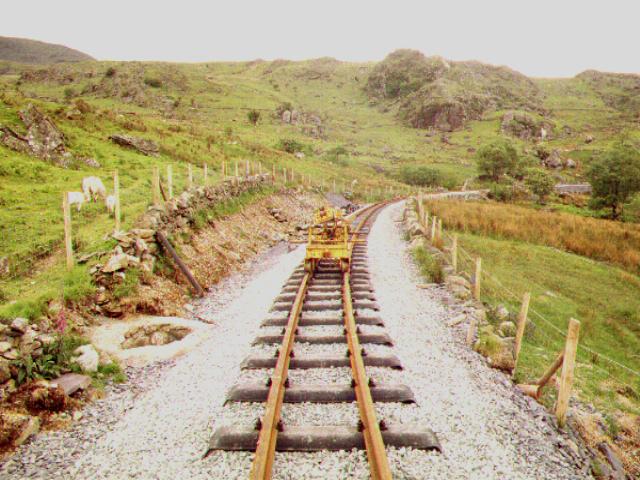
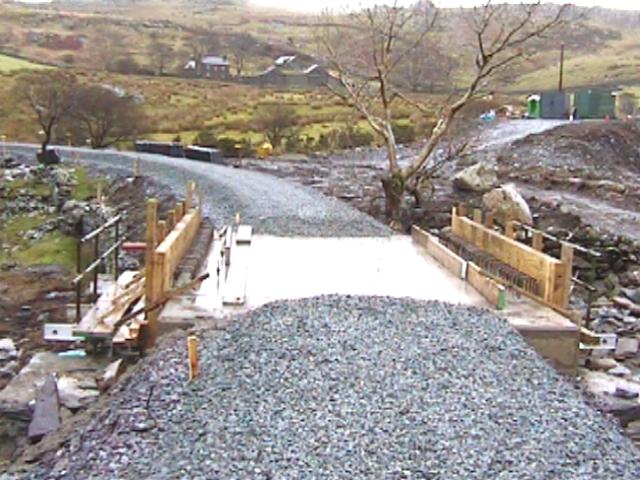
This southerly view (15/6/03) shows the formation built up by a metre across Glan-yr-afon yard giving a more even gradient up the 'long drag' to Rhyd Ddu. Click on the image to enlarge. This image is copyright B.W.Hughes taken on a Samsung Digimax 230 digital camera. Image post processed with iPhoto Plus4 and displayed at 96dpi.
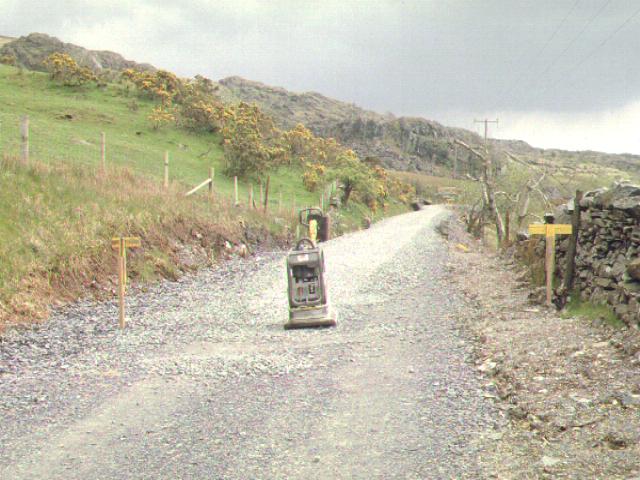
This southerly view (4/5/02) shows the end of ballast at Glan-yr-afon construction site (Ch.12900 approx). The vibrator has been at work compacting this section. Note that the trackbed deviates to the left away from the walled shelf edge at this point to save the cost of reinforcing the wall which supports the trackbed. Click on the image to enlarge. This image is copyright B.W.Hughes. Slide scan technology utilised is Olympus ES10 & iPhoto Plus4. Slide displayed at 96dpi.
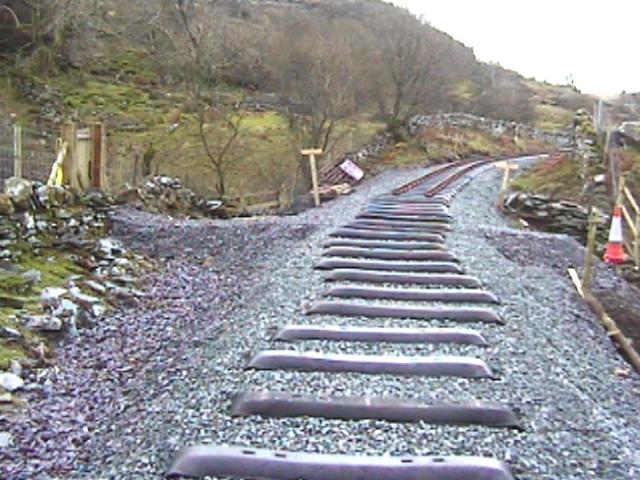
This northerly view (30/6/02) shows the end of the permanent track at Glan-yr-afon Yard at Ch.12916. WHRS volunteers are laying two panels of temporary track sloping down onto the unballasted formation. These will allow the 26 rails remaining at the Rhyd Ddu stockpile to be cleared making way for a ballast dump at the same location. Click on this view to enlarge. This image is copyright B.W.Hughes. This image was taken using a Samsung Digimax 230 digital camera with post processing using IPhoto Plus4. Image displayed at 96dpi.
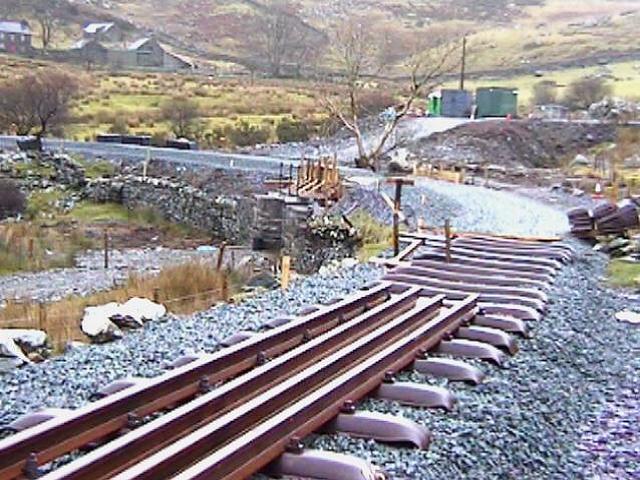
This northerly view (14/6/03) shows track laid across Glan-yr-afon yard. The track deviates to the east away from the edge of the stone wall to prolong the life of this structure. Click on the image to enlarge. This image is copyright B.W.Hughes taken on a Samsung Digimax 230 digital camera. Image post processed with iPhoto Plus4 and displayed at 96dpi.
This southerly view (3/6/02) at Ch.12920 shows the finished trackbed and sleepers laid up to Ch.13000 approx. Sleepers are within 100m of the current end of ballast available. The Glan-yr-afon yard will be used by Jones Bros. for refurbishing the Glan-yr-afon viaduct for the next six months. Track will then be able to link up to Snowdon Ranger Halt in the Autumn. Click on the image to enlarge. This image is copyright WHLR courtesy Jan Woods using iPhoto Plus4 image correction technology and displayed at 96dpi.
This southerly view (30/6/02) shows Dolgarrog stabled at the south end of Glan-yr-afon Yard. Behind the loco are a series of small tight reverse curves to allow the line to clear a rock jutting into the formation. Click on this view to enlarge. This image is copyright B.W.Hughes. This image was taken using a Samsung Digimax 230 digital camera with post processing using iPhoto Plus4. Image displayed at 96dpi.
This southerly view (14/6/03) shows track laying on the straight into Glan-yr-afon yard. The former 'chicane' on this straight has been removed. Click on the image to enlarge. This image is copyright B.W.Hughes taken on a Samsung Digimax 230 digital camera. Image post processed with iPhoto Plus4 and displayed at 96dpi.
With the Glan-yr-afon site approved for tipping as free from rare Great Crested Newts by environmentalists, the work on trackbed scraping moved up a gear. By the first week of August 2001, a site cabin and toilet appeared in the yard. Slate waste is being used to consolidate the trackbed before slate fines are rolled on top.
Volunteers cleared sheep creeps so that assessments on repair/replacement could be made. Underbridges generally have slate slab decks that may not be of sufficient strength for the modern day loadings. In previous phases, these have be cleared down to the slab and a reinforced concrete deck inserted over them to improve strength while retaining the character of the structure.
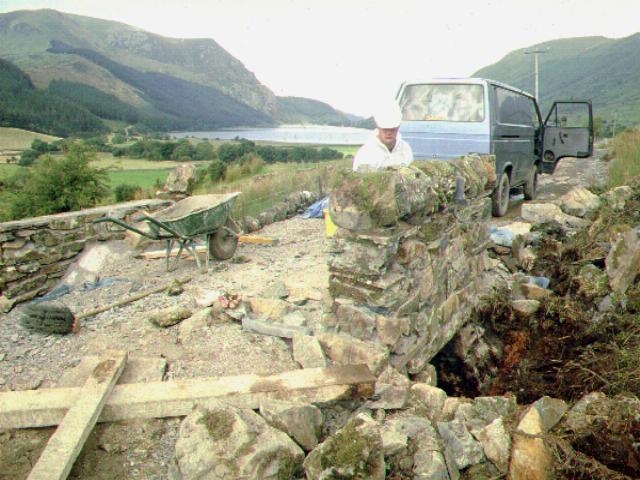
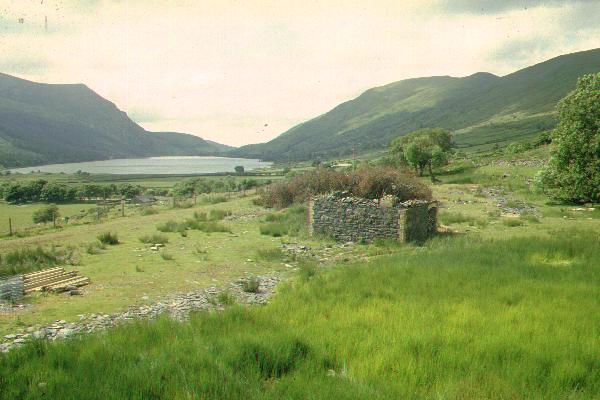
This northerly view (29/8/01) shows WHLR staff building parapets to UB 97 just south of Glan-yr-afon yard. Original most covered stone was being used and the final effect blends into the environment very sensitively. In the background is the south end of Llyn Cwellyn. Click on the image to enlarge. This image is copyright B.W.Hughes. Slide scan technology utilised is Olympus ES10 & iPhoto Plus4. Slide displayed at 96dpi.
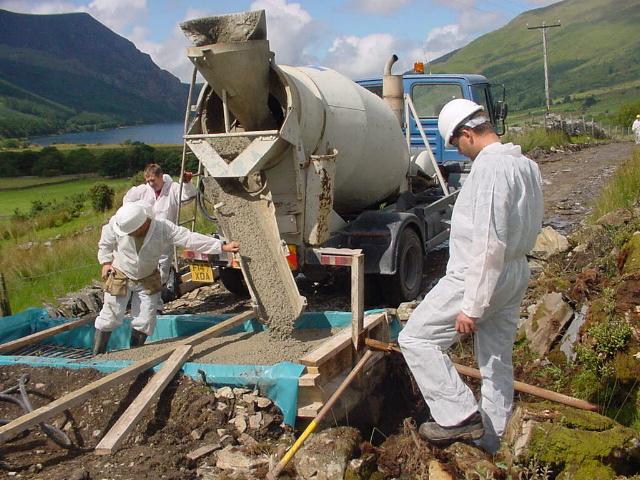
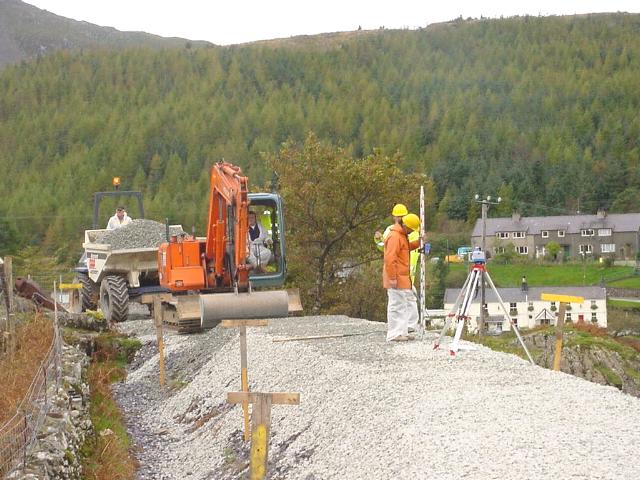
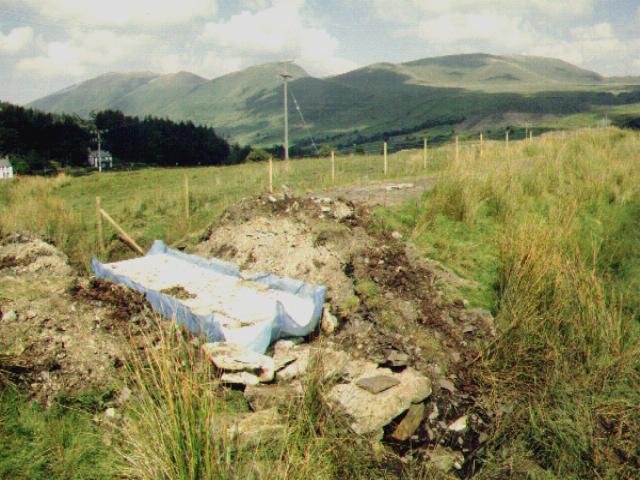
This northerly view (16/8/01) shows the deck of UB 98 (Ch. 13050) being cast by concrete poured into a mould with a steel frame for reinforcement. The mould is lined with blue plastic to prevent leakage. The new deck sits on top of the previous stone slab deck. Click on the image to enlarge. Photo copyright WHLR courtesy Jan Woods. Image post processed by I-photo Plus4 and displayed at 96dpi.
This northerly view (29/8/01) from UB 98 at Ch.13500 shows the second stage of track re-instatement. After scraping mud and vegetation off the trackbed, slate waste is added to firm it up. To the right are the slate tips from the former Glanrafon Quarry. Click on the image to enlarge. This image is copyright B.W.Hughes. Slide scan technology utilised is Olympus ES10 & iPhoto Plus4. Slide displayed at 96dpi.
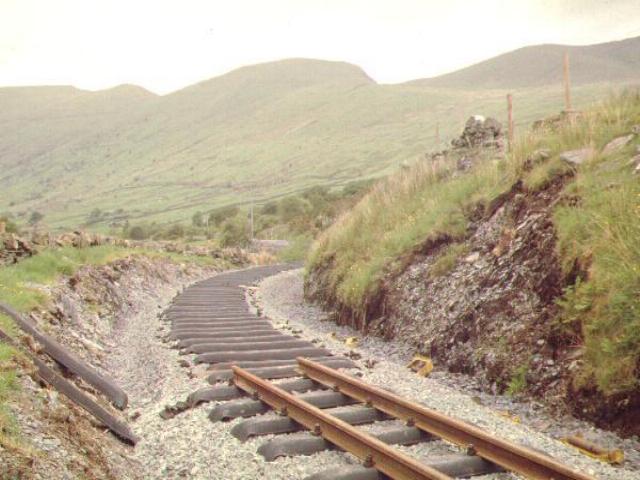
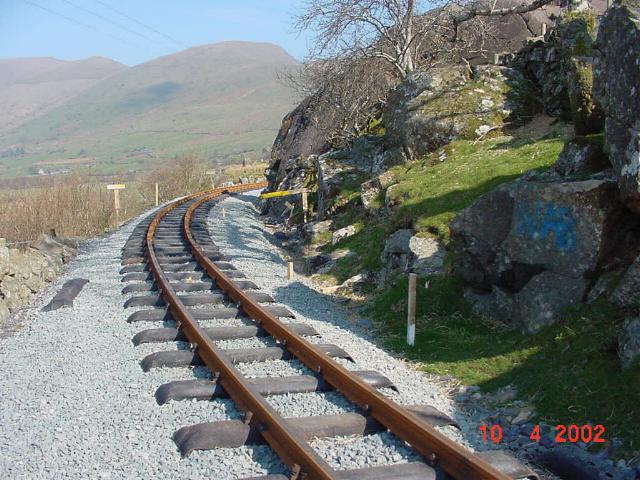
This northerly image (7/4/02) at Ch.13500 shows 9 months' progress since the previous illustration. Drainage work is proceeding north and the track has been rolled flat with small slate waste. The trackbed awaits the rolled slate fines top that is often deliberately inclined slightly to determine a drainage plane under the ballast to the side with the cess (usually the rising hillside). Click on the image to enlarge. This image is copyright B.W.Hughes. Slide scan technology utilised is Olympus ES10 & iPhoto Plus4. Slide displayed at 96dpi.

This northerly view (3/6/02) at Ch.13500 shows the sleepers laid on the fresh ballast with Glan-yr-afon yard just 200m away next to the trees. the track should be completed to Glan-yr-afon to Ch.12900 by the end of June. Click on the image to enlarge. This image is copyright WHLR, courtesy Jan Woods using iPhoto Plus4 image correction technology and displayed at 96dpi.

This northerly view (29/8/01) shows UB100 which had received its new concrete deck a few days previously. The plastic sheet remains in place on completion but is trimmed back and hidden by trackbed material and local stone parapets. Click on the image to enlarge. This image is copyright B.W.Hughes. Slide scan technology utilised is Olympus ES10 & iPhoto Plus4. Slide displayed at 96dpi.
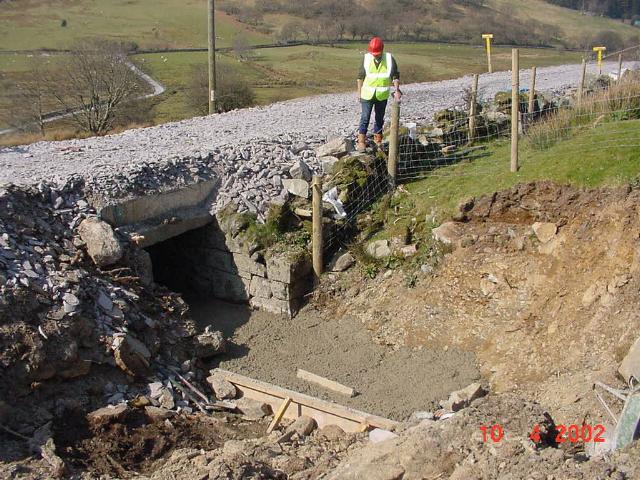
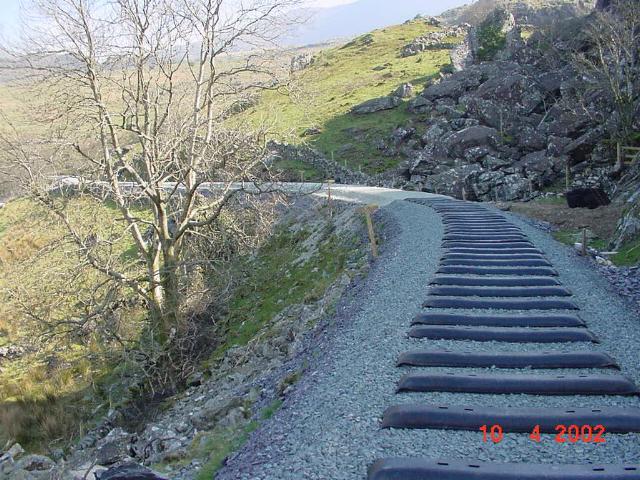
This northerly view (10/4/02) shows the concreting of the path through UB 100 (Ch.13150). A stiff mix has been poured over a plastic pipe designed to channel the stream under the path. The path bends to the left climbing up alongside the railway. This section of trackbed has been rolled roughly level with quarry waste. Click on the image to enlarge. Photo copyright WHLR courtesy Jan Woods. Image post processed by I-photo Plus4 and displayed at 96dpi.
Clogwyn-y-gwin curves
The railway follows the contours from LC58, curving above Clogwyn-y-gwin farm on the increasingly precipitous valley side. The next section features a ledge around a steep rocky bluff at the headwall of the Nant-y-Betws valley.

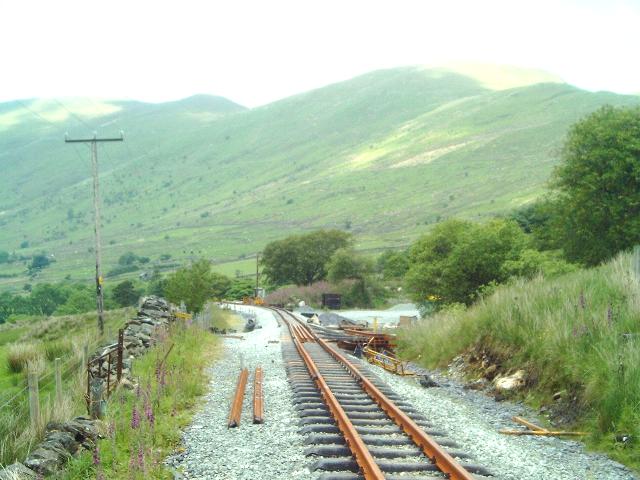
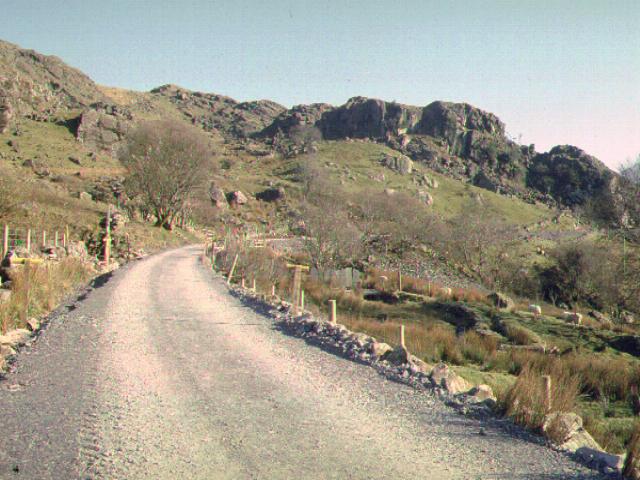
This southerly image (7/4/02) shows the Clogwyn-y-gwin curves from LC58. The railway sweeps to the left and then in a wide curve to the right across the face of the Clogwyn y-gwin buttress. The Head of Steel on this day was just above the white farmhouse, to the right of the Clogwyn-y-gwin buttress. Click on the image to enlarge. This image is copyright B.W.Hughes. Slide scan technology utilised is Olympus ES10 & iPhoto Plus4. Slide displayed at 96dpi.
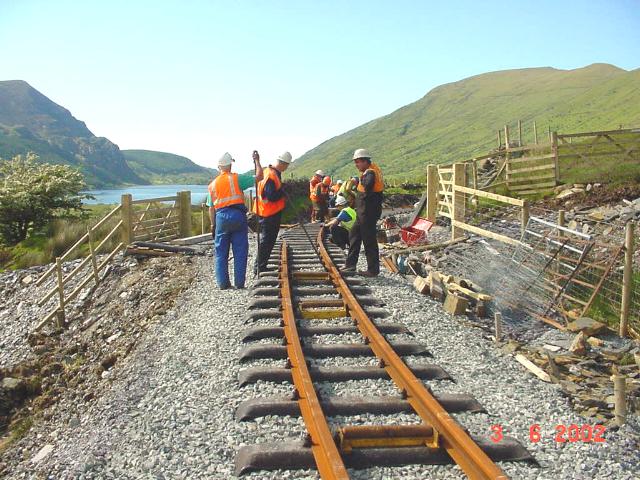
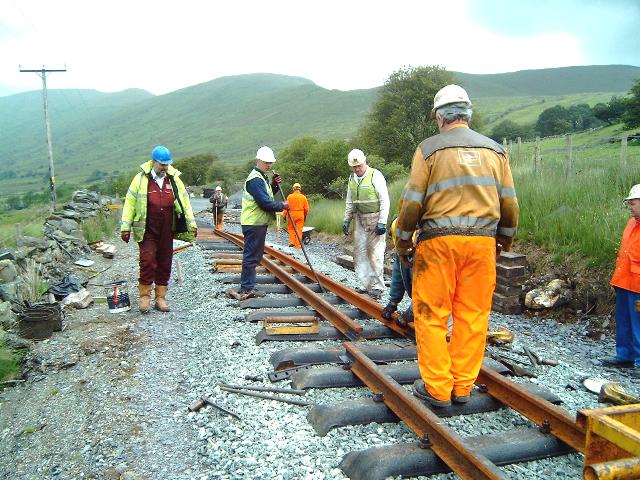
This northerly view (3/6/02) at LC58 taken in the reverse direction to the image above shows the track gang laying track over the l/c at the end of a 3 day track bash. Llyn Cwellyn is visible in the background. Click on the image to enlarge. This image is copyright B.W.Hughes. Slide taken on a Sigma SA300 SLR using iPhoto Plus4 image correction technology and displayed at 96dpi.
This southerly view (4/6/02) at LC58 shows the l/c was occupied by a Manweb team fixing a cracked electricity pole above the line. Click on the image to enlarge. This image is copyright B.W.Hughes. Slide taken on a Sigma SA300 SLR using iPhoto Plus4 image correction technology and displayed at 96dpi.
This northerly view (4/6/02) at LC58 shows the Head of Steel some 14m north of the l/c. The track is not shifted into its correct alignment as fishplates for the next set of rails needs to be bolted on straight at first. Click on the image to enlarge. This image is copyright B.W.Hughes. Slide taken on a Sigma SA300 SLR using iPhoto Plus4 image correction technology and displayed at 96dpi.
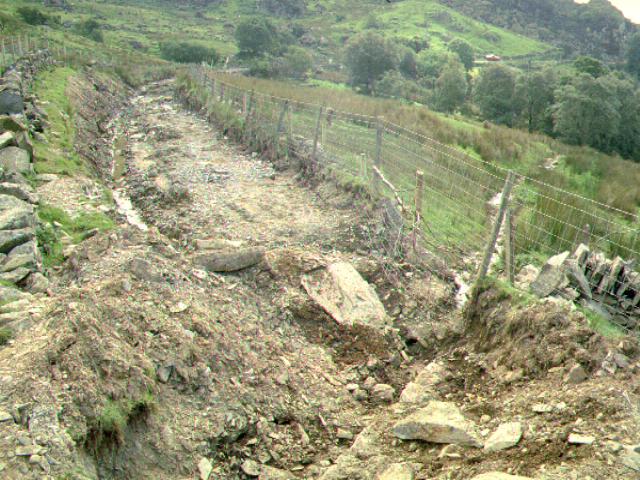
This southerly view (29/8/01) shows the trackbed at UB101. This stream leads diagonally across the hillside and is a former lead to Clogwyn-y-gwin farm. All the water in the stream is a result of trackbed drainage from the very wet section at Ch.13200. Click on the image to enlarge. This image is copyright B.W.Hughes. Slide scan technology utilised is Olympus ES10 & iPhoto Plus4. Slide displayed at 96dpi.
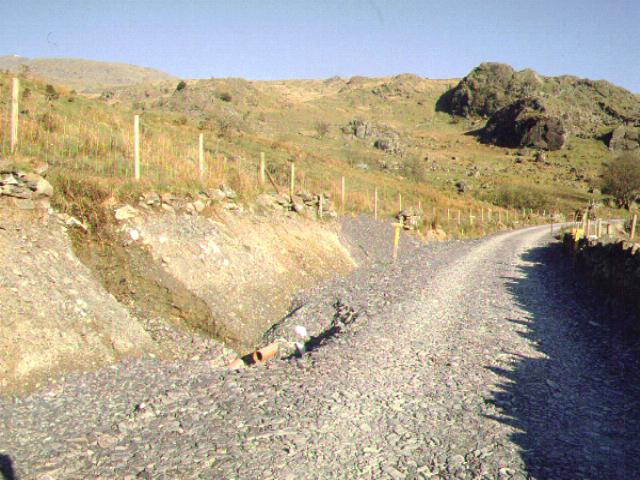
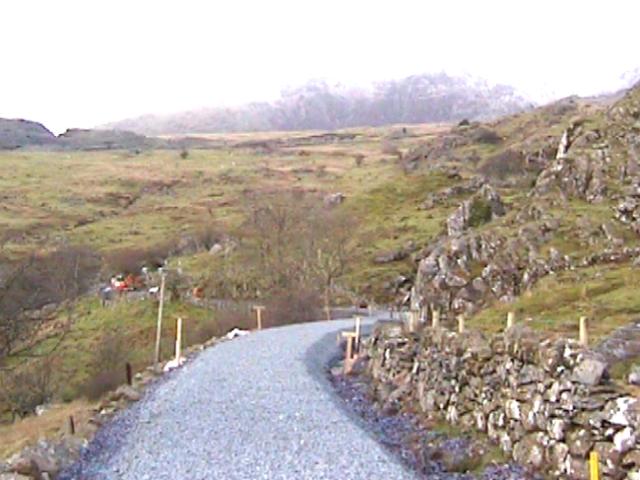
This southerly image (7/4/02) shows the improvement of the trackbed since the above illustration. This spot was very wet and required additional culverts and slotted drains along the uphill (left) side. At one place the uphill erosion of the weak 'glacial till' soil following cess excavation undermined Achnashean's new fence. The erosion was contained and the fence line re-instated. Click on the image to enlarge. This image is copyright B.W.Hughes. Slide scan technology utilised is Olympus ES10 & iPhoto Plus4. Slide displayed at 96dpi.
This southerly image (4/5/02) shows the same view as that above a month later. A day later sleepers had been laid through this location to Ch. 13060 north of LC58. Click on this image to enlarge. This image is copyright B.W.Hughes. Slide scan technology utilised is Olympus ES10 & iPhoto Plus4. Slide displayed at 96dpi.
This southerly view (4/6/02) at UB100 at Ch.13150 shows the track complete over the former soft spot. Local stone cladding has been added to the cutting side beyond to reduce the erosion that undermined the fence. Click on the image to enlarge. This image is copyright B.W.Hughes. Slide taken on a Sigma SA300 SLR using iPhoto Plus4 image correction technology and displayed at 96dpi.
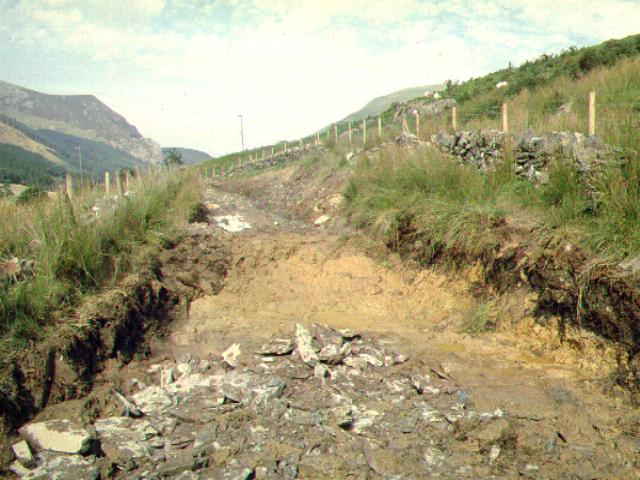
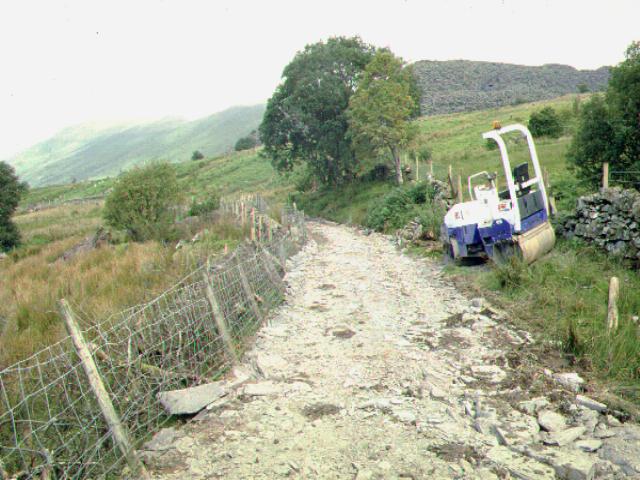
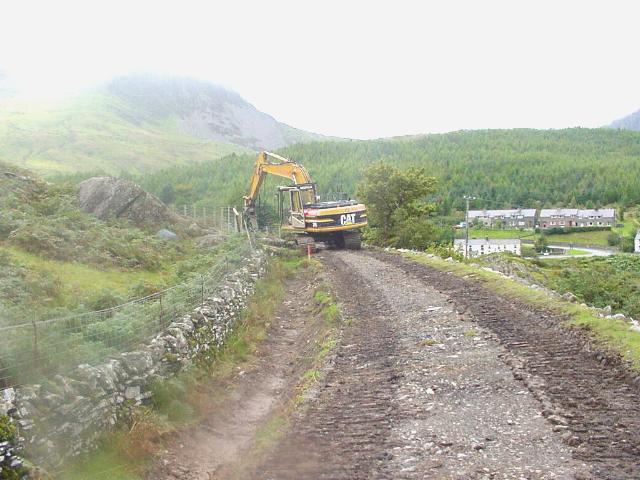
This northerly view (29/8/01) shows the only bad patch of trackbed uncovered on the Glan-yr-afon to Rhyd Ddu section at Ch.13200 approx. The mud here is six feet deep and the 360 degree excavator went into it up to the engine compartment the day before my visit! It has to be dragged out by a JCB. The mud was to be excavated and slate waste tipped in its place. Click on the image to enlarge. This image is copyright B.W.Hughes. Slide scan technology utilised is Olympus ES10 & iPhoto Plus4. Slide displayed at 96dpi.
This easterly view (28/4/01) shows the railway on a ledge above Clogwyn-y-gwin farm. The railway rounds the rock buttress to the right of the farm and meets an incline to Rhosclogwyn Quarry. Click on the image to enlarge. This image is copyright B.W.Hughes. Slide scan technology utilised is Olympus ES10 & iPhoto Plus4. Slide scanned at 200dpi.
The twists and turns will provide passengers with a variety of beautiful views including Snowdon and the south end of Llyn Cwellyn. Also visible will be the twin peaks that guard the entrance to the Nantlle valley, Mynydd Mawr and Mynydd Drws-y-coed.
This northerly view (29/8/01) shows the basic trackbed consolidated with slate waste north of UB102. Click on the image to enlarge. This was the northern extent of track improvement from Clogwyn-y-gwin. The vibrator roller is visible parked to the right. Click on the image to enlarge. This image is copyright B.W.Hughes. Slide scan technology utilised is Olympus ES10 & iPhoto Plus4. Slide displayed at 96dpi.
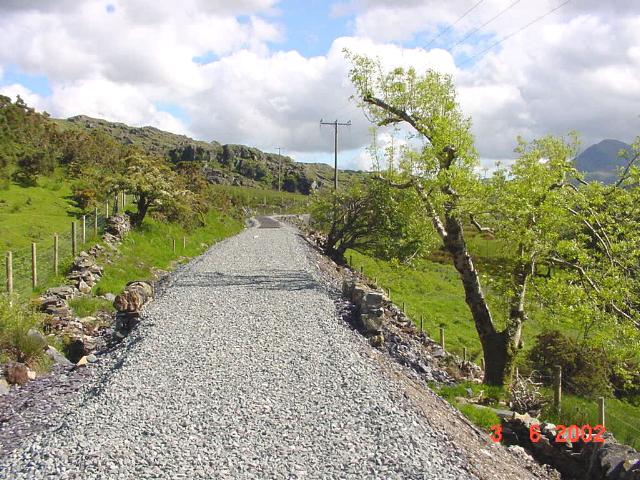
This southerly image (7/4/02) shows the completed trackbed at Ch.13300. Considerable progress has been made in the 9 months since the previous view. Slate fines have been rolled level and ballasting commenced the next day on this section. Click on the image to enlarge. This image is copyright B.W.Hughes. Slide scan technology utilised is Olympus ES10 & iPhoto Plus4. Slide displayed at 96dpi.
After Easter 2002, work restarted ballasting the trackbed towards Glan-yr-afon. The section north of Clogwyn-y-gwin needed some additional drainage but once this was complete, the ballasting got underway again on 8/4/02.
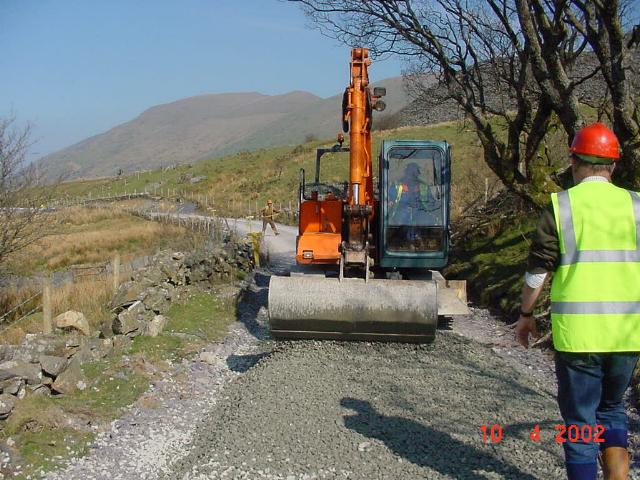
This northerly view (10/4/02) shows laying of ballast near UB103 (Ch.13300 approx.). Considerable progress has been made since the above view from a similar location. Ballast is brought by a dumper from the Glan-yr-afon work site and the 360o spreader makes a 30cm deep layer on the rolled slate fines base. Click on the image to enlarge. Photo copyright WHLR courtesy Jan Woods. Image post processed by I-photo Plus4 and displayed at 96dpi.
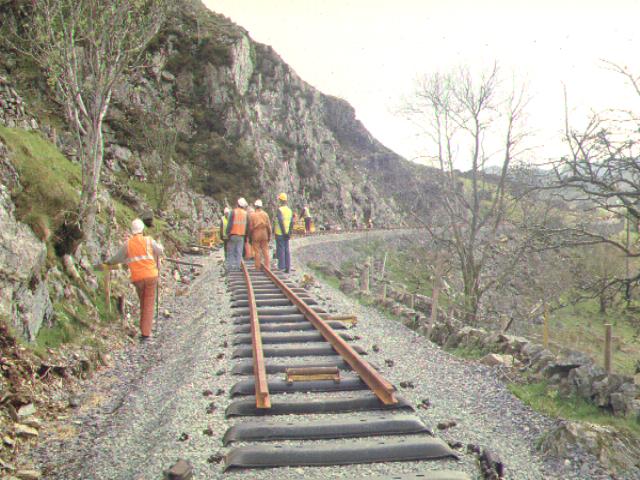
This northerly view (4/6/02) at Ch.13500 shows the completed track through the Clogwyn-y-gwin curves. This section has been slow to lay as the curvature made it awkward to lay rails and most inside radius rails needed cutting. Click on the image to enlarge. This image is copyright B.W.Hughes. Slide taken on a Sigma SA300 SLR using iPhoto Plus4 image correction technology and displayed at 96dpi.
This southerly view (23/2/02) shows the additional drainage features required just north of Clogwyn-y-gwin for the heavy rainfall experienced in this part of Wales in Winter. Water can flow over the surface in saturation conditions. Sidelong French drains channel the run off to additional cross culverts. On one section, 4 additional culverts were required. Click on the image to enlarge. This image is copyright B.W.Hughes. Image captured from Hitachi VM-D865LE using Studio DV and iPhoto Plus4 image correction technology.

This southerly archive view shows the alignment curving sharply around the Clogwyn rock buttress. The natural cliff is to the left and the area to the right of centre was excavated to provide spoil for the embankment. Rocks the size of buses have fallen off the buttress in the distant past. This image was provided by WHLR staff.
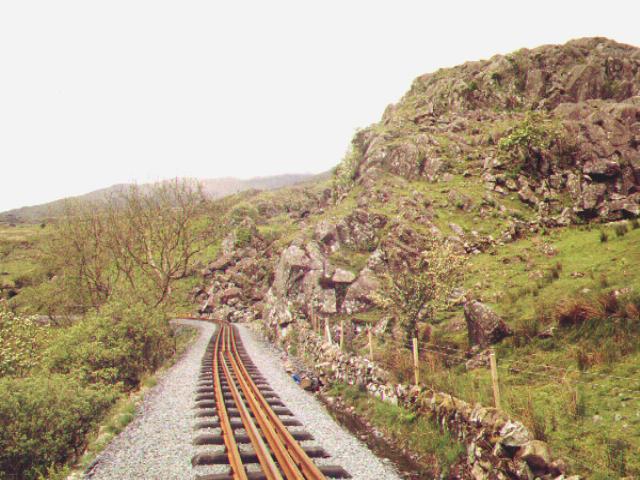
This southerly image (7/4/02) shows the progress made since the archive view above. A rolled slate fines bed has been laid and the end of the ballast bed at Clogwyn-y-gwin can be seen. Sleepers are visible laid on the ballasted section. Click on the image to enlarge. This image is copyright B.W.Hughes. Slide scan technology utilised is Olympus ES10 & iPhoto Plus4. Slide displayed at 96dpi.
This southerly image (4/5/02) shows the progress made in the 4 weeks since the view above. Click on the image to enlarge. This image is copyright B.W.Hughes. Slide scan technology utilised is Olympus ES10 & iPhoto Plus4. Slide displayed at 96dpi.
This southerly view (4/6/02) at Ch.13400 shows the completed track laid through the reverse curves at Clogwyn-y-gwin cliffs. The railway crosses LC61 in the distance where the farm track rises to the line. Click on the image to enlarge. This image is copyright B.W.Hughes. Slide taken on a Sigma SA300 SLR using iPhoto Plus4 image correction technology and displayed at 96dpi.
This northerly image (29/8/01) shows the curve under the Clogwyn cliff at Ch.13500. The trackbed here has been finished with slate fines. Click on the image to enlarge. This image is copyright B.W.Hughes. Slide scan technology utilised is Olympus ES10 & iPhoto Plus4. Slide displayed at 96dpi.
This northerly view (10/4/02) shows freshly laid ballast at Clogwyn-y-gwin where ballasting restarted on 8/4/02. Sleepers had been laid to the end of the ballast bed by 7/4/02. Click on the image to enlarge. Photo copyright WHLR courtesy Jan Woods. Image post processed by I-photo Plus4 and displayed at 96dpi.

This northerly image (4/5/02) shows the progress made in the none months since view above. The RRMs are used to move the rails to the Head of Steel. Click on the image to enlarge. This image is copyright B.W.Hughes. Slide scan technology utilised is Olympus ES10 & iPhoto Plus4. Slide displayed at 96dpi.
By 10/2/02, the formation was rolled level with slate fines and all drainage installed to the point in the above view at Clogwyn-y-gwin (Ch.13480). The ballast bed was extended to this point by 23/2/02.

This northerly view (29/8/01) shows the finished trackbed from LC61. The 360 degree tracked excavator and the dumper are visible. Clogwyn cliffs are to the right. Click on the image to enlarge. This image is copyright B.W.Hughes. Slide scan technology utilised is Olympus ES10 & iPhoto Plus4. Slide displayed at 96dpi.
This northerly view (4/6/02) at LC61 (Ch.13600) from the same point as above shows the finished track curving into Clogwyn-y-gwin cliffs. RRMs have deposited rails in the 2 foot. Click on the image to enlarge. This image is copyright B.W.Hughes. Slide taken on a Sigma SA300 SLR using iPhoto Plus4 image correction technology and displayed at 96dpi.
This northerly view (23/2/02) shows the ballasted trackbed at Clogwyn-y-gwin cliffs as seen from LC61 at Ch.13600. The end of the ballast bed, just round the corner, had moved no further in the following week. Machines visible in the distance are adding sidelong drains to the formation. Click on the image to enlarge. This image is copyright B.W.Hughes. Image captured from Hitachi VM-D865LE using Studio DV and iPhoto Plus4 image correction technology.
This northerly view (10/4/02) shows the Head of Steel near LC61 (Ch.13600) from the same viewpoint as above. Two lengths of track had been laid the previous weekend to reach this point.. Click on the image to enlarge. Photo copyright WHLR courtesy Jan Woods. Image post processed by I-photo Plus4 and displayed at 96dpi.
This northerly view (10/4/02) shows the completed track on the sharp curve at Ch.13700 approx. Click on the image to enlarge. Photo copyright WHLR courtesy Jan Woods. Image post processed by I-photo Plus4 and displayed at 96dpi.
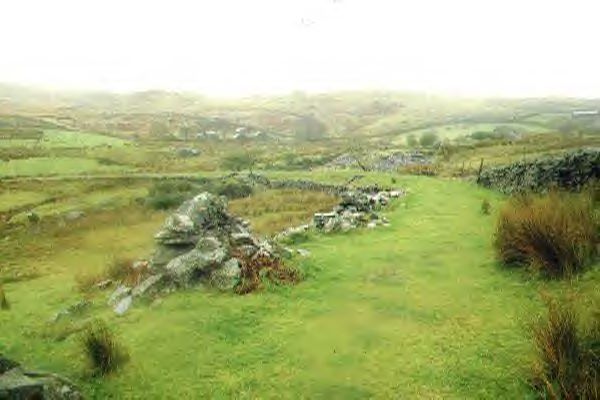
This northerly archive view shows the trackbed rounding Rhosclogwyn curves with the south end of Llyn Cwellyn visible. This is an exciting section of line with sharp curves and towering cliffs, offering unparalleled views of the Nant-y-Betws Pass. Sleeper spacing was still evident in the grass on this section before work began. Click on the image to enlarge. This image is copyright B.W.Hughes. Slide scanned at 200 dpi using Olympus ES10 and iPhoto Plus4 image correction technology.
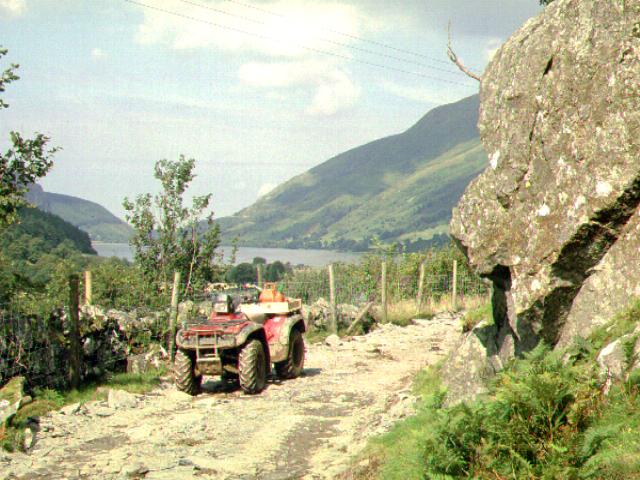
This northerly view (29/8/01) from the same point as above shows the trackbed just south of LC61 at Ch.13700 approx. The section to the farm boundary at LC62 had yet to have slate fines added. A quad bike has been used for access over the rougher sections. This section will have marvellous views from the train with cliffs to the right and Llyn Cwellyn far below to the left. Click on the image to enlarge. This image is copyright B.W.Hughes. Slide scan technology utilised is Olympus ES10 & iPhoto Plus4. Slide displayed at 96dpi.
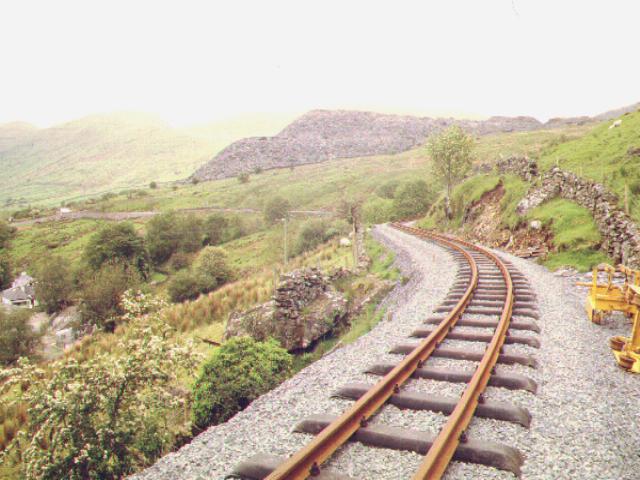
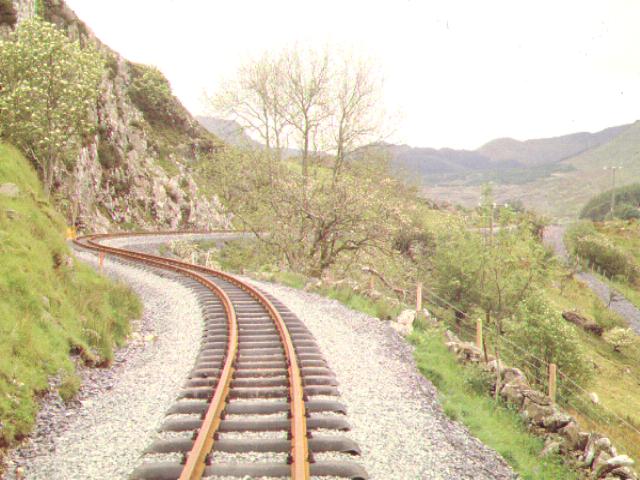
This northerly view (4/6/02) at Ch.13700 from the same point as above shows the finished trackbed and the view of Llyn Cwellyn that passengers will be treated to from next Easter. Click on the image to enlarge. This image is copyright B.W.Hughes. Slide taken on a Sigma SA300 SLR using iPhoto Plus4 image correction technology and displayed at 96dpi.
Rhosclogwyn Quarry sidings
Now high above the Afon Gwyrfai, the alignment sweeps through a sharp curve and meets the former Rhosclogwyn Quarry siding and incline at Ch. 13750. There was a 50 yard siding here in NWNGR days but the quarry closed prior to 1890. The siding remained and was reconnected in September 1903 for the Snowdon Slate Co. working the same quarry. In WHR days, the quarry moved its output by a wire ropeway to a new 20 yard siding starting at LC63 at Ch. 14050.
At LC62 (public footpath crossing) during the F&M problems, workers had to change to a new set of protective wear and disinfect boots again as they crossed a farm boundary. The disposable paper clothing costs £2 a piece and the railway goes through about 200 sets per week including WHLR staff and subcontractors and delivery drivers.
The public footpath to LC62 from Rhyd Ddu (diverted off the trackbed) has been improved. SNPA has provided sleeper bridges across various streams.
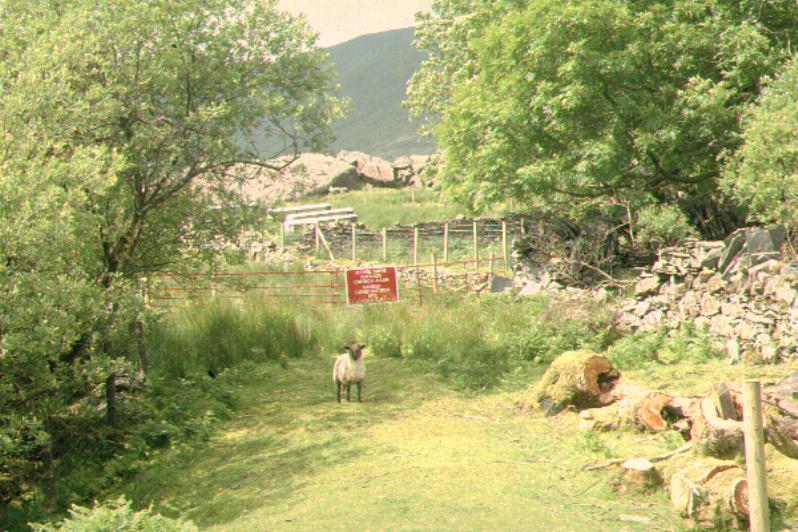
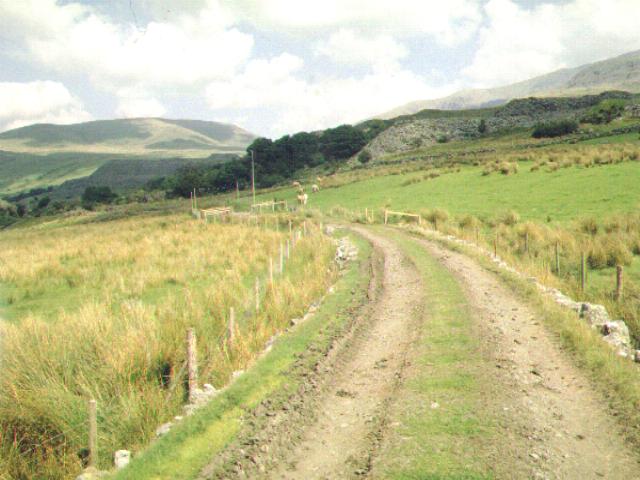
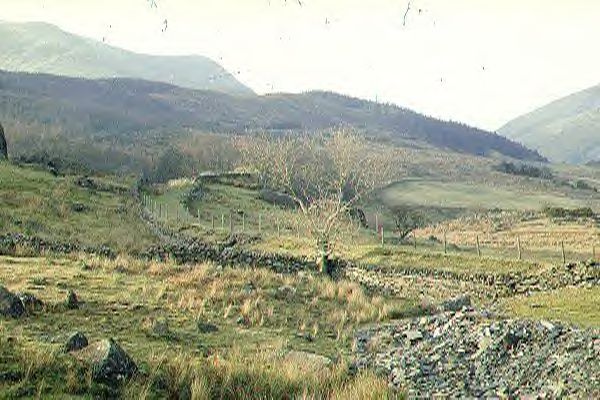
This northerly view (24/6/01) from the new position of LC62, shows the only close public view of the works. The trackbed is banned to public access and only WHLR personnel with special identity cards and protective gear are allowed on the trackbed. The reason is clear (see lamb in view). Foot and Mouth restrictions have just been lifted and it would be a disaster for the farmers and the WHLR if the disease were to spread to the area. Both farming and railway works would be severely hampered. Nevertheless, the parallel footpath is open. The Rhosclogwyn Incline is visible joining from the right. The formation is wider here and there was a short siding in NWNGR days. New fencing has been carried along the uphill section of the line (right-behind sign) and is visible in this view. WHLR staff disinfect their clothing and feet under agreed Risk Statements with DEFRA. Click on the image to enlarge. This image is copyright B.W.Hughes. Slide scanned at 200 dpi using Olympus ES10 and iPhoto Plus4 image correction technology.

This northerly view (29/8/01) shows the new position of LC62 at Ch.13780 from the same viewpoint as the image above. This is also the location where workers need to don new protective suits and disinfect their boots if crossing to the Ffridd Isaf farm area south from this location. Click on the image to enlarge. This image is copyright B.W.Hughes. Slide scan technology utilised is Olympus ES10 & iPhoto Plus4. Slide displayed at 96dpi.
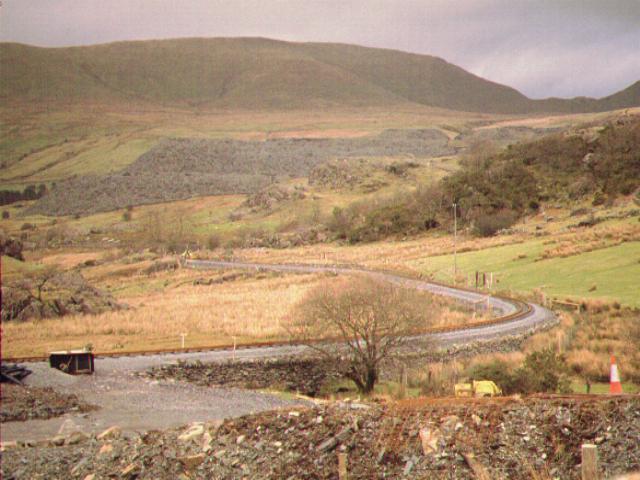
This northerly view (10/2/02) shows the completed formation rolled ready for ballasting from the same viewpoint as the above slide. The rolled slate fines continues to Ch.13480. The former Rhosclogwyn Incline joined in the centre of the view, just beyond the level crossing gates, descending the hillside from the right. This image is copyright B.W.Hughes. Slide scanned at 200 dpi using Olympus ES10 and iPhoto Plus4 image correction technology.
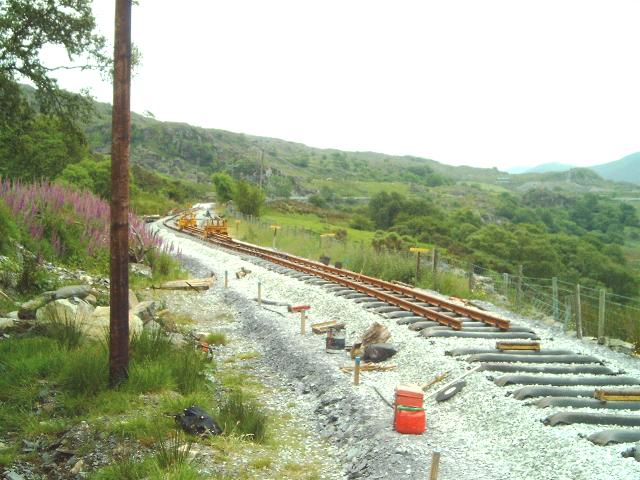
This southerly view (2/3/02) shows the Head of Steel at LC62 at Ch.13777. Six lengths (over 100m) were laid the previous weekend in atrocious weather conditions. Click on the image to enlarge. This image is copyright B.W.Hughes. Image captured from Hitachi VM-D865LE using Studio DV and iPhoto Plus4 image correction technology.

This northerly view (10/4/02) shows the completed LC62 (Ch.13780). On the east side of the line (right) the path from the level crossing has been run alongside the line for 10 metres approx. to the base of the Rhosclogwyn Incline. In future, this will form a good vantage point to photo the locos working hard on the 'long drag' 1 in 60 climb to Rhyd Ddu. Click on the image to enlarge. Photo copyright WHLR courtesy Jan Woods. Image post processed by I-photo Plus4 and displayed at 96dpi.
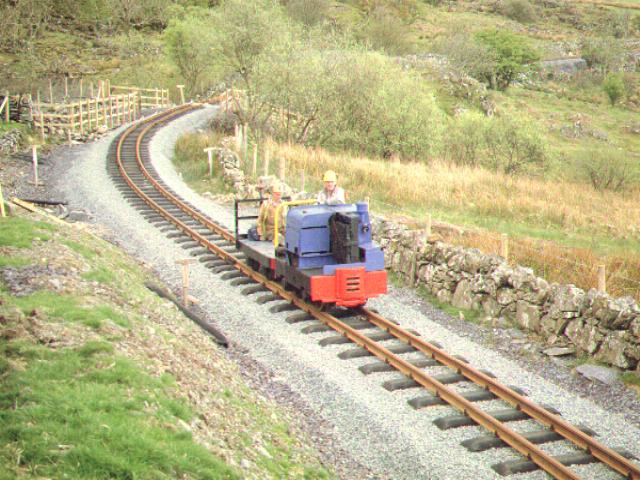
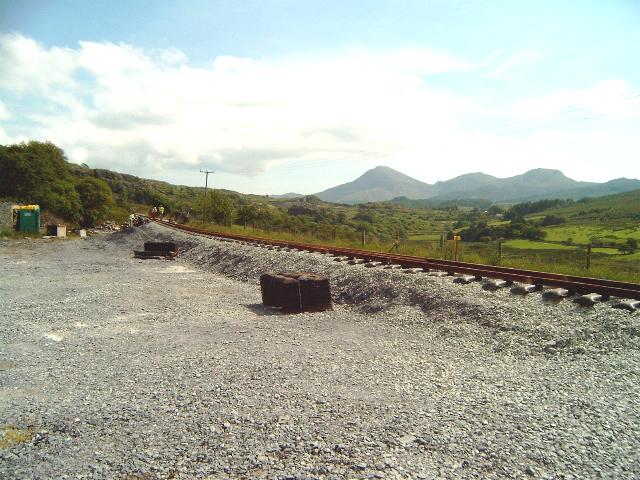
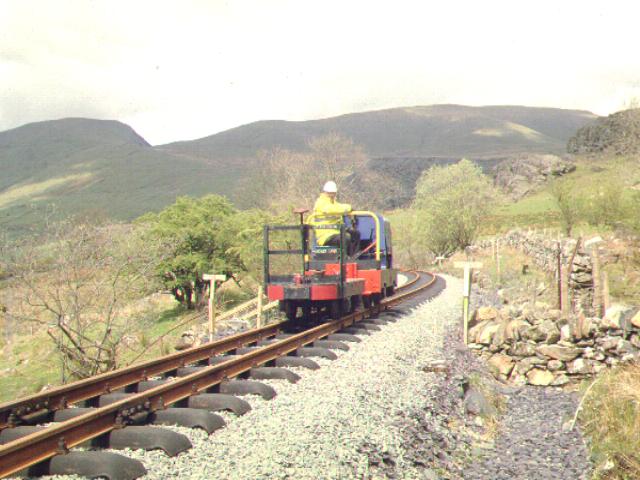
This southerly view (4/5/02) shows Dolgarrog and match truck passing the site of Rhosclogwyn Quarry Incline at Ch.13750. The loco has to stop and sound its horn at LC62 in the distance. The fenced footpath with provide a good viewpoint in year's to come as steam struggles up the 1 in 90 at this point. Click on the image to enlarge. This image is copyright B.W.Hughes from a slide taken on a Sigma SA300SLR. Slide scanned at 200 dpi using Olympus ES10 and iPhoto Plus4 image correction technology and displayed at 96dpi.
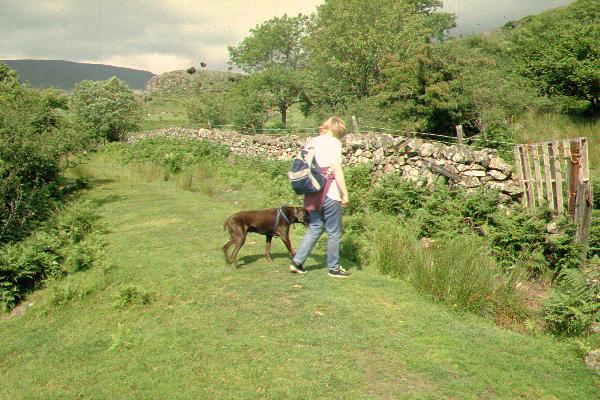
This northerly view (24/6/01) shows my wife and one of our dogs crossing the old site of LC62 at Ch. 13840. At this time dogs had to be on leads due to F&M restrictions. The Rhosclogwyn Quarry incline is behind the trees. Click on the image to enlarge. This image is copyright B.W.Hughes. Slide scanned at 200 dpi using Olympus ES10 and iPhoto Plus4 image correction technology.

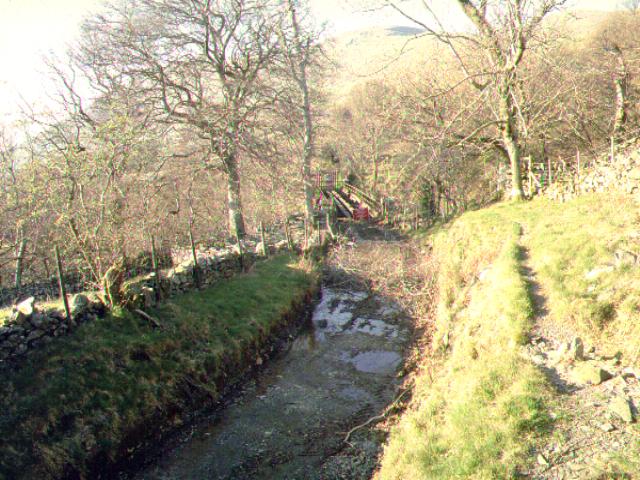
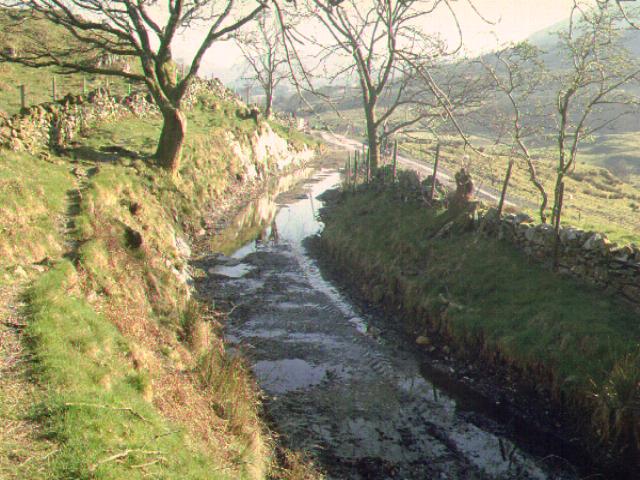
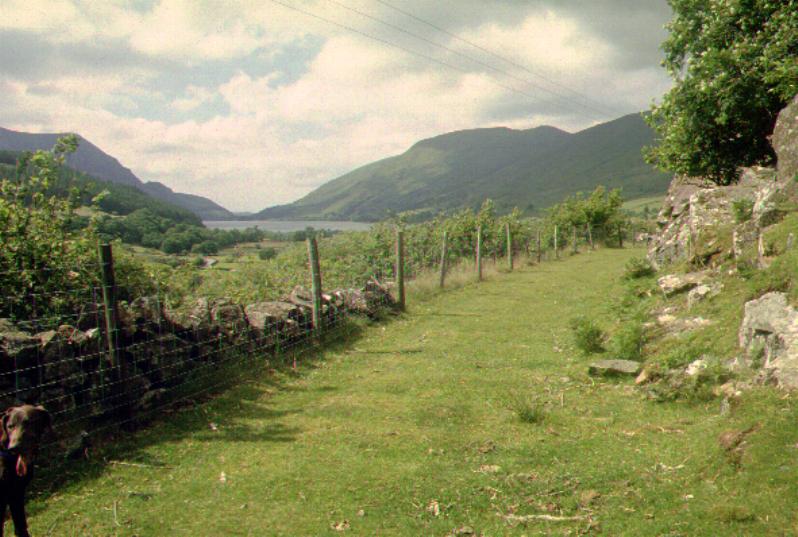
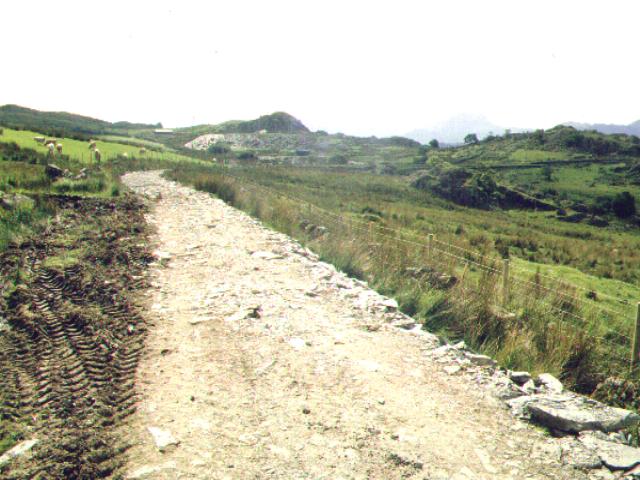
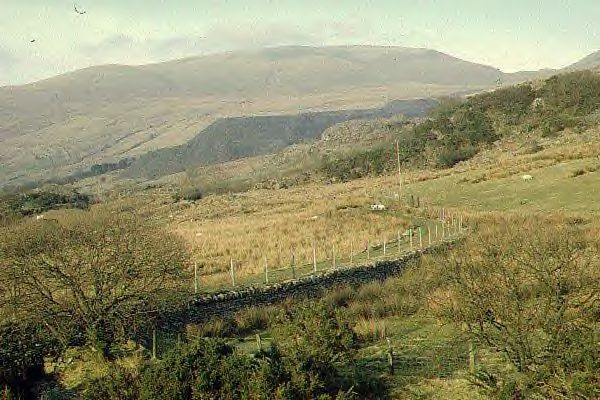
This southerly view (24/6/01) shows the trackbed at the old position of LC62, heading for Rhyd Ddu about 1 km to the south. The sign advises walkers to use the indistinct path across the field to the right and below the line as the permitted path on the trackbed is now closed. The diverted path is a very boggy path (as I found out to my cost) and visitors are advised to wear stout boots/wellies! Click on the image to enlarge. This image is copyright B.W.Hughes. Slide scanned at 200 dpi using Olympus ES10 and iPhoto Plus4 image correction technology.
Ffridd Isaf curves
On gently slopping ground, the alignment sweeps through a long curve over UB113 and then takes a reverse curve around the headwall of the glaciated Nant-y-Betws valley.
Work is also underway between Rhosclogwyn and Rhyd Ddu station throat. By the end of July 2001, fencing off of the formation was essentially complete.
This southerly view (29/8/01) shows the trackbed south from UB110 at Ch.13900. The trackbed has been consolidated with slate waste. Just around the right hand curve, the trackbed widens for the short siding that was fed by an aerial ropeway in WHR days. In the distance, Ffridd Isaf farm is visible and the base camp for this section. The alignment curves in a complete right angle around this side valley. Click on the image to enlarge. This image is copyright B.W.Hughes. Slide scan technology utilised is Olympus ES10 & iPhoto Plus4. Slide displayed at 96dpi.
This northerly view (29/8/01) shows the trackbed north of UB112, the Ffridd Isaf access point. The Rhosclogwyn Quarry tip is visible to the right. In WHR days their incline was abandoned and an aerial ropeway fed a short siding on the straight section just around the curve at Ch.14100. Click on the image to enlarge. This image is copyright B.W.Hughes. Slide scan technology utilised is Olympus ES10 & iPhoto Plus4. Slide displayed at 96dpi.
This northerly view (4/5/02) shows Dolgarrog and match truck returning to Rhyd Ddu at LC63 ( Ch.14050) with WHLR manager Roland Doyle in charge. Click on the image to enlarge. This image is copyright B.W.Hughes taken by a Sigma SA300SLR. Slide scanned at 200 dpi using Olympus ES10 and iPhoto Plus4 image correction technology and displayed at 96dpi.
A construction base has occupied the former slate tip near UB113 as observed on 29/8/01. Following completion of fencing the trackbed was scraped down to bare earth with slate waste added to the northern half. Achnashean has had difficulty as some of the posts need to bored into rock.
This northerly view (20/2/01) shows WHR climbing the last few curves into Rhyd Ddu through Ffridd Isaf curves. The image was taken with permission of Dave Kent from his road access. The mound of slate waste in the distance was produced by the Glanrafon Quarry. Click on the image to enlarge. This image is copyright B.W.Hughes. Slide scan technology utilised is Olympus ES10 & iPhoto Plus4. Slide scanned at 200dpi.

This northerly view shows the completed ballasting viewed from the Ffridd Isaf work base in Nov 2001. The trackbed is in view from UB113 to Ch.13800 near the Rhosclogwyn incline. Track will advance down the Pass in January. Click on the image to enlarge. This image is copyright B.W.Hughes. Video capture from Hitachi D8 camcorder & post processing by iPhoto Plus4. Image displayed at 96dpi.
This northerly view (9/2/02) shows the track laid to Ch.13884. The volunteer team is visible in the distance near Rhosclogwyn Incline laying track. Click on the image to enlarge. This image is copyright B.W.Hughes. Slide scanned at 200 dpi using Olympus ES10 and iPhoto Plus4 image correction technology.
This westerly view (20/2/01) shows the route heading over UB113/4 at Ffridd Isaf. In the distance, the Nantlle valley joins Nant-y-Betws valley. The image was taken with permission of Dave Kent from his road access. Click on the image to enlarge. This image is copyright B.W.Hughes. Slide scan technology utilised is Olympus ES10 & iPhoto Plus4. Slide scanned at 200dpi.
This westerly view from Ffridd Isaf access track shows the freshly laid track across UB114 in early January, just prior to casting the upstands which retain the ballast. The track was laid over the bridge by 31/12/01. Click on the image to enlarge. This image is copyright WHR courtesy Jan Woods. Image displayed at 96dpi.
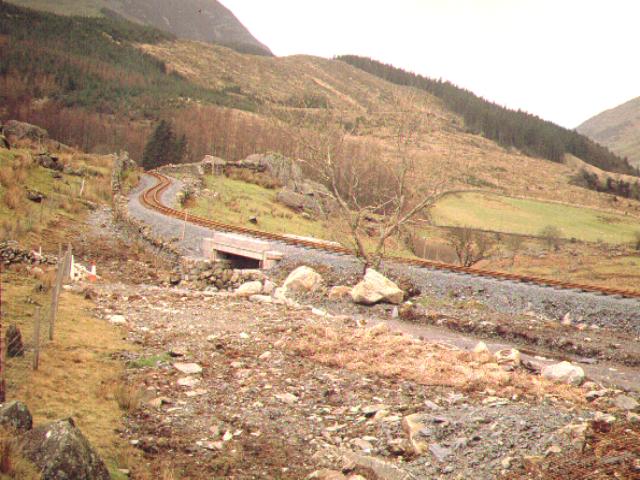
This northerly view (9/2/02) shows the completed bridge and the track laid over it. RRMs regularly move over the bridge bringing rail from the Rhyd Ddu store (replenished w/e 9/2/02). This view is from the Ffridd Isaf worksite. This image is copyright B.W.Hughes. Slide scanned at 200 dpi using Olympus ES10 and iPhoto Plus4 image correction technology.
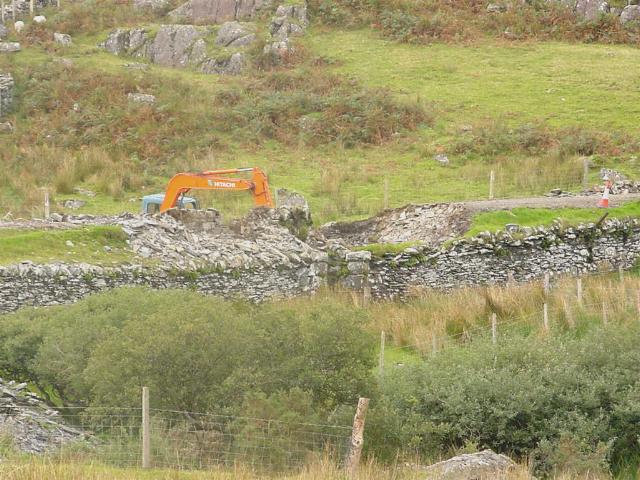
This southerly view (26/9/01) shows the excavation of UB114 at Ffridd Isaf curve. Click on the image to enlarge. This image is copyright WHLR. Slide scan technology utilised is Olympus ES10 & iPhoto Plus4. Slide displayed at 96dpi.
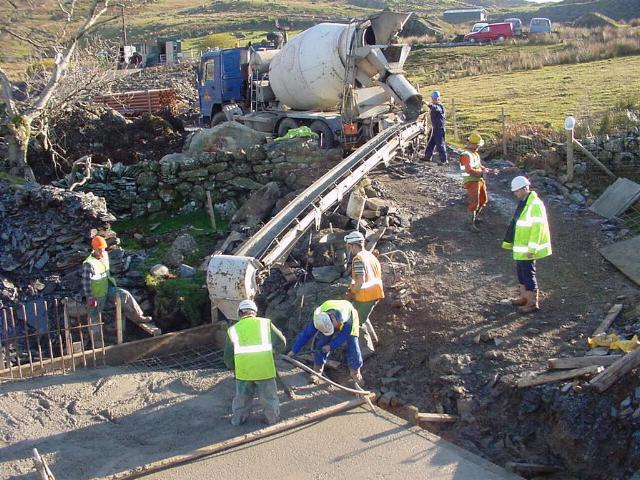
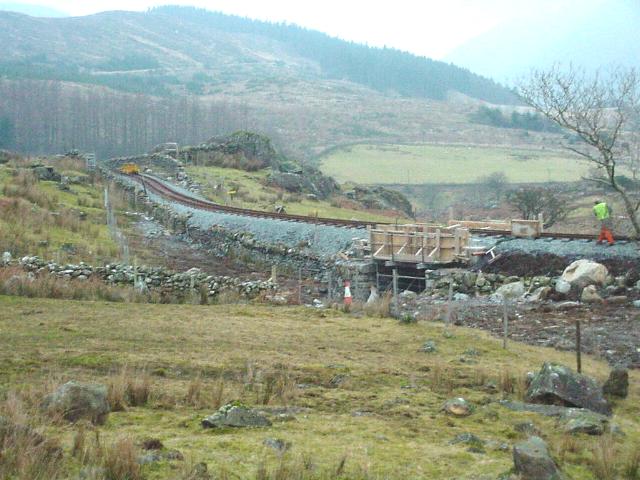
This easterly view (15/11/01) shows the casting of the roadway slab under UB114 at Ffridd Isaf curve. The reinforced concrete bridge is replacing a smaller structure and is being built wider as part of agreed mitigation measures. The heavy rebar for the sidewalls to support the railway deck is seen to the left. A concrete conveyor belt carries the 'readymix' from the concrete lorry to the casting area. Click on the image to enlarge. This image is copyright WHLR. Slide scan technology utilised is Olympus ES10 & iPhoto Plus4. Slide displayed at 96dpi.
Work got underway in mid November 2001 to construct the cast concrete farm access underbridge (UB114) at Ffridd Isaf curve. Following the casting of the base slab for the roadway under the bridge on 15/11/01, the sidewalls and deck slab followed as the structure became load bearing. Tracklaying from Rhyd Ddu could not advance beyond UB114 until the bridge was complete. Track was laid over the bridge between Xmas 2001 and the New Year.
This easterly image (24/12/01) shows the completed deck of UB114. The ballast retaining sidewalls remain to be cast. Ffridd Isaf B&B is in view behind bridge. Ballasting has been completed right up to the bridge on both sides. Track will advance down the Pass in January. Click on the image to enlarge. This image is copyright B.W.Hughes. Video capture from Hitachi D8 camcorder & post processing by iPhoto Plus4. Image displayed at 96dpi.
This easterly archive view shows the Ffridd Isaf curve with Ffridd Isaf above the curve. Sleeper spacings are still evident. The alignment follows the contours around this side valley to ease the gradients on the approach to Rhyd Ddu. Click on the image to enlarge. This image is copyright B.W.Hughes. Slide scan technology utilised is Olympus ES10 & iPhoto Plus4. Slide scanned at 200dpi.

This easterly view (14/9/01) shows Ffridd Isaf curve from Ch.14250 approx. An unknown old culvert has been discovered here and has been excavated to be piped. Click on the image to enlarge. This image is copyright B.W.Hughes. Slide scan technology utilised is Olympus ES10 & iPhoto Plus4. Slide displayed at 96dpi.
Ballasting commenced on 15/10/01 from Ffridd Isaf working back to Rhyd Ddu North site by 19/10/01. Tracklaying started from Rhyd Ddu North working northwards from 27/10/01. Ballast is still coming from Penmaenmawr, being 55p/tonne more expensive to go the long way round, missing the 17 tonne weight limit at OB53 Bryn Gloch.

This easterly view (16/10/01) shows the start of ballasting works at UB114 (under construction) as viewed from Ch.14300. Steel sleepers have been placed along the side of the track ready for tracklaying to commence at the end of October. The Ffridd Isaf work camp is visible above the trackbed. Click on the image to enlarge. This image is copyright WHLR, courtesy Jan Woods. Slide scan technology utilised is Olympus ES10 & iPhoto Plus4. Slide displayed at 96dpi.
This easterly image shows the head of steel at Ch.14260 just short of UB114. The ballast retaining sidewalls remain to be cast. Ffridd Isaf B&B is in view top left. Ballasting has been completed right up to the bridge on both sides. Track will advance down the Pass in January. Click on the image to enlarge. This image is copyright B. W. Hughes. Video capture from Hitachi D8 camcorder & post processing by iPhoto Plus4. Image displayed at 96dpi.
This easterly view (10/1/02) shows the track completed over the bridge and the ballast retaining walls completed. Click on the image to enlarge. Photo copyright WHLR courtesy Jan Woods. Image post processed by I-photo Plus4 and displayed at 96dpi.

This southerly view shows the track laid through Ffridd Isaf curve with Moel Hebog in the distance Click on the image to enlarge. This image is copyright WHR courtesy Jan Woods. Image post processed by I-photo Plus4 and displayed at 96dpi.
This westerly view (14/9/01) shows the side drain construction underway at Ch.14300 approx. with Rhyd Ddu village in view to the right. Click on the image to enlarge. This image is courtesy WHLR (Jan Woods). Slide scan technology utilised is Olympus ES10 & iPhoto Plus4. Slide displayed at 96dpi.

This northerly view (4/5/02) shows Dolgarrog and match truck returning to Rhyd Ddu at Ch. 14300. Click on the image to enlarge. This image is copyright B.W.Hughes. Image captured from Hitachi Video camera using Studio DV and iPhoto Plus4 image correction technology. Image displayed at 96dpi.
This westerly view (16/10/01) shows the deep ballast layer laid at Ch.14400 with Rhyd Ddu village visible behind. Work started at UB114 with ballast being trucked in from Rhyd Ddu North site access. Laser levelling is being used. Click on the image to enlarge. This image is copyright WHLR, courtesy Jan Woods. Slide scan technology utilised is Olympus ES10 & iPhoto Plus4. Slide displayed at 96dpi.

This northerly view (29/8/01) shows the trackbed from Ch.14450. Work is proceeding from Rhyd Ddu north and had not reached this section on the date on my visit. Click on the image to enlarge. This image is copyright B.W.Hughes. Slide scan technology utilised is Olympus ES10 & iPhoto Plus4. Slide displayed at 96dpi.
This northerly view (29/8/01) shows UB115 at Ch.14460. This is the first work north of Rhyd Ddu accessed from the station. Click on the image to enlarge. This image is copyright B.W.Hughes. Slide scan technology utilised is Olympus ES10 & iPhoto Plus4. Slide displayed at 96dpi.
Click here to visit the Rhyd-Ddu Station page
Click here to return to Stop Press page
Site Development
If you have suggestions for development of this site, please contact me by email. See address on Stop Press page.
Comments
Please add comments in my Guestbook.
Page Version 3.2 Dated 24/6/03