WHR
Cae Hywel Bridge to Plas-y-nant
area page
V3.28 updated 1/7/03
New images on this page updated 28/6/03
Click here for start of new images
Click here for JC Sreeves latest construction map
Comments
If you would like to make a comment about this website, why not visit my Guestbook?
Locations
This section begins just south of the Cae Hywel bowstring bridge UB 56 at Ch. 7930. There are no visible remains of Salem Halt at Ch. 8000 approx, though there is some question as to whether Boyd (Narrow Gauge Railways of South Caernarvonshire) is correct about the location of this halt (see below) as shown on the map (p194 Vol. I). The railway passes a house here and the trackbed appears to be used for access via the Cae Hywel bowstring bridge. A new access track is to be constructed to the west of the railway leading to an alternative bridge.
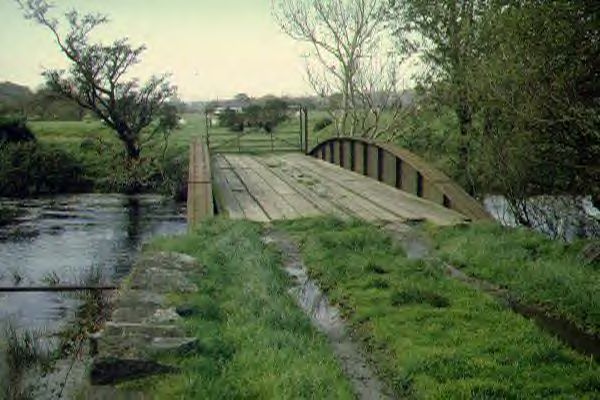
This northerly archive view shows the 15 m span bowstring girder bridge UB56. The bridge was planked for access by a local resident. Click on the image to enlarge. This image is copyright B.W.Hughes. Slide scan technology utilised is Olympus ES10 & iPhoto Plus4. Slide scanned at 200dpi.
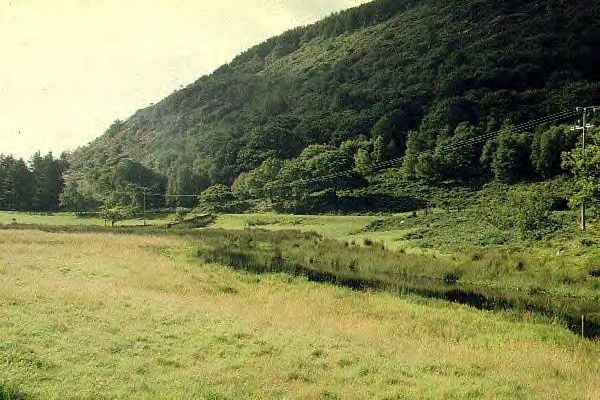
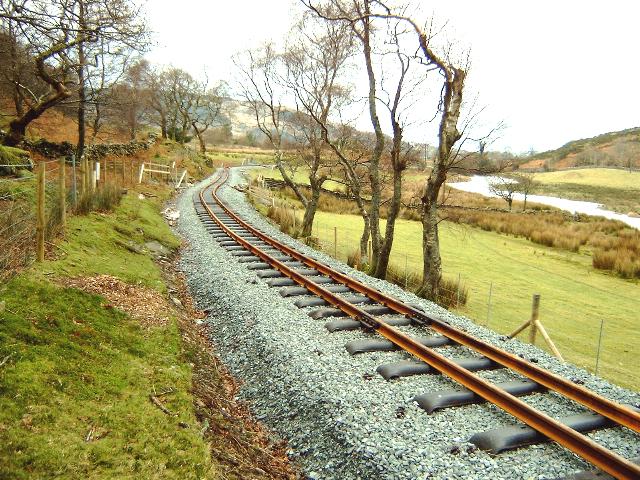
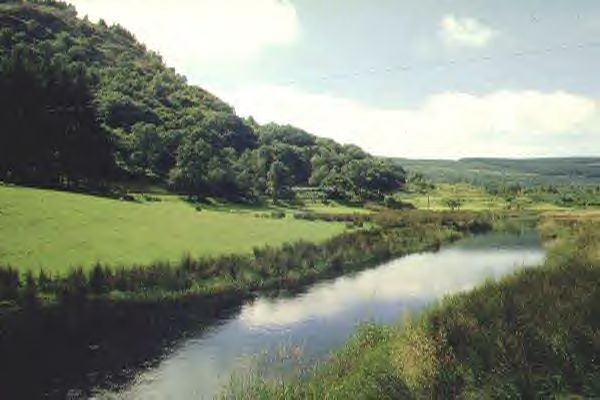
At Ch. 8200 the railway runs through reverse curves on a rock-cut ledge above the Afon Gwyrfai, clearly visible from the A4085. The route runs along the west side of the Afon Gwyrfai rising slowly from the level of the floodplain. It is visible from the A4085 throughout this length about 100 metres to the west.
Steel posts of an old l/c are visible at Ch. 8300 at LC35/36. The railway passes another house (opposite the new river footbridge), which appears to use the formation for access from the south. A new access track is to be constructed to the east of the line from LC38. The railway is quite sharply curved along this section as it clings to the hillside. The formation climbs above the floodplain onto a ledge similar to the stone shelf formations of the FR. This is in a small wooded patch so is only clearly visible in winter. The formation passes under a road bridge OB62 at Pont Cerrig-y-rhyd Ch. 8920 and follows a sharp reverse curve around the Afon Gwyrfai rapids. The railway approaches the A4085 once more at Plasynant station, crossing the river on the last of the three NWNGR bowstring bridges.
Public Access
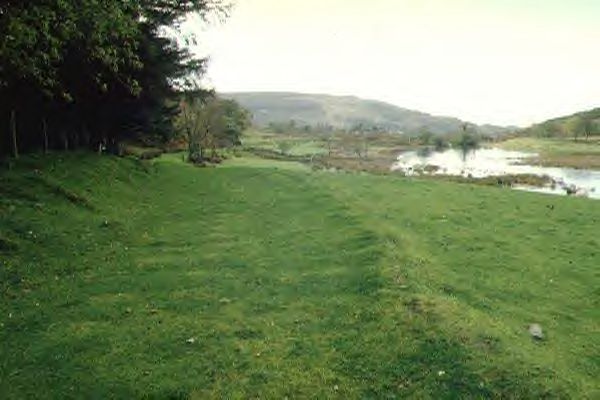
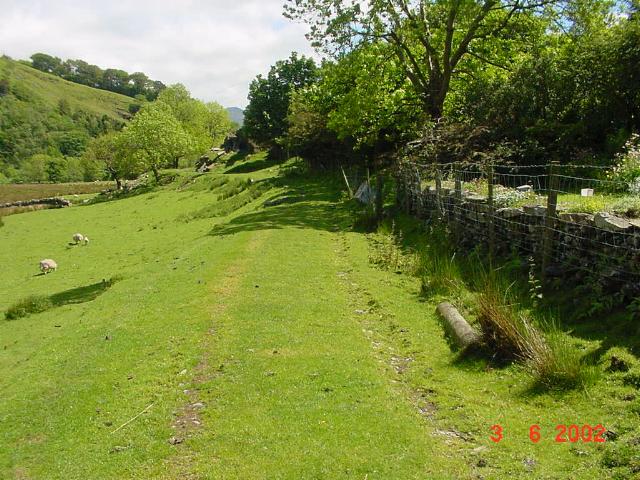
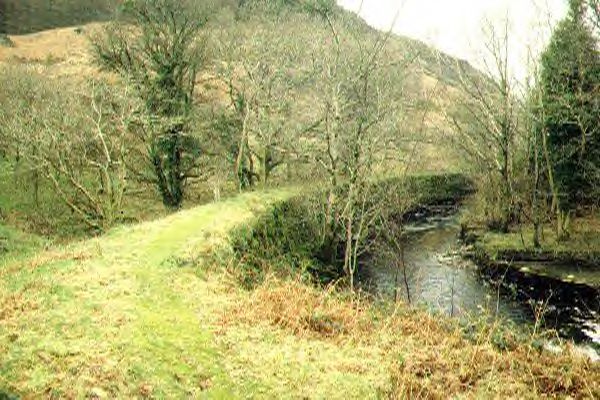
There is a public footpath west from Salem Chapel, crossing the Afon Gwyrfai on a new wooden footbridge and passing north along the east side of the railway for 200 metres to LC36 (4 braced steel rail posts in field) that gives a closer view of this section. This path loops around to the Bryn Gloch river footbridge mentioned in the previous section, making a 2-mile long circular walk.
There is a public footpath west from a point just north of the Plasynant bridge, passing over the Afon Gwyrfai Falls and then the railway on OB62 at Pont Cerrig-y-rhyd. This footpath peters out in the woods above the railway.
Gradients
The route rises at 1 in 1500 from UB56 Afon Gwyrfai bowstring bridge through Salem Halt. It then rises at 1 in 110 to about Ch. 8900, easing to 1 in 200 on the section to OB62 Pont Cerrig-y-rhyd. The railway then climbs sharply at 1 in 60 through reverse curves to the Afon Gwyrfai bowstring bridge at Plas-y-nant, before running level over the bridge and into the halt.
Cae Hywel Bridge (UB56)
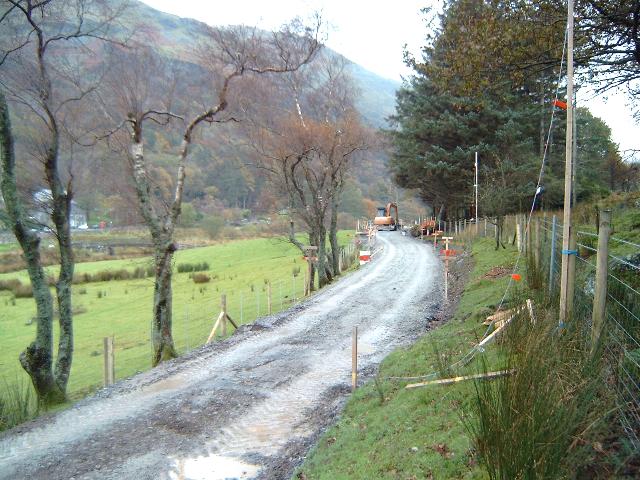
This was propped to allow dumpers to cross from February. These were carrying excess spoil from the Bryn Gloch excavation. The material is being used to widen the embankment across the Afon Gwyrfai floodplain to provide a road access on the west side of the line to the house at LC34.

This southerly view from Ch.7900 show the Afon Gwyrfai bridge UB56 at Cae Hywel. The new access track is visible to the south of the bridge on the right hand side. Click on the image to enlarge. This image is copyright WHLR, courtesy Jan Woods. Image displayed at 96dpi.
This westerly view from the Cae Hywel access road shows the Afon Gwyrfai bridge UB56 at Cae Hywel. Click on the image to enlarge. This image is copyright WHLR, courtesy Jan Woods. Image displayed at 96dpi.

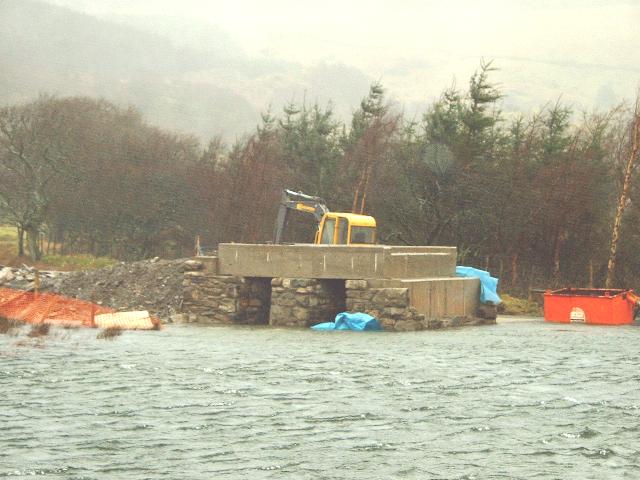
This westerly view (30/10/02) shows the south abutment of the Cae Hywel river bridge. The abutment has sandbags around it. The bridge was craned out as a unit in early November to be strengthened on land. Click on the image to enlarge. This image is copyright B.W.Hughes. Image taken using Samsung Digimax230 digital camera and post processed with iPhoto Plus4. Image displayed at 96dpi.
This westerly view (30/11/02) shows the gap created by the recently removed bridge deck for UB56. The deck was stored at Cae Hywel, just out of view to the right, awaiting replacement of its cross members. Click on the image to enlarge. This image is copyright B W Hughes taken on a Hitachi D8 digital camcorder VM-D865LE 230. Image post processed using iPhoto Plus4 image correction technology and displayed at 96dpi.
This westerly view (30/12/02) of UB56 shows piling has now taken place around both abutments. The southern abutment has been removed and the stone blocks from it are stacked on the trackbed immediately south of the bridge, close to the rail store. Click on the image to enlarge. This image is copyright B W Hughes. Image taken on Samsung Digimax230 digital camera using iPhoto Plus4 image correction technology. Image displayed at 96dpi.

This westerly view (23/2/03) shows the work on the structure of the south abutment of UB56 is well underway. The south abutment has been clad in local stone and the 3m overflow channel span is complete. This will be finished as at Plas-y-nant with a cosmetic central pier and completely clad with local stone. Click on the image to enlarge. This image is copyright B W Hughes. Image taken on Samsung Digimax230 digital camera using iPhoto Plus4 image correction technology. Image displayed at 96dpi.
This westerly view (9/3/03) shows the work on the structure of the south abutment of UB56 is nearing completion. The south abutment has been clad in local stone and the central cosmetic pier in the overflow channel span is complete. Click on the image to enlarge. This image is copyright B W Hughes. Image taken on Samsung Digimax230 digital camera using iPhoto Plus4 image correction technology. Image displayed at 96dpi.
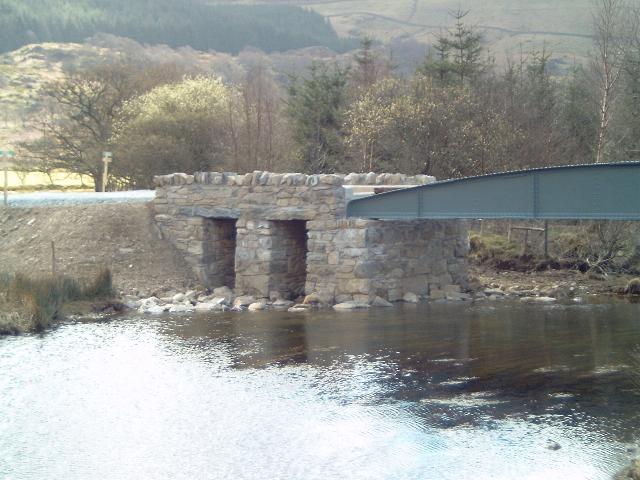
This westerly view (30/3/03) shows the work on the structure of the south abutment of UB56 completed and the refurbished bridge deck in place. Click on the image to enlarge. This image is copyright B W Hughes. Image taken on Samsung Digimax230 digital camera using iPhoto Plus4 image correction technology. Image displayed at 96dpi.
This northerly view (30/11/02) shows the recently removed deck of the Cae Hywel bridge. Like the similar Plas-y-nant bridge, the cross members are going to be replaced but the main girders just need minor attention. Click on the image to enlarge. This image is copyright B W Hughes taken on a Hitachi D8 digital camcorder VM-D865LE 230. Image post processed using iPhoto Plus4 image correction technology and displayed at 96dpi.

This northerly view (16/2/03) shows volunteers working to scale and paint the bridge girders for Cae Hywel bridge. On this date, the crossbeams had yet to be removed. This will presumably be started when steelwork for the Plas-y-nant bridge is completed in late February. The west side of the bridge has already had its silver epoxy undercoat. The bridge will probably be finished in matt black. Click on the image to enlarge. This image is copyright B W Hughes taken on Samsung Digimax 230 digital camera. Image post processed using iPhoto Plus4 image correction technology and displayed at 96dpi.
This northerly view (30/11/02) shows the poor state of the two abutments at Cae Hywel bridge. They may be replaced with new re-inforced concrete abutments, to be clad in local stone or re-using existing stone later. Click on the image to enlarge. This image is copyright B W Hughes taken on a Hitachi D8 digital camcorder VM-D865LE 230. Image post processed using iPhoto Plus4 image correction technology and displayed at 96dpi.
This northerly view (23/12/02) from the south abutment of UB56 shows piling has now taken place around both abutments. The southern abutment has been removed and the stone blocks from it are stacked on the trackbed immediately south of the bridge, close to the rail store. Given good weather, swift progress is expected on this bridge early in the New Year. Both abutments will be replaced by new massive concrete constructions as at Plas-y-nant and later covered with local stone. Click on the image to enlarge. This image is copyright B W Hughes. Image taken on Samsung Digimax230 digital camera using iPhoto Plus4 image correction technology. Image displayed at 96dpi.
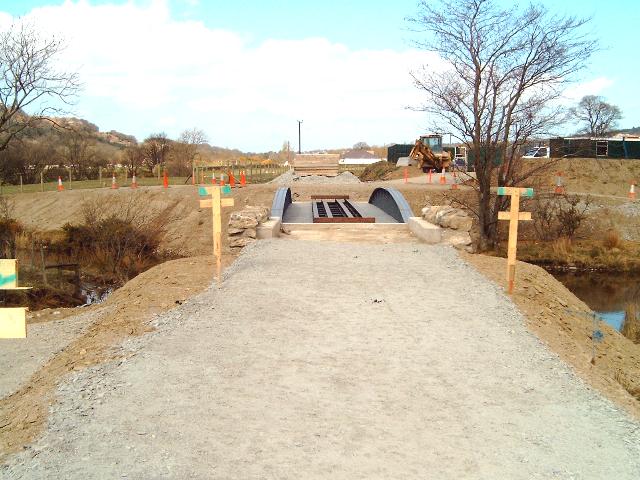
This northerly view (30/3/03) shows the completed bridge deck and southern approach. This image is copyright B W Hughes. Image taken on Samsung Digimax230 digital camera using iPhoto Plus4 image correction technology. Image displayed at 96dpi.
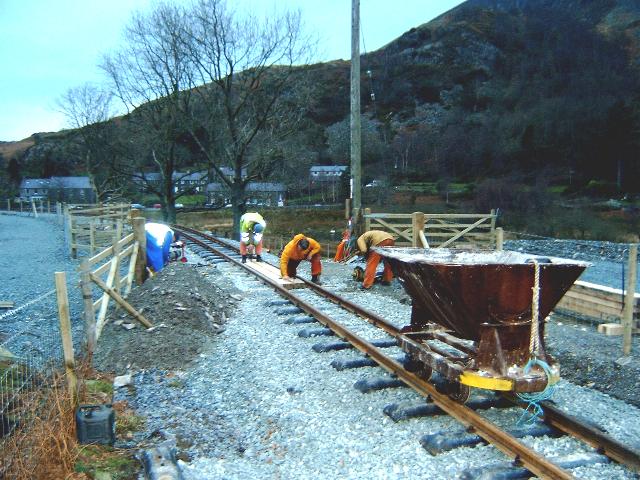
This northerly view (28/6/03) shows the track laid north from UB56 completing the track gap. Click on the image to enlarge. This image is copyright B W Hughes. Image taken on Samsung Digimax230 digital camera using iPhoto Plus4 image correction technology. Image displayed at 96dpi.
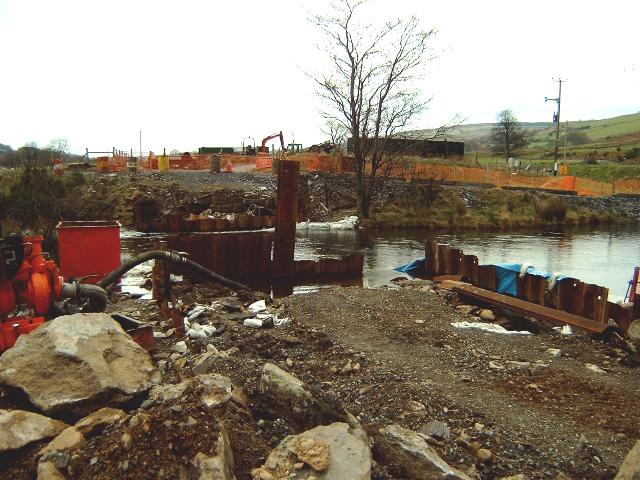
This westerly view (26/1/03) of UB56 shows piling has now taken place around the north abutment. A week later the foundation slab had been cast at this location. The pipe bridge is visible in the background. A plant road is visible descending to the foundation on the west side. Click on the image to enlarge. This image is copyright B W Hughes. Image taken on Samsung Digimax230 digital camera using iPhoto Plus4 image correction technology. Image displayed at 96dpi.
This easterly view (16/2/03) shows the recently completed north abutment for Cae Hywel bridge. The abutment will eventually be clad in local stone. Click on the image to enlarge. This image is copyright B W Hughes taken on Samsung Digimax 230 digital camera. Image post processed using iPhoto Plus4 image correction technology and displayed at 96dpi.
This southerly view (26/1/03) of UB56 shows piling has now taken place around both abutments. Rapid progress is expected on this bridge in February. Click on the image to enlarge. This image is copyright B W Hughes. Image taken on Samsung Digimax230 digital camera using iPhoto Plus4 image correction technology. Image displayed at 96dpi.

This southerly view (16/2/03) shows the recently completed north and south abutment at Cae Hywel bridge. The deck for the overflow channel within the south abutment has also been cast. Click on the image to enlarge. This image is copyright B W Hughes taken on Samsung Digimax 230 digital camera. Image post processed using iPhoto Plus4 image correction technology and displayed at 96dpi.
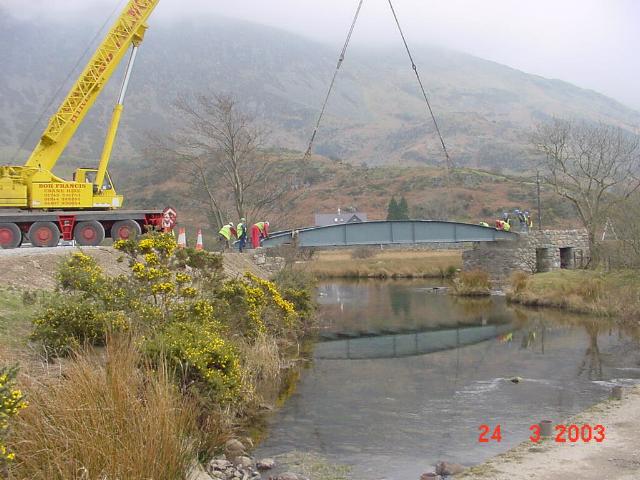
This easterly view (24/3/03) shows the refurbished bridge deck being craned into place. Click on the image to enlarge. This image is copyright WHLR courtesy Jan Woods. Image taken on digital camera using iPhoto Plus4 image correction technology. Image displayed at 96dpi.
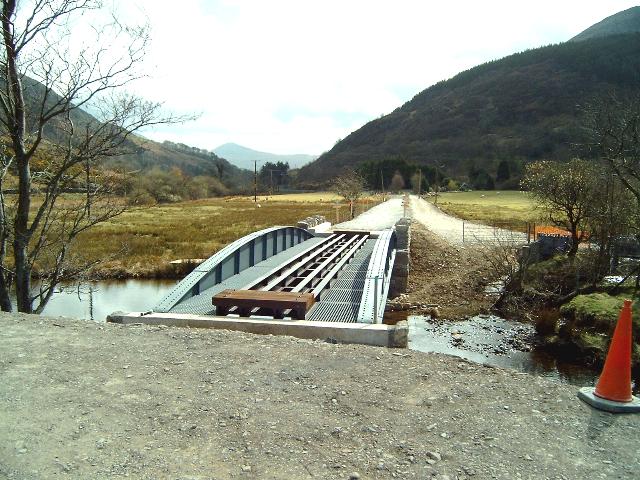
This southerly view (30/3/03) shows the completed bridge with the start of work on laying wooden sleepers on the steel waybeams. Click on the image to enlarge. This image is copyright B W Hughes. Image taken on Samsung Digimax230 digital camera using iPhoto Plus4 image correction technology. Image displayed at 96dpi.
This southerly view (17/4/03) shows a continuous deck of sleepers laid across the completed bridge. The joint is necessary on the bridge as joints are not allowed on the adjacent level crossing (LC33) due to timbering. At the time of this view a gap existed in the track laid as far as the corner in the distance. There was a short gap north of the l/c too where temporary track had been removed adjacent to the Cae Hywel rail stack. Click on the image to enlarge. This image is copyright B W Hughes. Image taken on Samsung Digimax230 digital camera using iPhoto Plus4 image correction technology. Image displayed at 96dpi.
This southerly view (28/6/03) shows track now laid across UB56 and the embankment beyond. Click on the image to enlarge. This image is copyright B W Hughes. Image taken on Samsung Digimax230 digital camera using iPhoto Plus4 image correction technology. Image displayed at 96dpi.

This southerly view (30/3/03) shows the completed south abutment and approach embankment. Click on the image to enlarge. This image is copyright B W Hughes. Image taken on Samsung Digimax230 digital camera using iPhoto Plus4 image correction technology. Image displayed at 96dpi.
This northerly view (26/1/03) of UB56 shows piling has around both abutments. The southern abutment has had a foundation slab poured. This is visible just under water level. Click on the image to enlarge. This image is copyright B W Hughes. Image taken on Samsung Digimax230 digital camera using iPhoto Plus4 image correction technology. Image displayed at 96dpi.

This northerly view (16/2/03) shows the recently completed north abutment of Cae Hywel bridge as viewed from the deck of the recently cast overflow channel span. Click on the image to enlarge. This image is copyright B W Hughes taken on Samsung Digimax 230 digital camera. Image post processed using iPhoto Plus4 image correction technology and displayed at 96dpi.
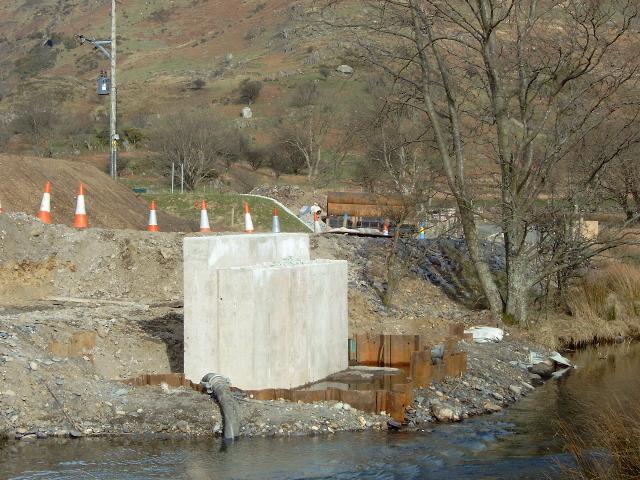
This northerly view (23/2/03) shows the north abutment now clad with local stone. This abutment is now complete and will shortly be backfilled. In the background, the main girders have now been painted with silver epoxy undercoat, except at the ends where the bearings clips were torched off. Click on the image to enlarge. This image is copyright B W Hughes. Image taken on Samsung Digimax230 digital camera using iPhoto Plus4 image correction technology. Image displayed at 96dpi.

This easterly view (16/2/03) shows the recently cast deck for the overflow channel span and the south abutment of Cae Hywel bridge. The re-inforced concrete structures will be clad in local stone in due course. This 3m span may have a cosmetic central pier added as at Plas-y-nant bridge. The embankment to the right will be built up following completion of the abutment. Click on the image to enlarge. This image is copyright B W Hughes taken on Samsung Digimax 230 digital camera. Image post processed using iPhoto Plus4 image correction technology and displayed at 96dpi.
South of Cae Hywel bridge
This section was pegged out just prior to 29/8/01 to establish fence lines. Fencing will be erected in early September. Contractor's are currently examining this section of the route to offer tenders. The pegs extended from the Waterworks to as far as Salem Halt by 1/9/01.

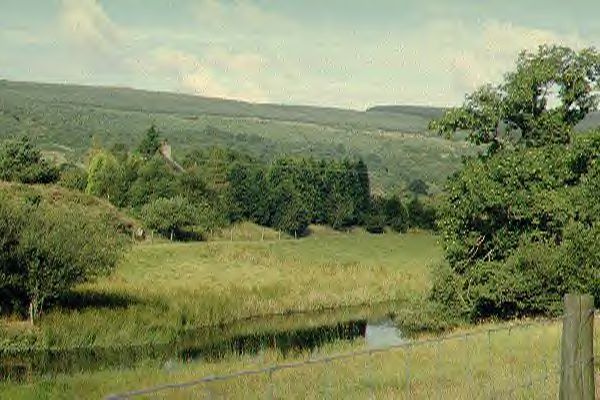
This southerly archive view shows the embankment across the floodplain immediately south of the bowstring bridge. This is the end of one of the longest straight sections (600 m) on this part of the railway. Click on the image to enlarge. This image is copyright B.W.Hughes. Slide scan technology utilised is Olympus ES10 & iPhoto Plus4. Slide scanned at 200dpi.

This southerly view from Ch.7950 south of the Afon Gwyrfai bridge UB56 at Cae Hywel shows the new access road to the right and the trackbed left. Click on the image to enlarge. This image is copyright WHLR, courtesy Jan Woods. Image displayed at 96dpi.

This northerly view (25/6/02) shows Jones' dumpers being used to ferry rock excavated from Bryn Gloch to construct the new access road just south of Cae Hywel bridge. The trackbed is marked out with 10m surveyor's posts. Click on the image to enlarge. This image is copyright WHR, courtesy Jan Woods. iPhoto Plus4 image correction technology and displayed at 96dpi.

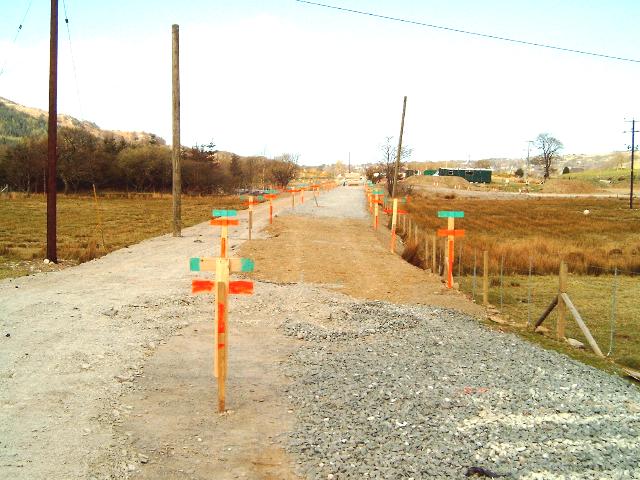
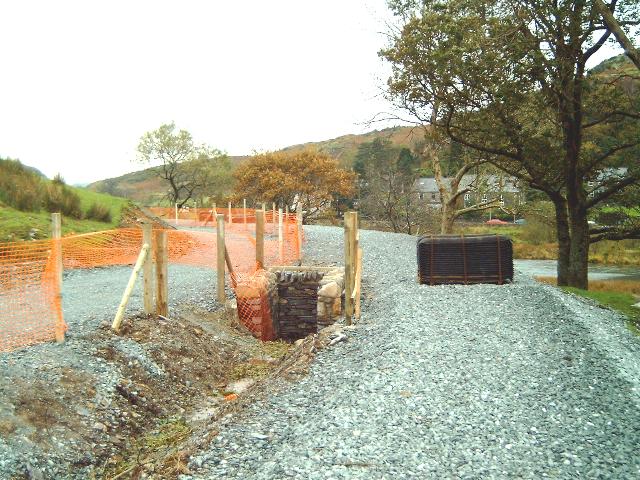
This northerly view (30/11/02) shows the recently completed track at LC34. Two panels of temporary track (36m) lie through and north of this crossing and terminate just south of the small rail stacks. As the road access to the Tros-y-gol house has to be maintained on the widened embankment to the left of the Landrover, the Landrover winch was used to drag the rails from the right hand and left hand piles (as required by the curvature) to load onto the RRMs. Click on the image to enlarge. This image is copyright B W Hughes taken on a Hitachi D8 digital camcorder VM-D865LE 230. Image post processed using iPhoto Plus4 image correction technology and displayed at 96dpi.
This northerly view (30/3/03) from a similar viewpoint to that above shows the completed embankment ready for ballasting at Tros-y-gol. Click on the image to enlarge. This image is copyright B W Hughes. Image taken on Samsung Digimax230 digital camera using iPhoto Plus4 image correction technology. Image displayed at 96dpi.
This northerly view (28/6/03) shows Harold at Tros-y-gol and track now laid across the embankment towards UB56. Click on the image to enlarge. This image is copyright B W Hughes. Image taken on Samsung Digimax230 digital camera using iPhoto Plus4 image correction technology. Image displayed at 96dpi.

This southerly archive view shows the unlikely site suggested by Boyd's map for Salem Halt. The stone piers are for LC34 accommodation crossing. Click on the image to enlarge. This image is copyright B.W.Hughes. Slide scan technology utilised is Olympus ES10 & iPhoto Plus4. Slide scanned at 200dpi.
This southerly view (26/1/03) shows the final position of the start of the track at Ch.8080 just south of LC34. Click on the image to enlarge. This image is copyright B W Hughes. Image taken on Samsung Digimax230 digital camera using iPhoto Plus4 image correction technology. Image displayed at 96dpi.
This southerly view (30/10/02) shows a similar view to that above with the formation completed adjacent to Tros-y-gol. This section was ballasted the following week and tracklaying commenced w/e 17/11/02. Click on the image to enlarge. This image is copyright B.W.Hughes. Image taken using Samsung Digimax230 digital camera and post processed with iPhoto Plus4. Image displayed at 96dpi.
This southerly view (30/11/02) shows the recently completed track at LC34. The permanent track starts just south of this crossing at Ch.8099. The section to Plas-y-nant has a sequence of tight left and right hand curves and a 15mph speed limit may be imposed. Click on the image to enlarge. This image is copyright B W Hughes taken on a Hitachi D8 digital camcorder VM-D865LE 230. Image post processed using iPhoto Plus4 image correction technology and displayed at 96dpi.
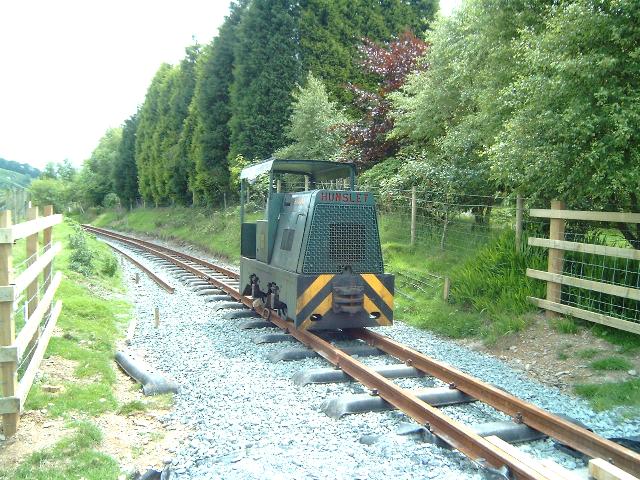
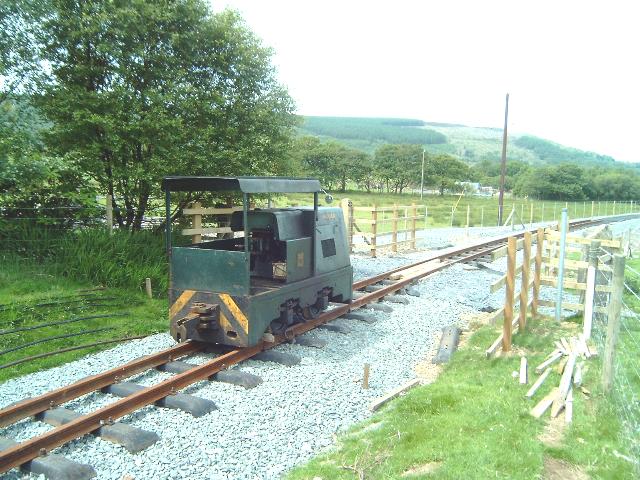
This southerly view (22/6/03) shows Harold at Tros-y-gol. Click on the image to enlarge. This image is copyright B W Hughes. Image taken on Samsung Digimax230 digital camera using iPhoto Plus4 image correction technology. Image displayed at 96dpi.

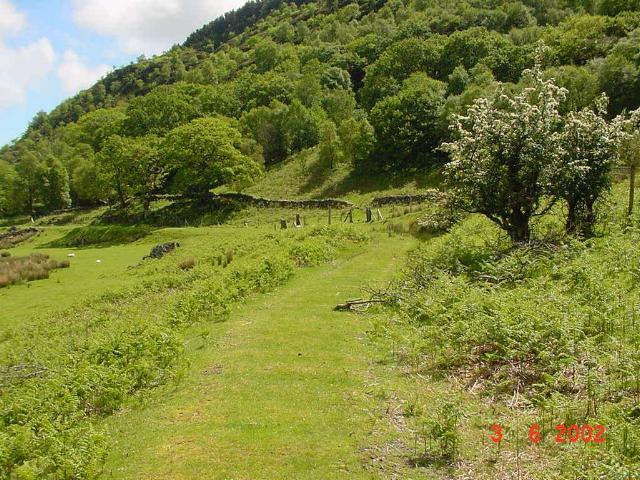
This southerly view (2/8/02) from LC34 at Ch.8100 shows the consolidated trackbed and completed fencing. Click on the image to enlarge. This image is copyright B W Hughes. Image taken on Samsung Digimax230 digital camera using iPhoto Plus4 image correction technology. Image displayed at 96dpi.
This southerly archive view shows the trackbed south through the rock-cut ledge curves at Ch. 8200. The impressions of sleepers are still visible in the grass. The Afon Gwyrfai had flooded on this occasion. Click on the image to enlarge. This image is copyright B.W.Hughes. Slide scan technology utilised is Olympus ES10 & iPhoto Plus4. Slide scanned at 200dpi.

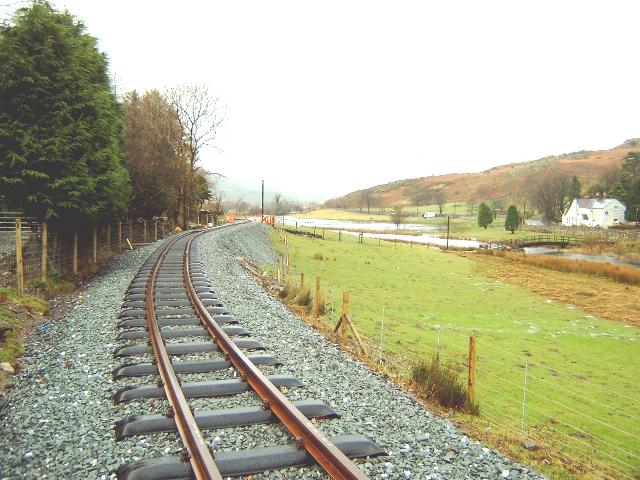
This southerly view (30/11/02) shows the recently completed track at Ch.8200. The pre-curved rails used (spare from Phase 1) have improved the speed of tracklaying. The section to Plas-y-nant has a sequence of tight left and right hand curves and a 15mph speed limit may be imposed. Click on the image to enlarge. This image is copyright B W Hughes taken on a Hitachi D8 digital camcorder VM-D865LE 230. Image post processed using iPhoto Plus4 image correction technology and displayed at 96dpi.
This southerly view (30/11/02) shows the situation a few hours later with the Afon Gwyrfai to the left. In the distance to the left is the site of Salem Halt adjacent to the footbridge. Click on the image to enlarge. This image is copyright B W Hughes taken on a Hitachi D8 digital camcorder VM-D865LE 230. Image post processed using iPhoto Plus4 image correction technology and displayed at 96dpi.
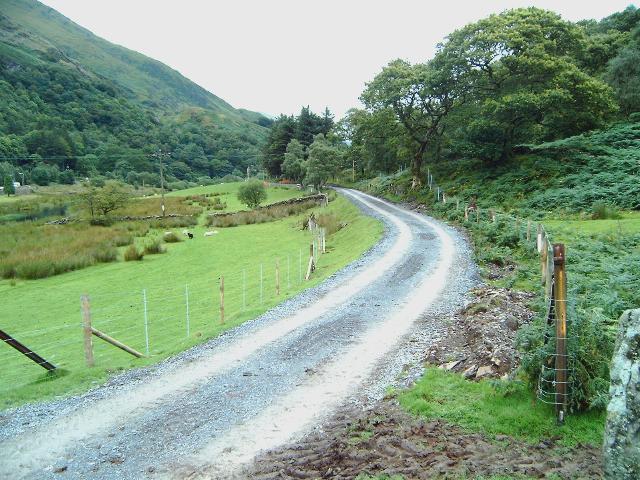
This westerly roadside view (5/8/00) shows the rock-cut ledge above the Afon Gwyrfai at Ch. 8200 as viewed from the main A4085 road north of Salem. The route is sharply curved on this section and will afford good views of the locomotive leading the train. New views of the narrowing Gwyrfai valley will appear with each turn. Click on the image to enlarge. This image is copyright B.W.Hughes. Slide scan technology utilised is Olympus ES10 & iPhoto Plus4. Slide scanned at 200dpi.

This westerly view (30/6/02) shows the trackbed from the same angle as the above view, now fenced in. Some fence poles are steel as they are based on rock. Some warning poles have been erected to protect overhead power lines. Click on the image to enlarge. This image is copyright B.W.Hughes. Image taken on Samsung Digimax230 digital camera and post processed using iPhoto Plus4. Image displayed at 96dpi.

This westerly view (30/11/02) shows the recently completed track at Ch.8200. The section to Plas-y-nant has a sequence of tight left and right hand curves and a 15mph speed limit may be imposed. Here the track is on a ledge above the Afon Gwyrfai, as seen from the main road. Click on the image to enlarge. This image is copyright B W Hughes taken on a Hitachi D8 digital camcorder VM-D865LE 230. Image post processed using iPhoto Plus4 image correction technology and displayed at 96dpi.
This southerly view from Ch.8200 towards Salem Halt shows the original sleeper spacings evident in the turf from when the track was lifted in 1941. Click on the image to enlarge. This image is copyright WHLR, courtesy Jan Woods. Image displayed at 96dpi.
This southerly view (25/7/02) shows the consolidated trackbed through the same location as shown in the above illustration. Click on the image to enlarge. This image is copyright WHR, courtesy Jan Woods. Image post processed using iPhoto Plus4 image correction technology and displayed at 96dpi.
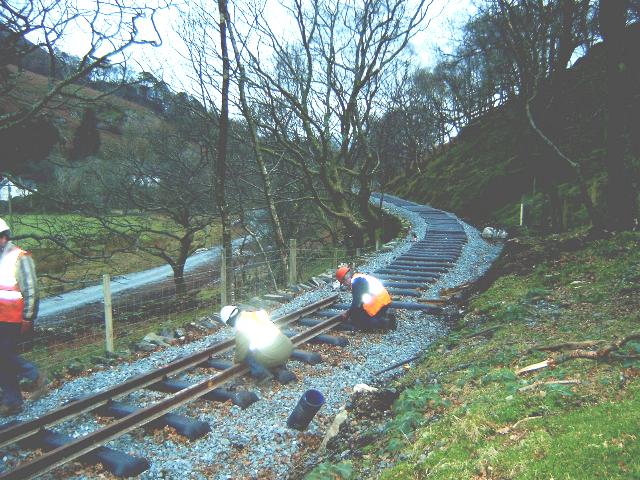
This southerly view (30/11/02) shows the recently laid sleepers through LC35/6. By the following day track would be laid through this curve. Click on the image to enlarge. This image is copyright B W Hughes taken on a Hitachi D8 digital camcorder VM-D865LE 230. Image post processed using iPhoto Plus4 image correction technology and displayed at 96dpi.
This southerly view (5/8/00) shows the trackbed from Ch. 8200 towards Salem footbridge as viewed from the A4085 at the same location as that above. The steel rail posts of LC35 are visible. The route forms a ledge just below the woods. Click on the image to enlarge. This image is copyright B.W.Hughes. Slide scan technology utilised is Olympus ES10 & iPhoto Plus4. Slide scanned at 200dpi.

This northerly view (30/11/02) shows rails being laid on the ledge above the Afon Gwyrfai. The rails have to have their fishplates straight when tightened. This necessitates the rails being laid protruding off the trackbed. Using pre-curved rails minimises the throw! Click on the image to enlarge. This image is copyright B W Hughes taken on a Hitachi D8 digital camcorder VM-D865LE 230. Image post processed using iPhoto Plus4 image correction technology and displayed at 96dpi.
This northerly archive view shows the formation at LC35 Ch. 8300 emerging from the sharp curves on the rock-cut ledge. The trackbed has been little disturbed here and the sleeper spacings are still visible in the grass south from this point. Click on the image to enlarge. This image is copyright B.W.Hughes. Slide scan technology utilised is Olympus ES10 & iPhoto Plus4. Slide scanned at 200dpi.

This northerly view (2/8/02) from the public footpath over LC35 shows the consolidated trackbed and completed fencing. Click on the image to enlarge. This image is copyright B W Hughes. Image taken on Samsung Digimax230 digital camera using iPhoto Plus4 image correction technology. Image displayed at 96dpi.
This northerly view (1/12/02) shows the recently completed track at LC35 with the Afon Gwyrfai and the main road on the opposite bank closing on the alignment. The RRMs are shown carrying the next set of rails to be laid. Click on the image to enlarge. This image is copyright B W Hughes taken on a Hitachi D8 digital camcorder VM-D865LE 230. Image post processed using iPhoto Plus4 image correction technology and displayed at 96dpi.
This southerly archive view shows trackbed south from LC35 at Ch.8300. The braced steel rail posts of the gate are visible. Sleeper spacings are clearly visible in the grass. The Afon Gwyrfai was flooded on the occasion of this photo and is normally in a much narrower channel. Click on the image to enlarge. This image is copyright B.W.Hughes. Slide scan technology utilised is Olympus ES10 & iPhoto Plus4. Slide scanned at 200dpi.
This southerly view (2/8/02) from the public footpath over LC35 shows the consolidated trackbed, though side drains on the uphill side remained to be completed and culverts needed strengthening. Click on the image to enlarge. This image is copyright B W Hughes. Image taken on Samsung Digimax230 digital camera using iPhoto Plus4 image correction technology. Image displayed at 96dpi.
This southerly view (1/12/02) shows the recently completed track at LC35. By the end of the day, the track was extended a further length towards LC36, the A-frame footpath crossing. The next section is relatively straight to the site of Salem Halt opposite the footbridge. LC34 was not ballasted by Jones Bros. and had to be dug out to provide a 25cm ballast layer. The track is carried across the gap on wooden supports. The gap was filled by a Jubilee skip or two of ballast the following weekend. Click on the image to enlarge. This image is copyright B W Hughes taken on a Hitachi D8 digital camcorder VM-D865LE 230. Image post processed using iPhoto Plus4 image correction technology and displayed at 96dpi.
This southerly view (23/12/02) shows the completed formation over LC34. The crossing was ballasted by skip in the first week of December. Click on the image to enlarge. This image is copyright B W Hughes. Image taken on Samsung Digimax230 digital camera using iPhoto Plus4 image correction technology. Image displayed at 96dpi.
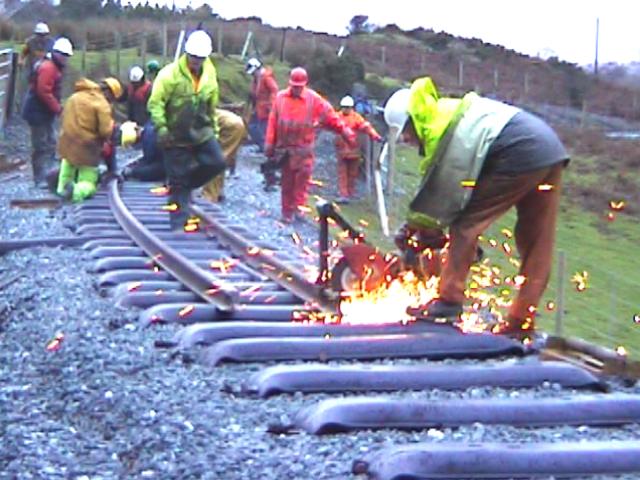
This northerly view (1/12/02) shows the fireworks as the inside radius rail just south of LC35 is cut to length. This also means that at least one new bolthole has to be drilled for the fishplates on that rail. Click on the image to enlarge. This image is copyright B W Hughes taken on a Hitachi D8 digital camcorder VM-D865LE 230. Image post processed using iPhoto Plus4 image correction technology and displayed at 96dpi.
This northerly view (30/11/02) shows the recently laid sleepers crossing LC36. This public footpath crossing has been built up with steps (right) from the rail-built A-frame stiles. Click on the image to enlarge. This image is copyright B W Hughes taken on a Hitachi D8 digital camcorder VM-D865LE 230. Image post processed using iPhoto Plus4 image correction technology and displayed at 96dpi.
This northerly view (1/12/02) shows the last act of the day in fading light at 1530 when the next pair of rails is dragged up to LC36. This pair of rails will cross LC36, the A-frame footpath crossing, but are left short of it to avoid a trip hazard. Rail joints are not allowed on level crossings as they will be covered by boarding and would be difficult to maintain. Click on the image to enlarge. This image is copyright B W Hughes taken on a Hitachi D8 digital camcorder VM-D865LE 230. Image post processed using iPhoto Plus4 image correction technology and displayed at 96dpi.

This southerly view (30/11/02) shows the recently laid sleepers south from LC35, the footpath crossing with the rail-built stile crossing. this is one of the few straights on the section from Cae Hywel to Plas-y-nant. The rail built A-frame stile is visible on the left. Click on the image to enlarge. This image is copyright B W Hughes taken on a Hitachi D8 digital camcorder VM-D865LE 230. Image post processed using iPhoto Plus4 image correction technology and displayed at 96dpi.
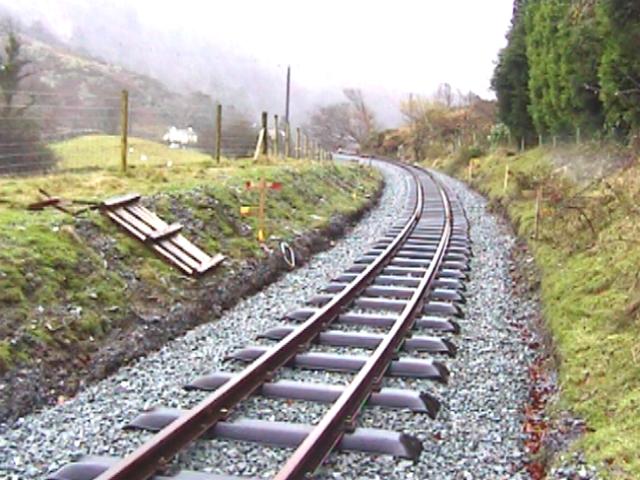
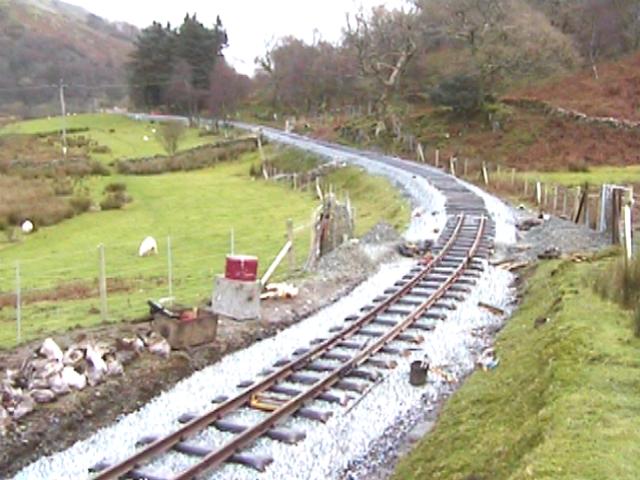
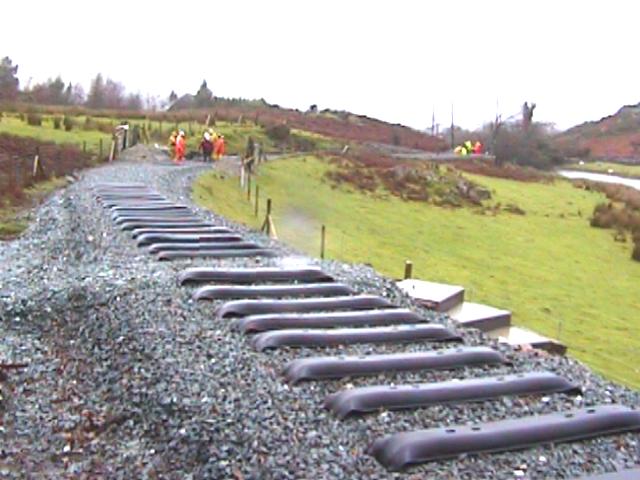
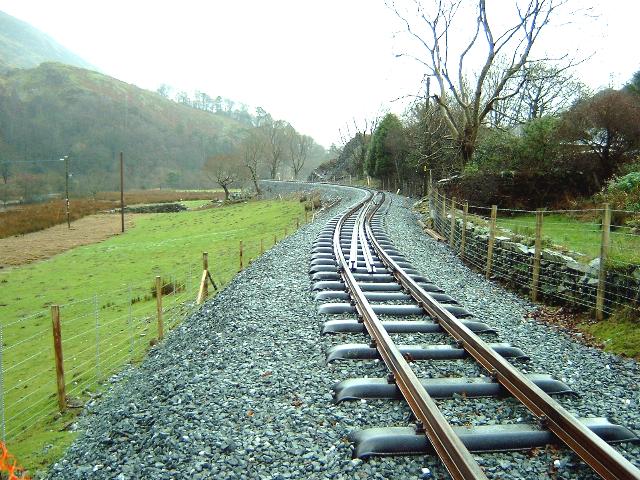
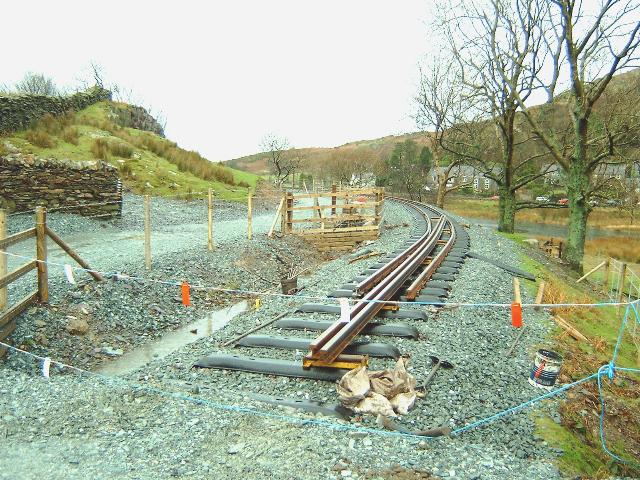
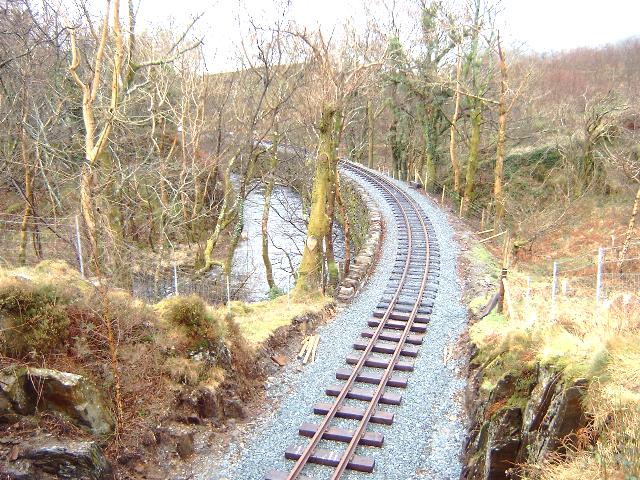
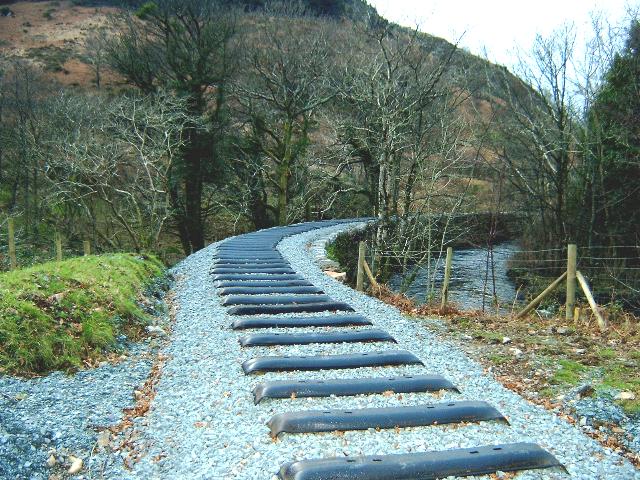
This northerly view (23/12/02) from the trackbed shows the Head of Steel from the previous weekend (6 lengths laid) at Ch.8440. The sinuous nature of the track on this section is clearly visible. Click on the image to enlarge. This image is copyright B W Hughes. Image taken on Samsung Digimax230 digital camera using iPhoto Plus4 image correction technology. Image displayed at 96dpi.

This southerly view (30/10/02) shows the ballasting at a point just north of Salem river footbridge. Click on the image to enlarge. This image is copyright B.W.Hughes. Image taken using Samsung Digimax230 digital camera and post processed with iPhoto Plus4. Image displayed at 96dpi.
This southerly view (23/12/02) from Ch.8440 shows the Head of Steel from the previous weekend. Salem village and the river footbridge is visible in the distance. Click on the image to enlarge. This image is copyright B W Hughes. Image taken on Samsung Digimax230 digital camera using iPhoto Plus4 image correction technology. Image displayed at 96dpi.
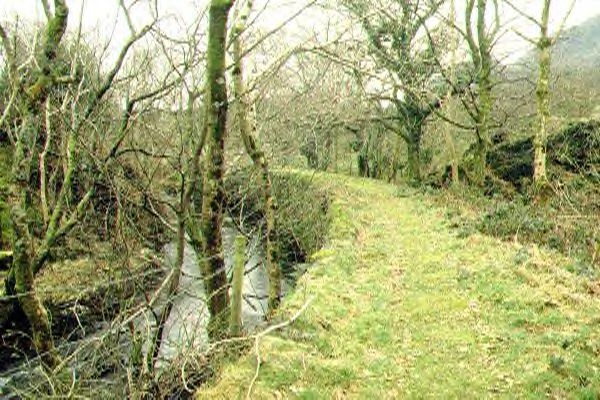
This northerly view (5/8/00) shows the beautiful Gwyrfai valley from the Salem river footbridge. The railway formation is visible as a ledge running just below the woods in the far side of the valley. A footpath runs north from the footbridge along the river side of the railway. Click on the image to enlarge. This image is copyright B.W.Hughes. Slide scan technology utilised is Olympus ES10 & iPhoto Plus4. Slide scanned at 200dpi.

This northerly view (30/6/02) shows the progress visible from the Salem river footbridge. The railway formation has been scraped level and is being fenced on the east side. The west side is already completed. Some posts have been erected to protect overhead power lines. Click on the image to enlarge. This image is copyright B.W.Hughes. Image taken on Samsung Digimax230 digital camera with post processing by iPhoto Plus4. Image displayed at 96dpi.
Salem Halt mystery
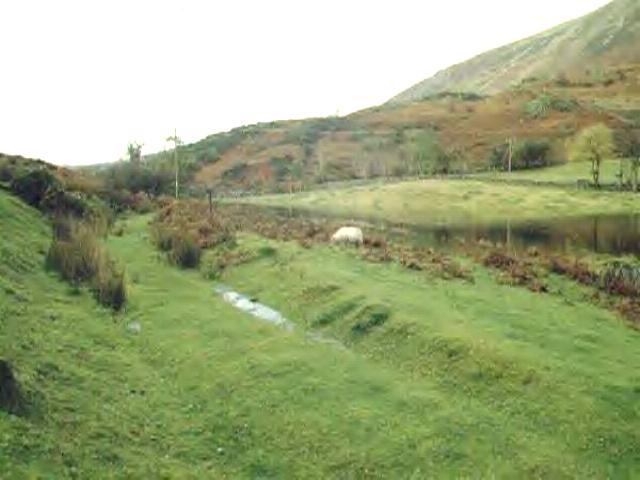
The railway continues the 600 m long Waterworks straight (the longest on the section to Rhyd Ddu), over the Salem bridge to Salem Halt shown by Boyd at Ch. 8000 approx. The location of this halt is arguable and it was only opened in 1922. There are no visible remains of the halt given by Boyd as 5 m 40 ch, which clearly does not match his map. This distance corresponds to Ch. 8850 from Dinas, whereas the original Plasynant Halt (new Ch. 9100) is given as 5 m 75 ch, which is equivalent to original Ch. 9250. The difference of 150 metres is due to the zero point for modern chainages being the west face of OB1 at Dinas. So Boyd's position for Salem Halt was around Ch. 8500 which corresponds to the position opposite the Salem footbridge, not near the Salem bowstring bridge.
This northerly archive view shows the more likely site of Salem Halt at Ch. 8500, opposite Salem river footbridge at LC 37. Sleeper spacings are clearly visible in the grass. The Afon Gwyrfai was in flood when this photo was taken. The footbridge provides access to houses to the left of this view. This image is copyright B.W.Hughes. Slide scan technology utilised is Olympus ES10 & iPhoto Plus4. Slide scanned at 200dpi.
This northerly view (2/8/02) from LC37 at Ch.8500 shows the consolidated trackbed although side drains and strengthening of culverts remained to be completed. Click on the image to enlarge. This image is copyright B W Hughes. Image taken on Samsung Digimax230 digital camera using iPhoto Plus4 image correction technology. Image displayed at 96dpi.
This northerly view (30/10/02) shows the ballasting of the trackbed just north of the Salem river footbridge. Click on the image to enlarge. This image is copyright B.W.Hughes. Image taken using Samsung Digimax230 digital camera and post processed with iPhoto Plus4. Image displayed at 96dpi.
This northerly view (30/12/02) shows the completed track over LC37. Spare rails have been dumped in the 'two foot'. Click on the image to enlarge. This image is copyright B W Hughes. Image taken on Samsung Digimax230 digital camera using iPhoto Plus4 image correction technology. Image displayed at 96dpi.
This southerly view (3/6/02) shows trackbed south from LC37, the more likely site of Salem Halt. The route follows the contours snaking around the hillside above the Afon Gwyrfai to the narrowest location in the valley at Pont Cerrig-y-rhyd. Sleeper spacings are still visible in the grass. Click on the image to enlarge. This image is copyright WHLR, courtesy Jan Woods. Slide displayed at 96dpi.
This southerly view (2/8/02) from LC37 at Ch.8500 shows the consolidated trackbed now completely fenced in. Drainage and culverts still need to be improved on this section. Click on the image to enlarge. This image is copyright B W Hughes. Image taken on Samsung Digimax230 digital camera using iPhoto Plus4 image correction technology. Image displayed at 96dpi.
This southerly view (30/10/02) shows the ballast quarry at the end of the ballasted section south from Salem footbridge. The sleepers stacked on the trackbed were laid on the ballast the following weekend. Click on the image to enlarge. This image is copyright B.W.Hughes. Image taken using Samsung Digimax230 digital camera and post processed with iPhoto Plus4. Image displayed at 96dpi.
This southerly view (30/12/02) shows the completed formation over LC37. Click on the image to enlarge. This image is copyright B W Hughes. Image taken on Samsung Digimax230 digital camera using iPhoto Plus4 image correction technology. Image displayed at 96dpi.
This northerly view (30/10/02) shows the completed ballasted trackbed with Salem and the river footbridge to the right. The piles of sleepers were laid out on the trackbed the following weekend with tracklaying likely through this section in November and December. Click on the image to enlarge. This image is copyright B.W.Hughes. Image taken using Samsung Digimax230 digital camera and post processed with iPhoto Plus4. Image displayed at 96dpi.
This northerly view (30/12/02) shows the completed tracklaying around Ch.8600. Click on the image to enlarge. This image is copyright B W Hughes. Image taken on Samsung Digimax230 digital camera using iPhoto Plus4 image correction technology. Image displayed at 96dpi.
Views from Salem footbridge
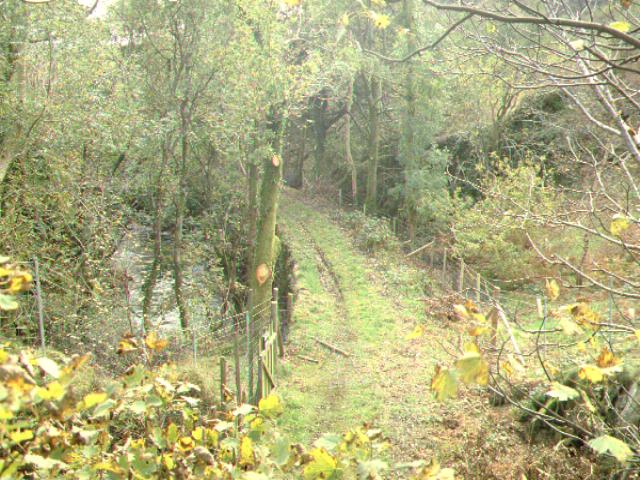
The railway is clearly visible running on a grassed ledge just above the pastures of the floodplain. The new wooden footbridge provides a public footpath that turns north to LC36 and the approach to LC37 is not a public footpath. The trackbed can be quite wet on this gently curved section and new drainage has been provided. The railway passes east of and just below housing.

This southerly view (30/6/02) shows the ballast quarry from the Salem river footbridge. The railway formation is visible as a ledge running just below the woods in the far side of the valley. Poles have been erected to warn vehicles of the power cables. Click on the image to enlarge. This image is copyright B.W.Hughes. Image taken using Samsung Digimax230 digital camera and post processed with iPhoto Plus4. Image displayed at 96dpi.
Ballast Quarry
There is a former ballast quarry that was used by the WHR at Ch. 8600. This is excavated on the west side of the line just north of Salem Halt. there is no evidence of any siding here and it is likely that, when necessary, trains were loaded standing on the running line.
This westerly roadside view (29/4/01) shows the WHR's ballast quarry at Ch. 8600 just south of Salem Halt. The trackbed runs along the base of the hill. A light covering of snow shows the quarry in good contrast. Click on the image to enlarge. This image is copyright B.W.Hughes. Slide scan technology utilised is Olympus ES10 & iPhoto Plus4. Slide scanned at 200dpi.
This southerly view (30/10/02) shows the ballast quarry and the new roadway to the right. Fencing was being erected between the railway and the road. Click on the image to enlarge. This image is copyright B.W.Hughes. Image taken using Samsung Digimax230 digital camera and post processed with iPhoto Plus4. Image displayed at 96dpi.
This southerly view (30/12/02) shows the completed formation near Ch.8600. The new road access is fenced off to the right. The excavation of the former ballast quarry to provide fill and clearance for the road are visible. Click on the image to enlarge. This image is copyright B W Hughes. Image taken on Samsung Digimax230 digital camera using iPhoto Plus4 image correction technology. Image displayed at 96dpi.
This northerly view (25/6/02) shows the excavation of rock from the Salem 'ballast pit' for building a new access road to the house at LC37. Click on the image to enlarge. This image is copyright WHR, courtesy Jan Woods. iPhoto Plus4 image correction technology and displayed at 96dpi.

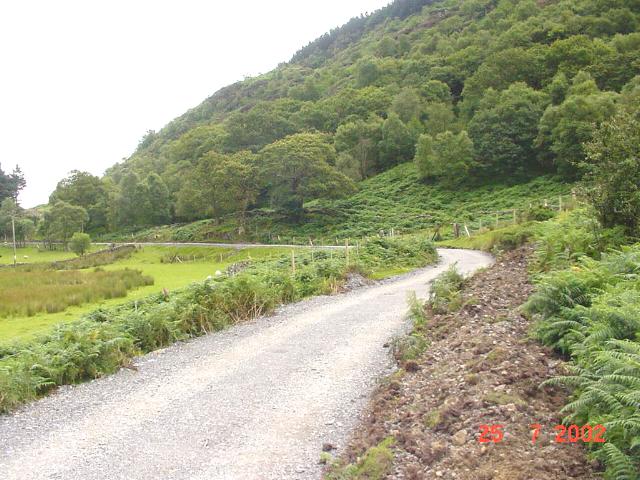
This northerly view (2/8/02) from the site of the new LC38 at Ch.8650 shows the new road constructed through the old NWNGR ballast quarry. The private access road on the left has been constructed a little higher than the railway to the right. Click on the image to enlarge. This image is copyright B W Hughes. Image taken on Samsung Digimax230 digital camera using iPhoto Plus4 image correction technology. Image displayed at 96dpi.
This southerly view (30/10/02) shows the newly fenced roadway to the left as seen from LC38. A new sheep creep has been positioned here which passes under the pile of sleepers. Click on the image to enlarge. This image is copyright B.W.Hughes. Image taken using Samsung Digimax230 digital camera and post processed with iPhoto Plus4. Image displayed at 96dpi.
This northerly view (30/12/02) shows the track laying approaching LC38. This is the new level crossing for the road access to the house opposite Salem bridge. Click on the image to enlarge. This image is copyright B W Hughes. Image taken on Samsung Digimax230 digital camera using iPhoto Plus4 image correction technology. Image displayed at 96dpi.

This southerly view (2/8/02) from the site of the new LC38 shows the new access track now on the east side and below the railway alignment. Rock from the quarry has been used to complete the access track. Click on the image to enlarge. This image is copyright B W Hughes. Image taken on Samsung Digimax230 digital camera using iPhoto Plus4 image correction technology. Image displayed at 96dpi.
This southerly view (30/12/02) shows the completed track approaching LC38. The crossing had no ballast and needed to be dug out like other crossings on the Jones Bros. built section. The following day a skip delivered ballast. Click on the image to enlarge. This image is copyright B W Hughes. Image taken on Samsung Digimax230 digital camera using iPhoto Plus4 image correction technology. Image displayed at 96dpi.
This northerly view (25/6/02) shows some excavation underway to the left of the alignment at Salem. The village is seen to the right on the far bank of the Afon Gwyrfai. Click on the image to enlarge. This image is copyright WHR, courtesy Jan Woods. iPhoto Plus4 image correction technology and displayed at 96dpi.
This northerly view (25/7/02) shows the consolidated trackbed from the same view as that shown in the above illustration. Click on the image to enlarge. This image is copyright WHR, courtesy Jan Woods. Image post processed with iPhoto Plus4 image correction technology and displayed at 96dpi.
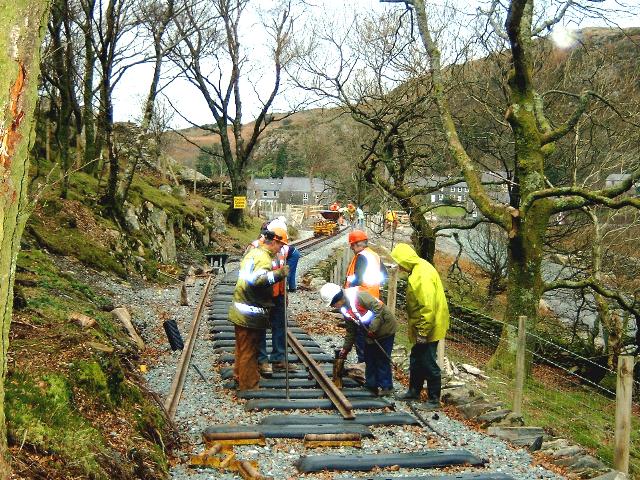
This northerly view (30/12/02) shows the completed track laying across LC38. The crossing had no ballast and needed to be dug out like other crossings on the Jones Bros. built section. WHR volunteers, having tamped the track, are screwing down the crossing boards. Click on the image to enlarge. This image is copyright B W Hughes. Image taken on Samsung Digimax230 digital camera using iPhoto Plus4 image correction technology. Image displayed at 96dpi.
Stone ledge
The trackbed runs through a small wood at this location Ch. 8800, on a stone-built ledge about 100 m long. The ledge is of similar construction to the FR's stone ledges though is only about 10 metres or so above the valley floor.
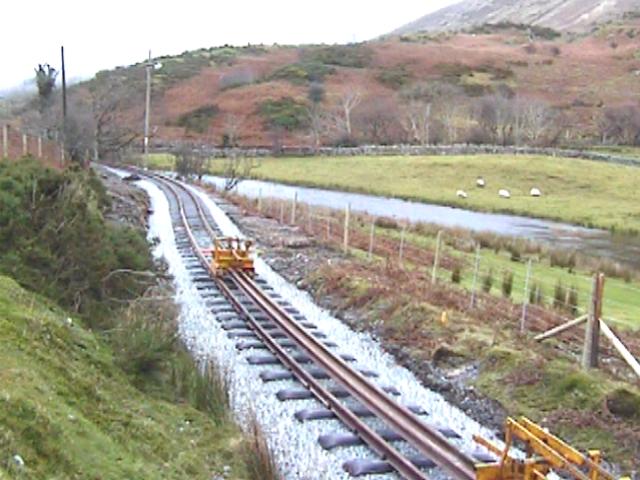
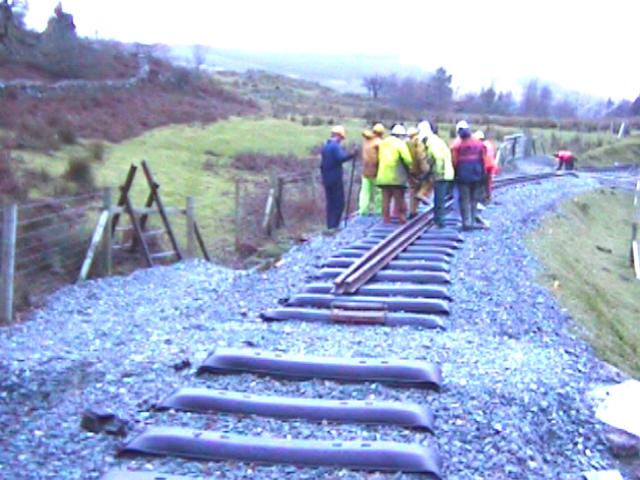
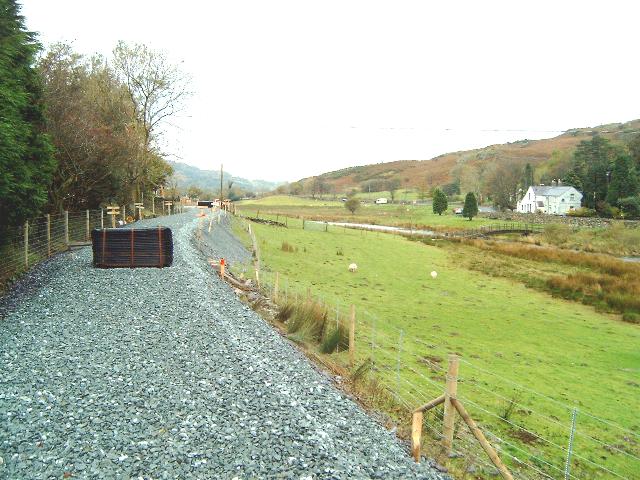
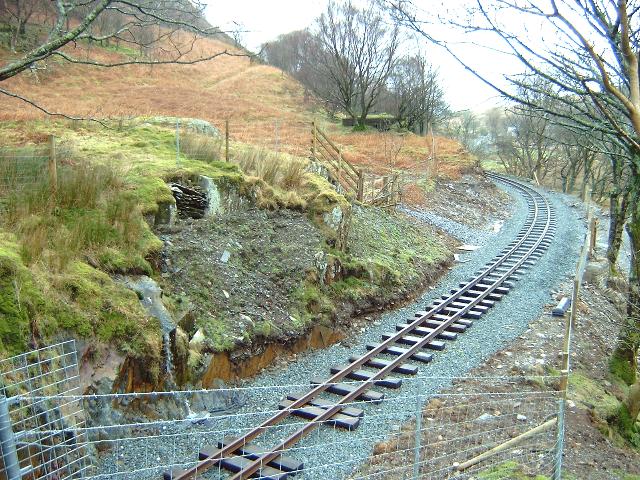
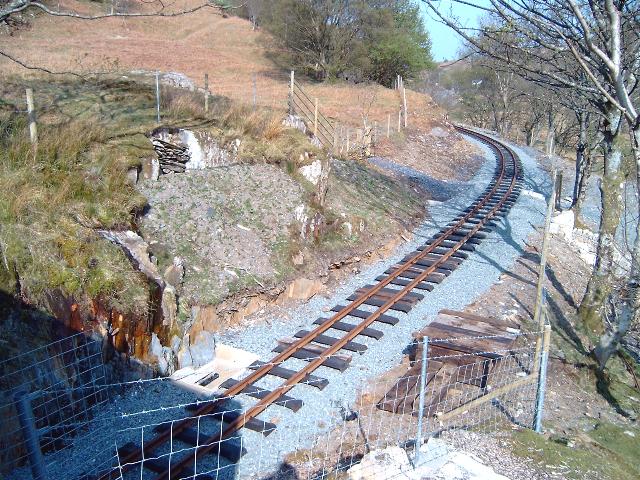
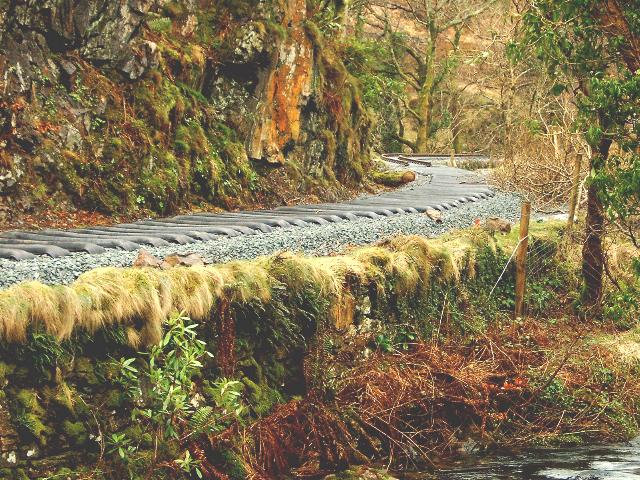
This northerly view (31/12/02) shows the completed track approaching the stone ledge at the Head of Steel (Ch.8763). This was as far as the Xmas Trackbash campaign laid in their 5-day post-Xmas campaign. Click on the image to enlarge. This image is copyright B W Hughes. Image taken on Samsung Digimax230 digital camera using iPhoto Plus4 image correction technology. Image displayed at 96dpi.
This southerly archive view shows the rock-built ledge above the Afon Gwyrfai near Ch. 8700 approx. The route is gently curved on this section and will need additional drainage. A local resident appears to be using the trackbed for access to the A4085 via Pont Cerrig-y-rhyd. This image is copyright B.W.Hughes. Slide scan technology utilised is Olympus ES10 & iPhoto Plus4. Slide scanned at 200dpi.
This southerly view (31/12/02) shows the completed track approaching the stone ledge at the Head of Steel (Ch.8763). The final rail is being screwed down. Around the corner is a 100m straight that the tracklaying volunteers will look forwards to as the continuous curves through Salem have meant slow going. Click on the image to enlarge. This image is copyright B W Hughes. Image taken on Samsung Digimax230 digital camera using iPhoto Plus4 image correction technology. Image displayed at 96dpi.

This westerly roadside view (5/8/00) shows the rock-built ledge above the Afon Gwyrfai at Ch. 8800 as viewed from the main A4085 road south of Salem. Click on the image to enlarge. This image is copyright B.W.Hughes. Slide scan technology utilised is Olympus ES10 & iPhoto Plus4. Slide scanned at 200dpi.
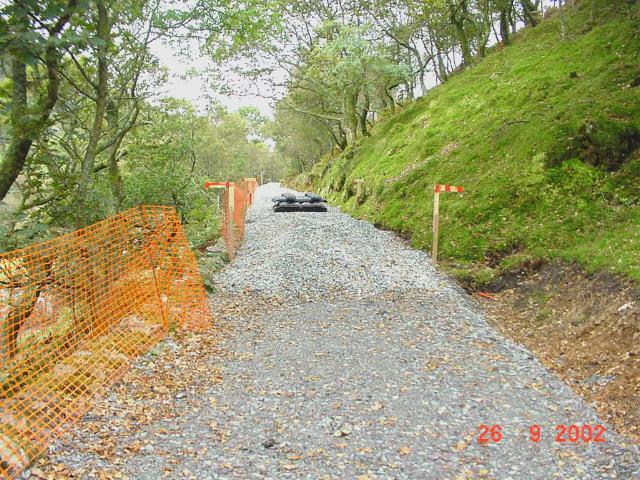
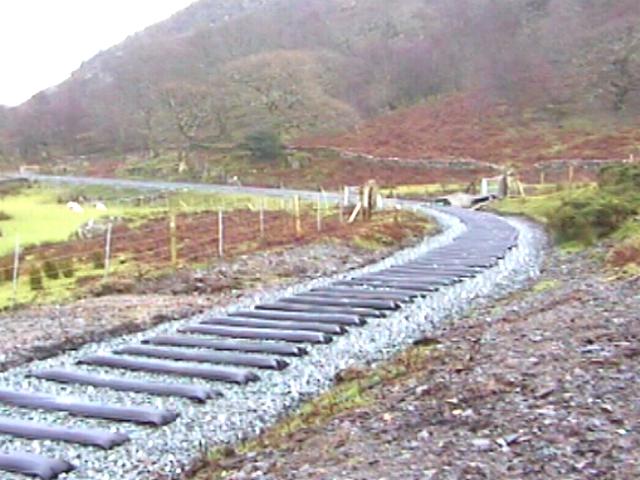
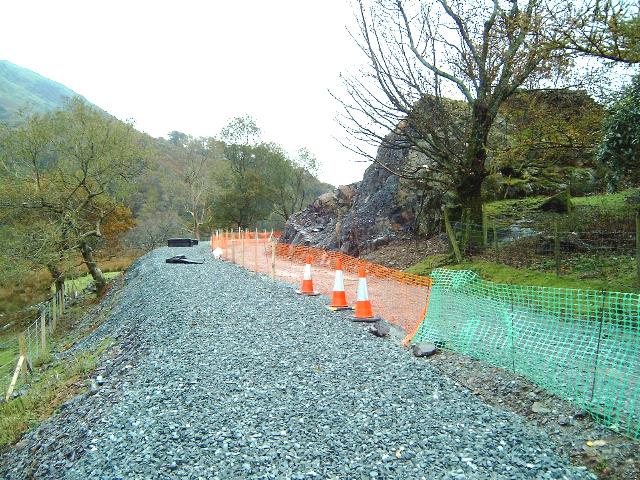
This southerly view (26/9/02) shows the first section of ballast to be laid on this section for some 70m north of Ch.8800. Pallets of steel sleepers have been placed on the trackbed ready for the tracklaying volunteers. Click on the image to enlarge. This image is copyright WHR, courtesy Jan Woods. Image post processed with iPhoto Plus4 image correction technology and displayed at 96dpi.

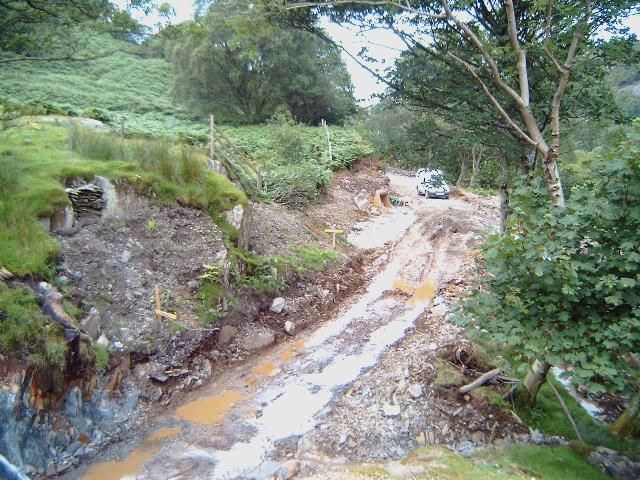
This southerly view (2/8/02) shows the northern limit of excavation on the stone ledge at Ch.8870 for the increased clearance for OB62. The rock pecker is visible in the distance. spoil was used to make an access road for the local house which had previously been using the trackbed. Click on the image to enlarge. This image is copyright B W Hughes. Image taken on Samsung Digimax230 digital camera using iPhoto Plus4 image correction technology. Image displayed at 96dpi.
Ballasting got underway on this section in September and proceeded north towards Cae Hywel from Ch.8870. The section from Plas-y-nant to Pont Cerrig-y-rhyd was ballasted north in October as soon as the rock wall and bridge works were complete on OB62. Ballasting reached Cae Hywel in early November and rails were craned over UB56 to form a stockpile on the approach to Tros-y-gol. The bridge was removed on the same day, sharing the costs of the crane hire between Jones Bros. and the WHLR.
As all the sleepers were spaced out ready, it was possible to lay track north from Tros-y-gol reaching Ch.8300 approx. during the weekend of 16-17/11/02. Another rapid advance in the Head of Steel towards Salem was expected w/e 1/12/02. The curved rails from the remaining stockpile at Dinas have been used and these are useful on the sharp curves around Tros-y-gol.
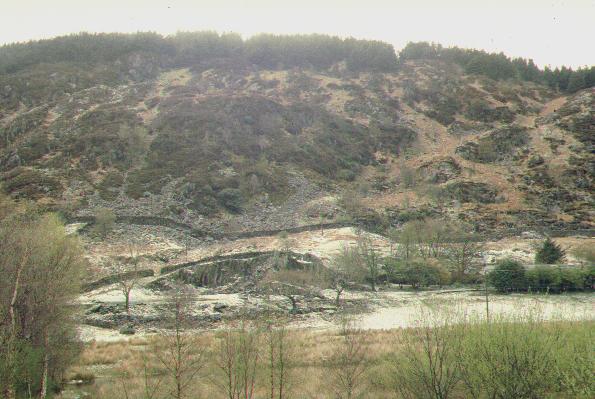
This northerly archive view shows the end of the rock-built shelf above the Afon Gwyrfai at Ch. 8850 approx. The river is visible below to the right. The Gwyrfai valley is narrowing to a defile at this point, where the Gwyrfai Falls cut the rock at Pont Cerrig-y-rhyd. Click on the image to enlarge. This image is copyright B.W.Hughes. Slide scan technology utilised is Olympus ES10 & iPhoto Plus4. Slide scanned at 200dpi.
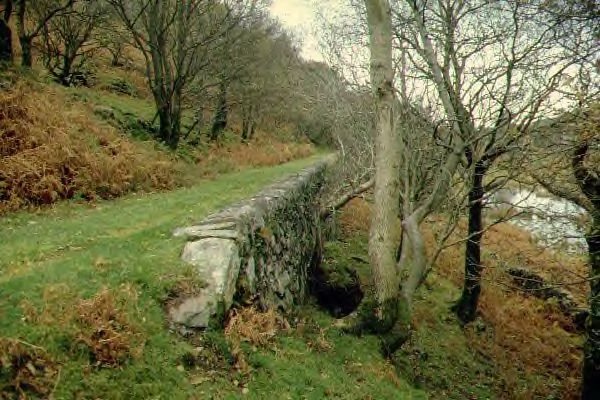
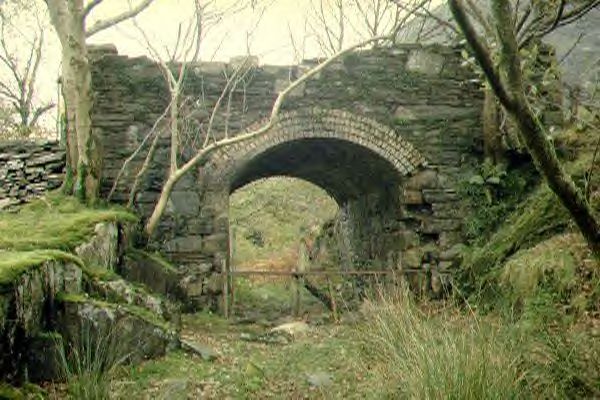
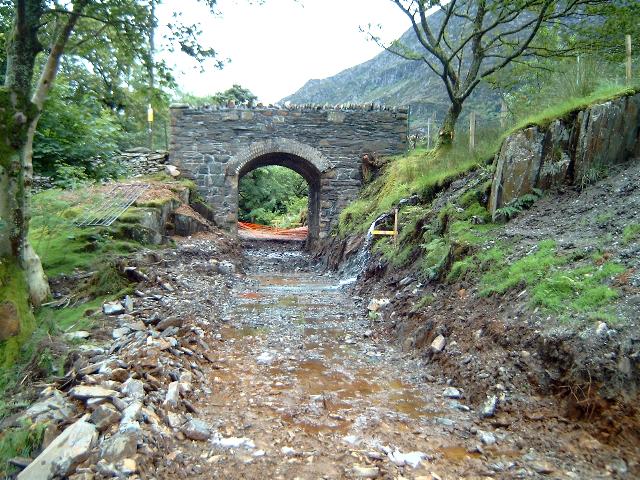
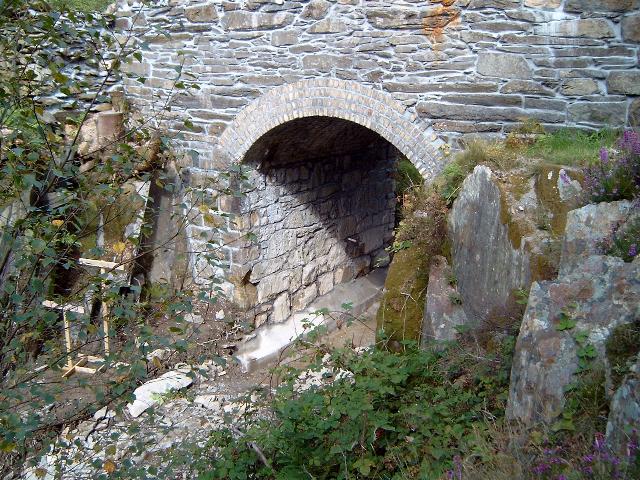
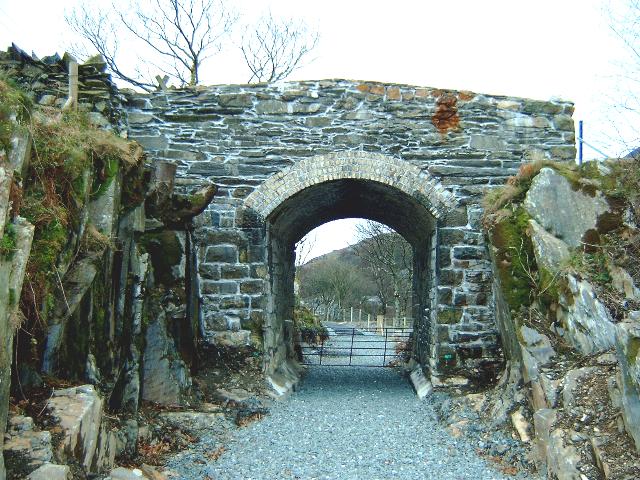
Cerrig-y-rhyd bridge OB62
The trackbed runs into a rock cutting and passes under the bridge at Ch. 8920. This bridge is a typical NWNGR overbridge, built with a partial arch (like the one at Tryfan Junction) in local stone. It will require underpinning and the base of the cutting will require rock excavation to provide clearance for the larger Garratt loading gauge.
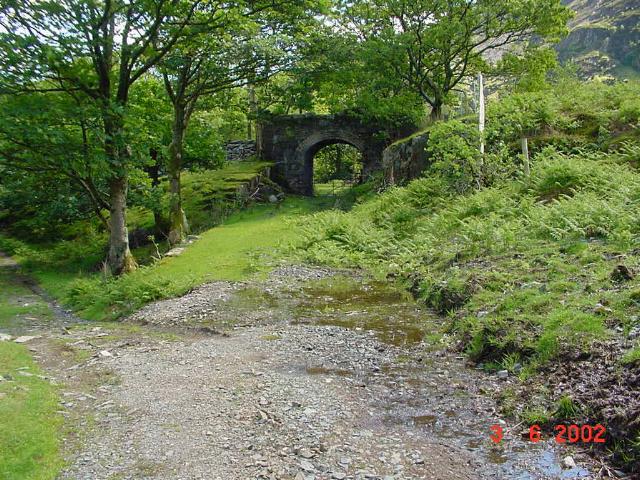
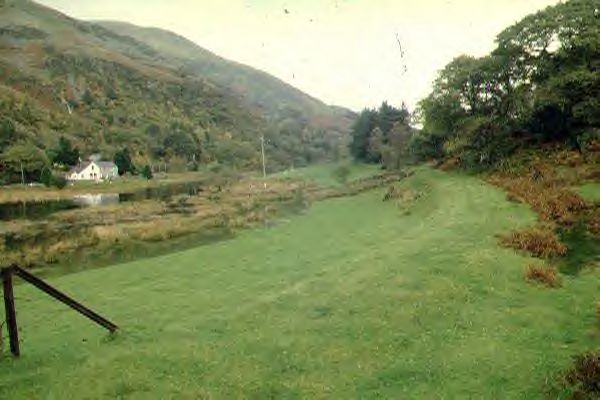
This southerly view shows OB62 from Ch.8900. An alternative access to the house on the railway side of the river at Salem will be constructed to the left. Click on the image to enlarge. This image is copyright WHLR, courtesy Jan Woods. Image displayed at 96dpi.
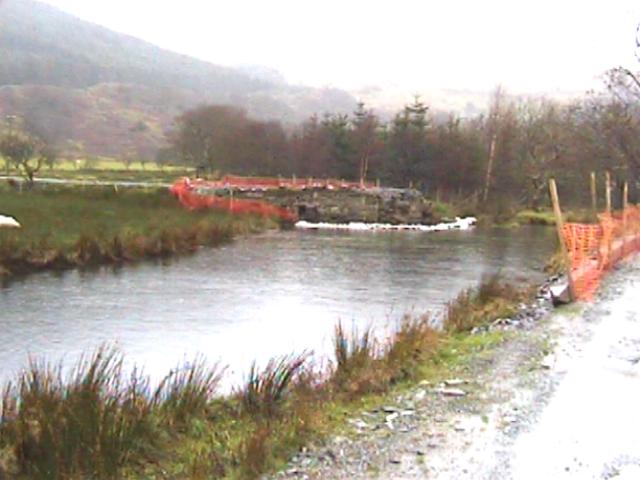
This southerly archive view shows OB62 at Ch. 8820. The bridge is a flat arch similar to that at Tryfan Junction. The cutting will require some deepening to achieve the necessary clearance for the Garratt loading gauge. The route is sharply curved on this section and will afford good views of the locomotive leading the train. The right hand abutment of the portal shows evidence of some 'borrowing' of dressed stone. This image is copyright B.W.Hughes. Slide scan technology utilised is Olympus ES10 & iPhoto Plus4. Slide scanned at 200dpi.
This southerly view (2/8/02) of OB62 shows the excavation of the trackbed to create a metre of increased clearance under the bridge. This was completed by using a rock pecker which fragmented the rock base under the trackbed. Click on the image to enlarge. This image is copyright B W Hughes. Image taken on Samsung Digimax230 digital camera using iPhoto Plus4 image correction technology. Image displayed at 96dpi.

This southerly view (30/10/02) shows the completed ballasted formation through Pont Cerrig-y-rhyd. Fencing needs to be completed in this area. Click on the image to enlarge. This image is copyright B.W.Hughes. Image taken using Samsung Digimax230 digital camera and post processed with iPhoto Plus4. Image displayed at 96dpi.
This southerly view (31/12/02) shows the completed ballasted formation through Pont Cerrig-y-rhyd with sleepers laid out. Track should be laid through here by February. Click on the image to enlarge. This image is copyright B.W.Hughes. Image taken using Samsung Digimax230 digital camera and post processed with iPhoto Plus4. Image displayed at 96dpi.
This northerly view (5/8/02) from the public footpath on OB62 shows the trackbed now excavated to full depth. Drainage was added over the next few days. Click on the image to enlarge. This image is copyright B.W.Hughes. Image taken on Samsung Digimax 230 digital camera using iPhoto Plus4 image correction technology and displayed at 96dpi.
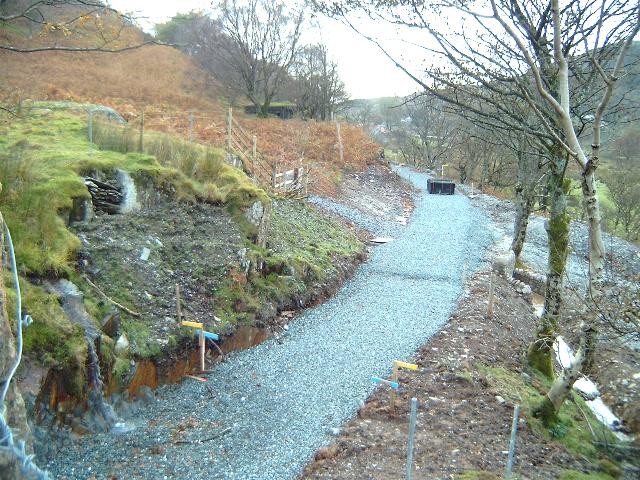
This northerly view (30/10/02) shows the ballasted formation from Pont Cerrig-y-rhyd. The seasonal waterfall visible on the left does not have a catch pit or drainage and the soaked area of ballast could present problems in the future. Click on the image to enlarge. This image is copyright B.W.Hughes. Image taken using Samsung Digimax230 digital camera and post processed with iPhoto Plus4. Image displayed at 96dpi.

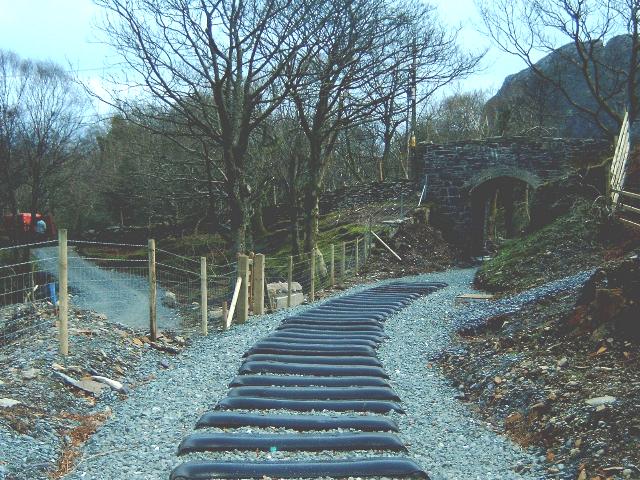
This northerly view (30/11/02) shows the recent ballasting with sleepers laid out. the ballast step is to accommodate wooden sleepers through OB62 so that check rails may be fitted. A van is visible driving along the newly diverted house access. Click on the image to enlarge. This image is copyright B W Hughes taken on a Hitachi D8 digital camcorder VM-D865LE 230. Image post processed using iPhoto Plus4 image correction technology and displayed at 96dpi.
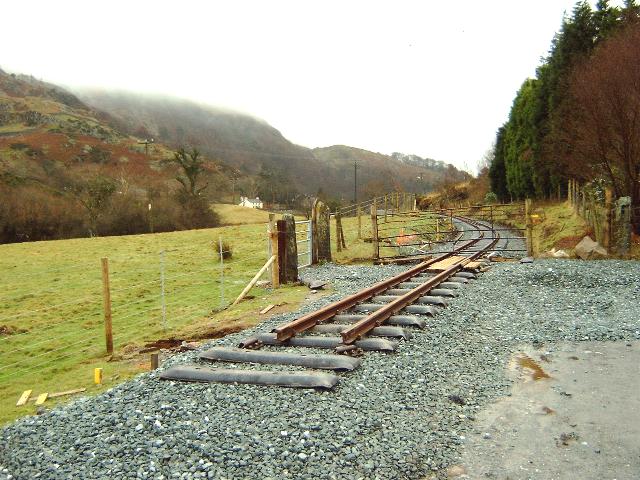
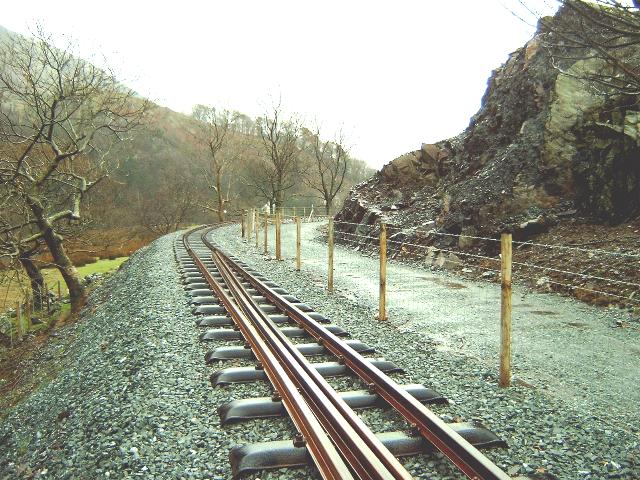
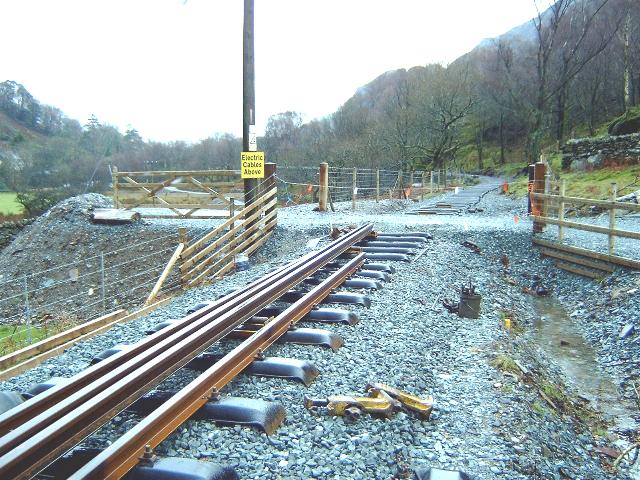
This northerly view (26/1/03) shows the track now laid through the bridge. Wooden sleepers have been used to allow checkrails to be fitted. A gap in the sleepers (left) probably represents where a drain will be constructed for the waterfall that is currently soaking into the trackbed. Click on the image to enlarge. This image is copyright B W Hughes. Image taken on Samsung Digimax230 digital camera using iPhoto Plus4 image correction technology. Image displayed at 96dpi.
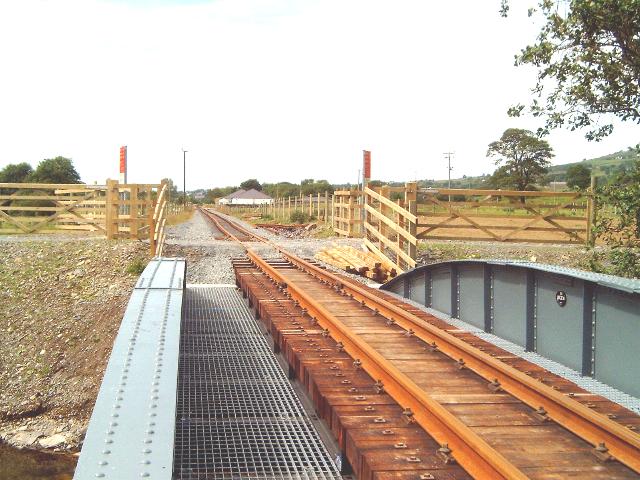
This northerly view (17/4/03) shows the wooden sleepers replaced by steel sleepers through OB62, as check rails have not been required through this bridge. A few wooden sleepers remain. Click on the image to enlarge. This image is copyright B W Hughes. Image taken on Samsung Digimax230 digital camera using iPhoto Plus4 image correction technology. Image displayed at 96dpi.

This northerly archive view shows OB62 at Ch. 8820 at Pont Cerrig-y-rhyd. The bridge spans a 2 m deep rock cutting adjacent to the Gwyrfai Falls. A local resident has marked the trackbed as 'Private' from OB62 to Plasynant. Click on the image to enlarge. This image is copyright B.W.Hughes. Slide scan technology utilised is Olympus ES10 & iPhoto Plus4. Slide scanned at 200dpi.
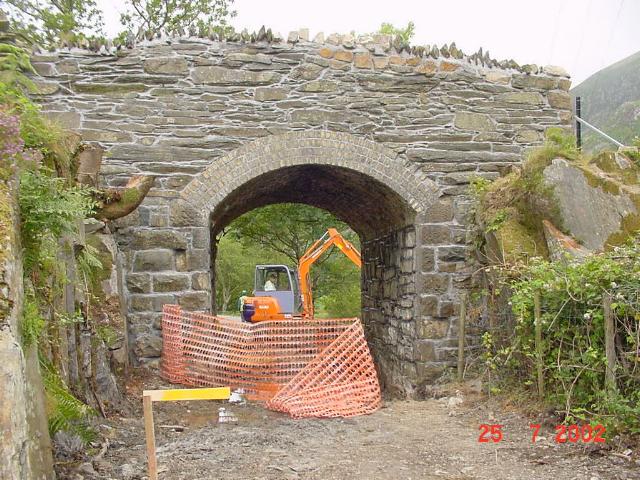
This northerly view (25/7/02) shows some excavation underway through OB62 to expose the foundations. The bridge has been repointed in untypical grey mortar. Eventually, the trackbed will be lowered by 1m through this bridge by excavating the rock floor of the cutting. Click on the image to enlarge. This image is copyright WHR, courtesy Jan Woods. Image post processed with iPhoto Plus4 image correction technology and displayed at 96dpi.
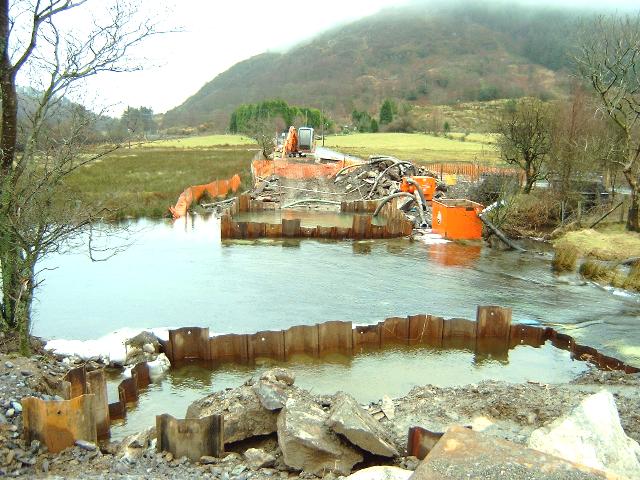
This northerly view (26/8/02) from the public footpath at Pont Cerrig-y-rhyd shows underpinning complete. Once excavated to the correct depth, it was found that the rock under the foundations was sound except in the north west corner where steel pins were driven beneath the foundation stones. Both sides of the bridge foundations have had a reinforced concrete buttress added, visible in this view. The way is now clear for Jones Bros. to firm up the trackbed with slate waste through the bridge to Plas-y-nant and add drainage. Click on the image to enlarge. This image is copyright B W Hughes. Image taken on Samsung Digimax230 digital camera using iPhoto Plus4 image correction technology. Image displayed at 96dpi.
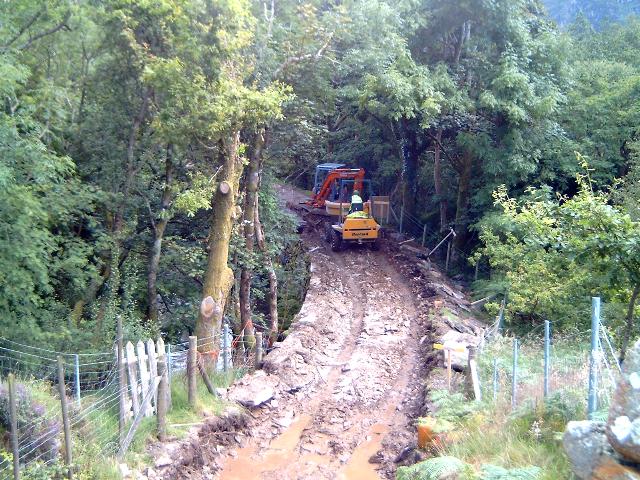
With the basic excavation done between the arches by Jones by 7/8/02, a specialist contractor was called in to do the rock pecking around the foundations and was working late into the evening from 9/8/02 and into the following week. The foundations are based on local rock which it was thought might have been shattered when the cutting was blasted in NWNGR days.
A concrete bracing structure was provided for each abutment. In fact very little underpinning has been found necessary (just the north west corner so far) as the rock under the foundations is mostly sound. Rods have been driven in under the abutments to support the stonework while the shattered rock was excavated from beneath and replaced by concrete. Progress had been rapid.
This northerly view (31/12/02) shows the completed ballasted formation through Pont Cerrig-y-rhyd. The concrete shoulders that support the underpinning are visible on both sides. Click on the image to enlarge. This image is copyright B.W.Hughes. Image taken using Samsung Digimax230 digital camera and post processed with iPhoto Plus4. Image displayed at 96dpi.

This northerly view (17/4/03) shows the completed track through OB62. Although this was initially laid with wooden sleepers, these have been replaced with steel sleepers as check rails are not required. Click on the image to enlarge. This image is copyright B W Hughes. Image taken on Samsung Digimax230 digital camera using iPhoto Plus4 image correction technology. Image displayed at 96dpi.

This northerly view (12/9/02) from the trackbed south of Pont Cerrig-y-rhyd shows underpinning complete. The formation level has been reduced by up to 1m along this riverside embankment. Click on the image to enlarge. This image is copyright WHLR, courtesy Jan Woods. Image post processed using iPhoto Plus4 image correction technology and displayed at 96dpi.
Gwyrfai gorge
North of OB62, the railway swings through sharp reverse curves in the Gwyrfai Gorge, following a river meander. This is the site of the original Caernarfon Waterworks and Nant Mill. A cutting through the rock spur shows the former location of the waterwheel. South of OB62, the railway is carried on a rock wall embankment which constricts the Afon Gwyrfai to a narrow channel to the east.
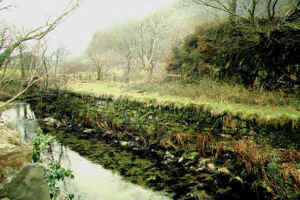
This southerly archive view shows the route curving sharply on a rock wall 3 metres above the Afon Gwyrfai. The rock wall embankment cuts off a river meander and confines the river to a narrow gorge. Sleeper spacings are still visible in the grass on this section. Click on the image to enlarge. This image is copyright B.W.Hughes. Slide scan technology utilised is Olympus ES10 & iPhoto Plus4. Slide scanned at 200dpi.
This southerly view (24/10/01) shows fencing and tree clearance complete south of OB62. Achnashean had now completed fencing from just south of Cae Hywel bridge to Plas-y-nant bridge and the site was available for contractors to start construction early in Spring 2002. Click on the image to enlarge. This image is copyright B.W.Hughes. Slide scan technology utilised is Olympus ES10 & iPhoto Plus4. Slide displayed at 96dpi.
This southerly view (5/8/02) shows Jones Bros excavating the rock wall through the Gwyrfai Gorge. The 1m deepening of the trackbed through the bridge is being run out over the 100m or so to the Gwyrfai bridge at Plas-y-nant, increasing the gradient to 1 in 60 on this section. Click on the image to enlarge. This image is copyright B.W.Hughes. Image taken on Samsung Digimax 230 digital camera using iPhoto Plus4 image correction technology and displayed at 96dpi.

This southerly view (30/10/02) shows the ballasted formation completed along the ledge through the Gwyrfai Gorge. Click on the image to enlarge. This image is copyright B.W.Hughes. Image taken using Samsung Digimax230 digital camera and post processed with iPhoto Plus4. Image displayed at 96dpi.

This southerly view (30/11/02) shows the recently completed ballast now with sleepers laid, just south of OB62. The ballast step is because wooden sleepers will be laid through OB62 to allow the fitting of check rails. Click on the image to enlarge. This image is copyright B W Hughes taken on a Hitachi D8 digital camcorder VM-D865LE 230. Image post processed using iPhoto Plus4 image correction technology and displayed at 96dpi.
This southerly view (26/1/03) shows the track now laid through the bridge and onto the rock wall embankment through the gorge. Click on the image to enlarge. This image is copyright B W Hughes. Image taken on Samsung Digimax230 digital camera using iPhoto Plus4 image correction technology. Image displayed at 96dpi.
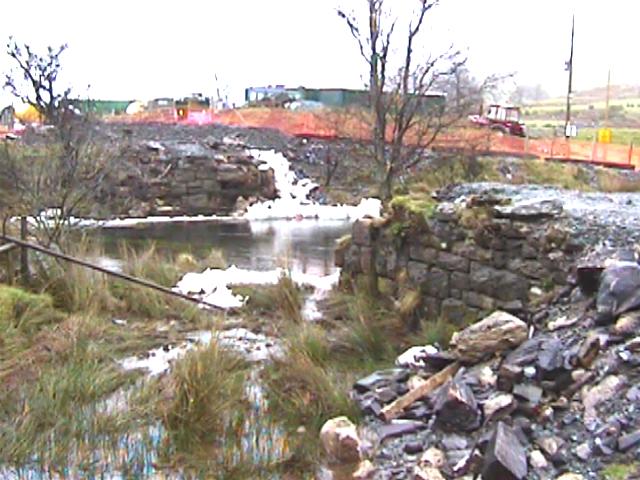
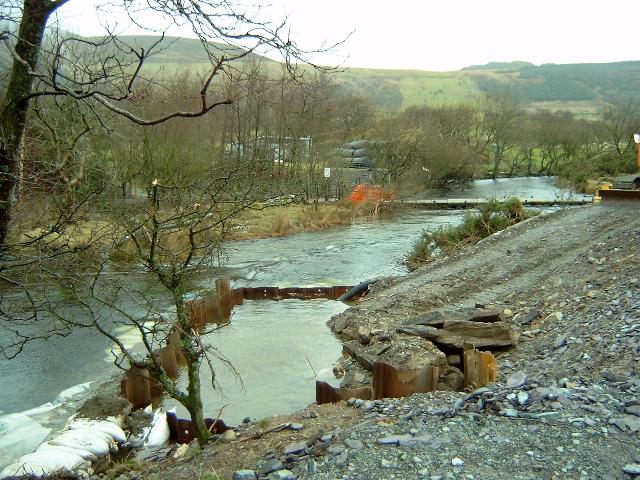
This westerly roadside view (26/8/02) from Nant Mill shows the repair work being done on the rock wall embankment through the Gwyrfai Gorge. At this point the river goes over a weir and has scoured out some of the rocks from the wall on which the railway is based. White sandbags can be seen just above the weir and Jones appears to be concreting the void and presumably finishing with local stone. Click on the image to enlarge. This image is copyright B W Hughes. Image taken on Samsung Digimax230 digital camera using iPhoto Plus4 image correction technology. Image displayed at 96dpi.
This northerly archive view shows the rock wall embankment curving sharply towards Cerrig-y-rhyd bridge. The rock wall cuts off a river meander and confines the river to a narrow gorge. The original Caernarfon Waterworks are to the right. Click on the image to enlarge. This image is copyright B.W.Hughes. Slide scan technology utilised is Olympus ES10 & iPhoto Plus4. Slide scanned at 200dpi.
This northerly view (25/7/02) shows the cleared trackbed. The danger sign refers to the rock wall approaching UB64. Click on the image to enlarge. This image is copyright WHR, courtesy Jan Woods. Image post processed with iPhoto Plus4 image correction technology and displayed at 96dpi.
This northerly view (31/12/02) shows the completed ballasted formation with sleepers laid ready for tracklaying through the Gwyrfai Gorge at Nant Mill. Click on the image to enlarge. This image is copyright B.W.Hughes. Image taken using Samsung Digimax230 digital camera and post processed with iPhoto Plus4. Image displayed at 96dpi.
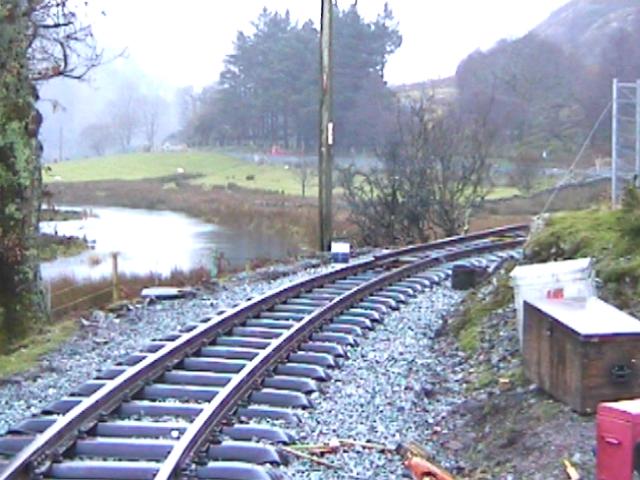
This northerly view (26/1/03) shows the track now laid onto the rock wall embankment through the gorge. The Head of Steel is visible just two rails lengths short of the Plas-y-nant bridge. Click on the image to enlarge. This image is copyright B W Hughes. Image taken on Samsung Digimax230 digital camera using iPhoto Plus4 image correction technology. Image displayed at 96dpi.

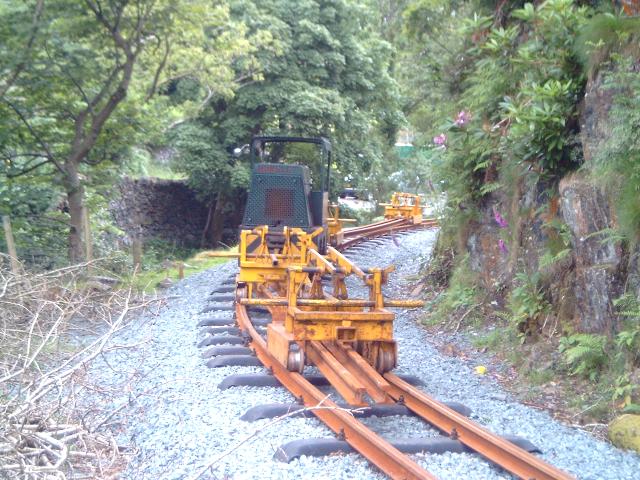
This northerly view (17/4/03) shows tracklaying through the Gwyrfai Gorge. These temporary lengths were laid over two days in order to carry rail north from the rail stack at Plas-y-nant. Click on the image to enlarge. This image is copyright B W Hughes. Image taken on Samsung Digimax230 digital camera using iPhoto Plus4 image correction technology. Image displayed at 96dpi.
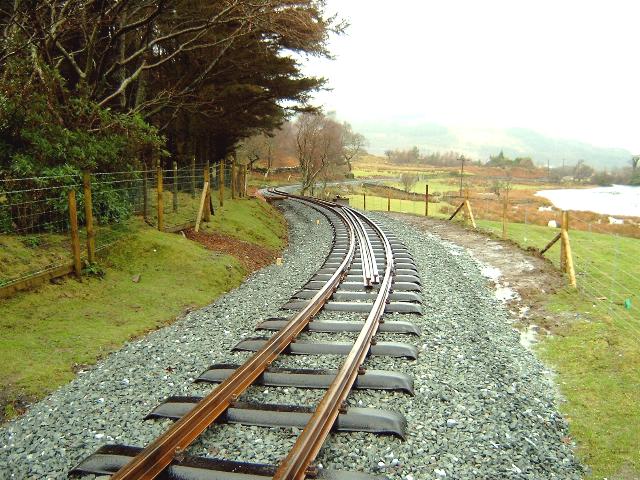
This southerly view (28/6/03)shows Harold propelling and pulling two sets of rails on the curve just north of Plas-y-nant. Click on the image to enlarge. This image is copyright B W Hughes. Image taken on Samsung Digimax230 digital camera using iPhoto Plus4 image correction technology. Image displayed at 96dpi.
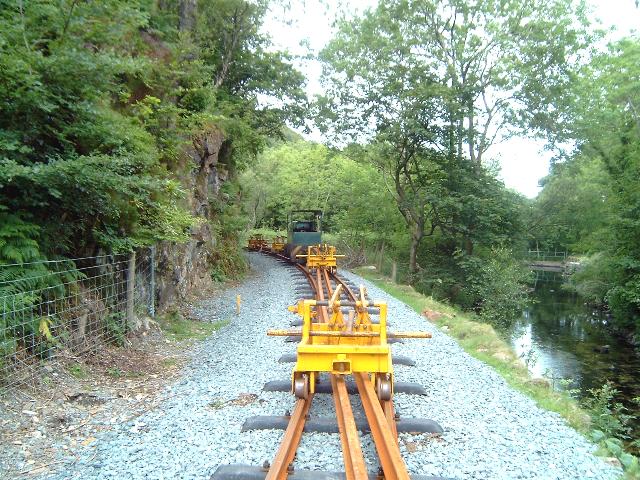
This southerly view (28/6/03)shows Harold on the curve just north of Plas-y-nant having collected rails from Plas-y-nant and about to take them to Betws Garmon. Click on the image to enlarge. This image is copyright B W Hughes. Image taken on Samsung Digimax230 digital camera using iPhoto Plus4 image correction technology. Image displayed at 96dpi.
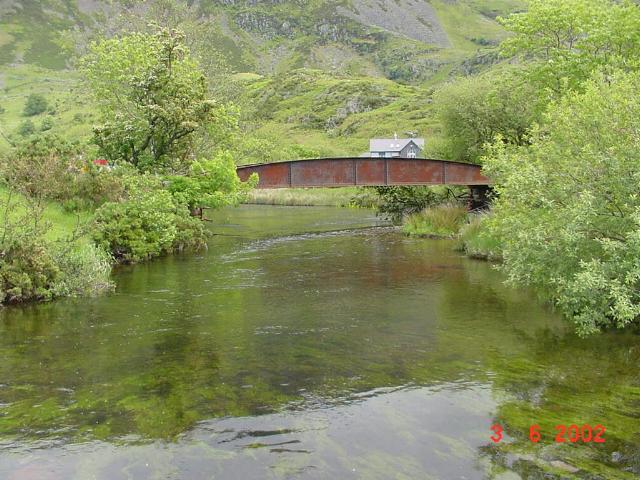
This southerly view (20/2/01) taken from the main road shows the route emerging from the Gwyrfai Gorge into the Upper Gwyrfai valley. The railway comes off the rock cut ledge and onto the bowstring bridge (UB64) visible on the left. Click on the image to enlarge. This image is copyright B.W.Hughes. Slide scan technology utilised is Olympus ES10 & iPhoto Plus4. Slide scanned at 200dpi.
Click here to visit the Plas-y-nant Bridge page
Click here to visit the Plas-y-nant to Castell Cidwm page
Click here to return to Stop Press page
Site Development
If you have suggestions for development of this site, please contact me by email at the address on the Stop Press page.
Page Version 3.28 dated 1/7/03