WHR
Nantmor to Pont Croesor
area page
V4.17 updated 16/7/07
New images on this page are from 12/7/07
Click here for start of new images
Click here for Laurence Armstrong's latest WHR Middle map
Click here for Laurence Armstrong's latest WHR South map
Click here for Steve Harris' Phase 4 gradient profiles
Click here for Steve Harris' Phase 4 TWA maps
Click here for Chainages and OS Map References
Locations
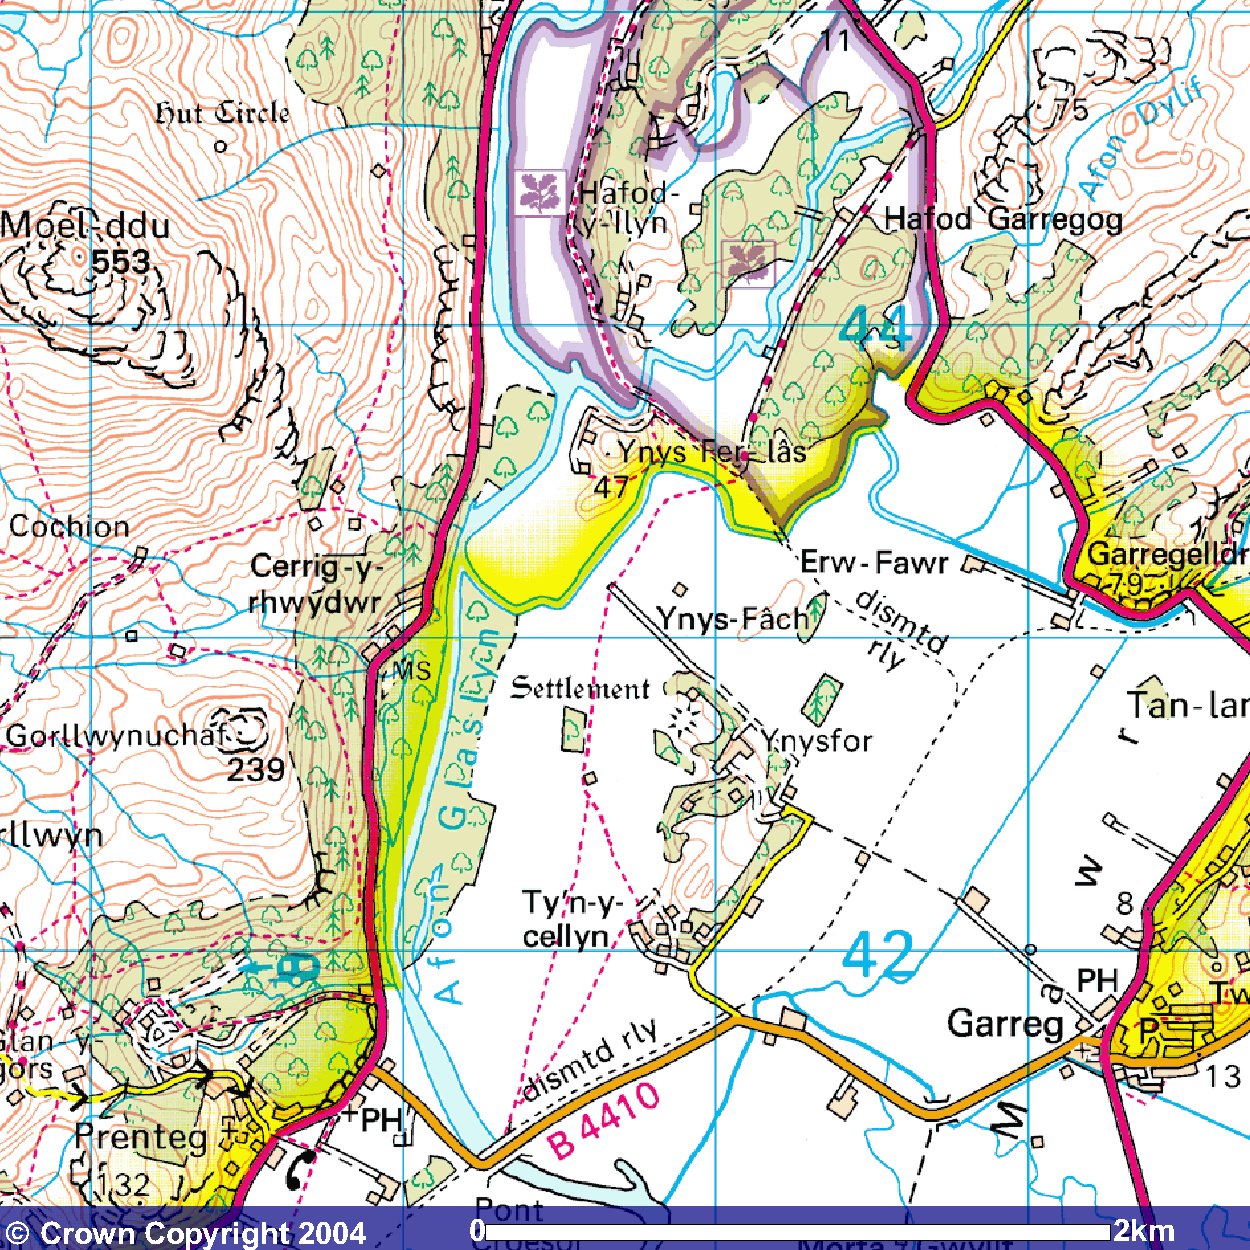
The above OS map shows the route from a point south of Nantmor to Pont Croesor. Click on the image to enlarge. Image produced from the Ordnance Survey Get-a-map service. Image reproduced with kind permission of Ordnance Survey and Ordnance Survey of Northern Ireland.
Click here to use the free OS Get-a-map service.
The section begins LC92 at Ch. 24910 , just north of Nantmor Halt. The Halt had a tin sheeting shelter on the right side and a 40 foot siding on the left side.
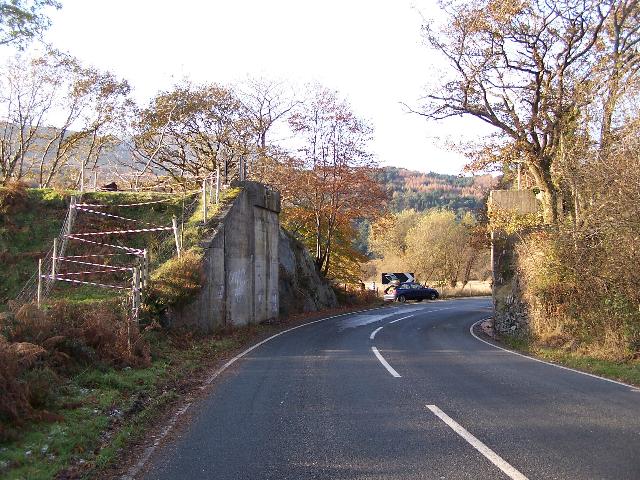
The route now approaches the road closely after Ch. 25000 and is on an embankment in the trees just above the A4085. There is a sharp curve onto a long straight to the southwest at UB181. The alignment follows the curve of the hillside and the main road on the floodplain below.
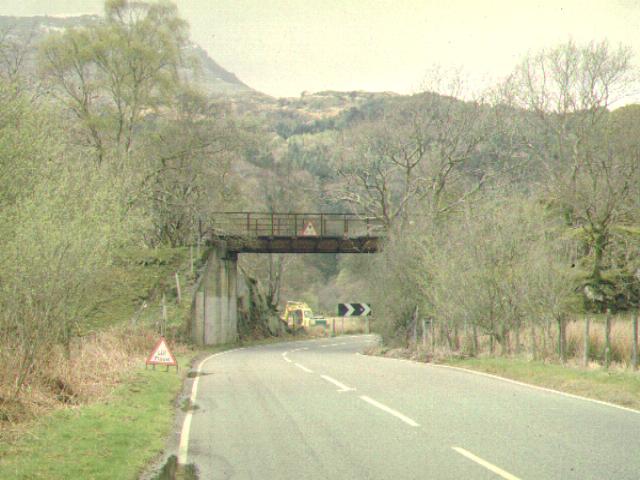
The route now runs through a rock cutting and onto an embankment crossing the A4085 on UB182. The bridge and re-inforced concrete abutments are still in place, although recently fenced off. There are rails present just north of UB182 from the early attempts by the WHR ('64) Co, as it was then known, to restore the Beddgelert-Porthmadog section.
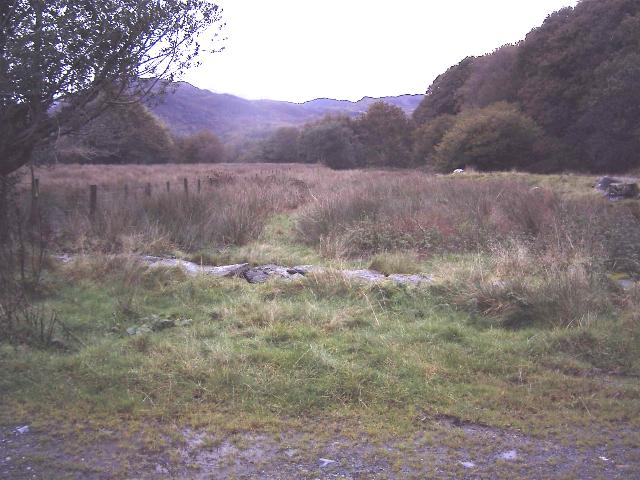
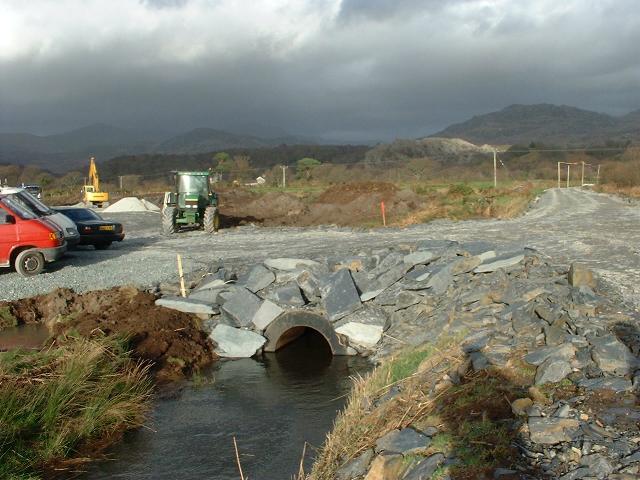
The embankment drops steeply down to the floodplain at LC94 (Ch. 25800), where it meets the Afon Glaslyn to the right. There is the remains of a broken off steel pole at this location. As the railway did not have signals, the function of this post is a mystery.
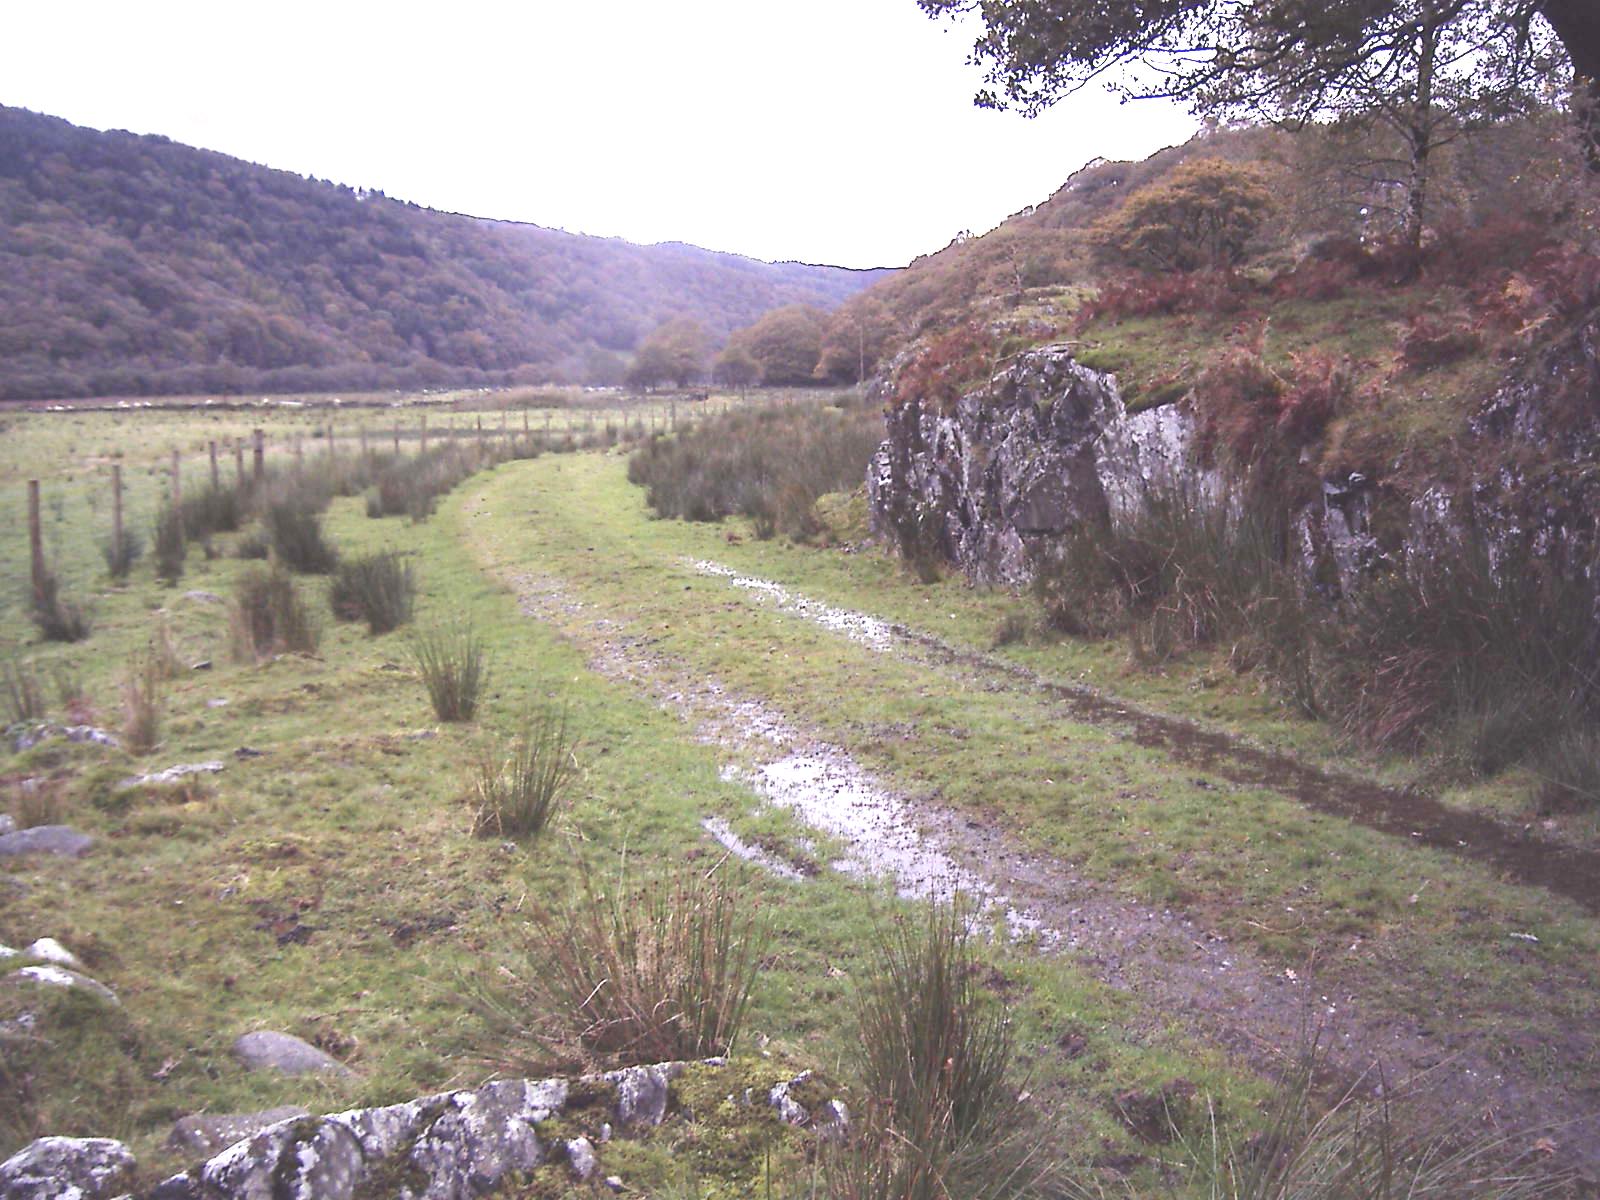
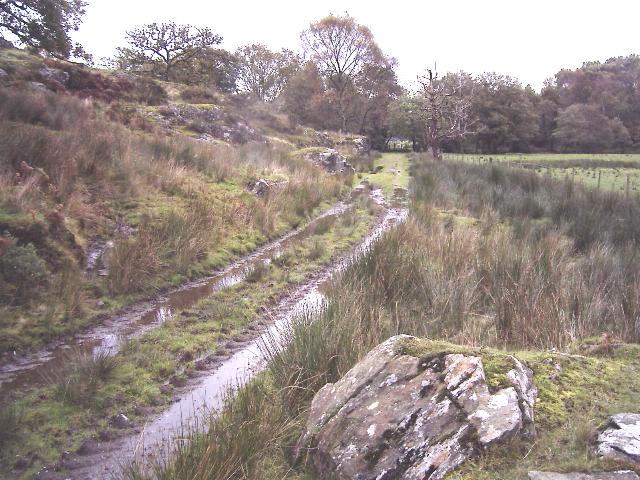
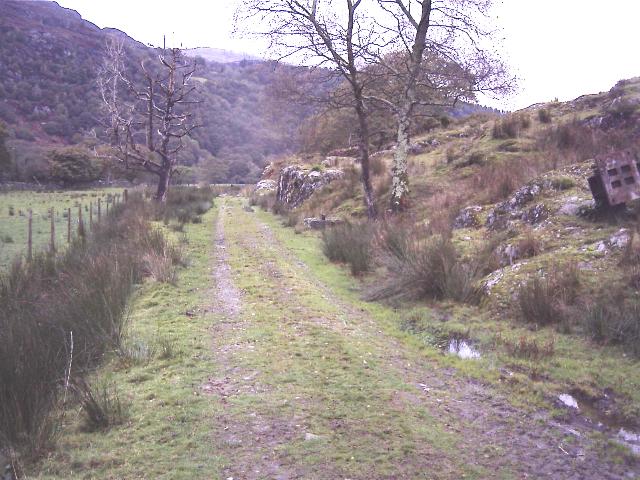
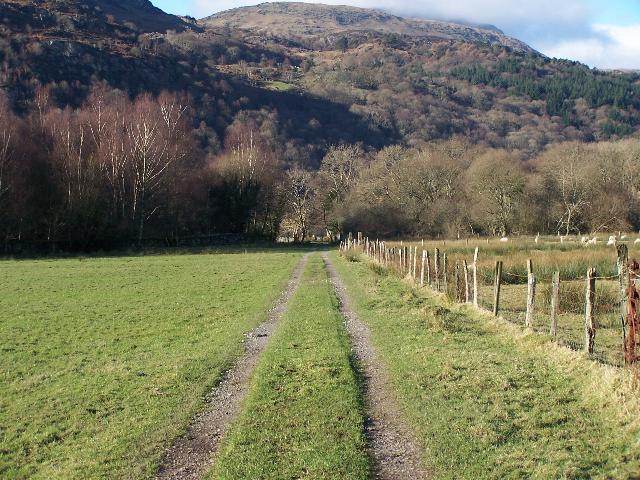
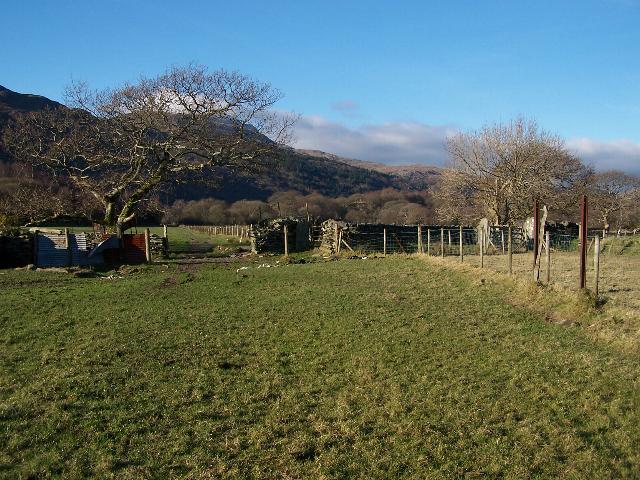
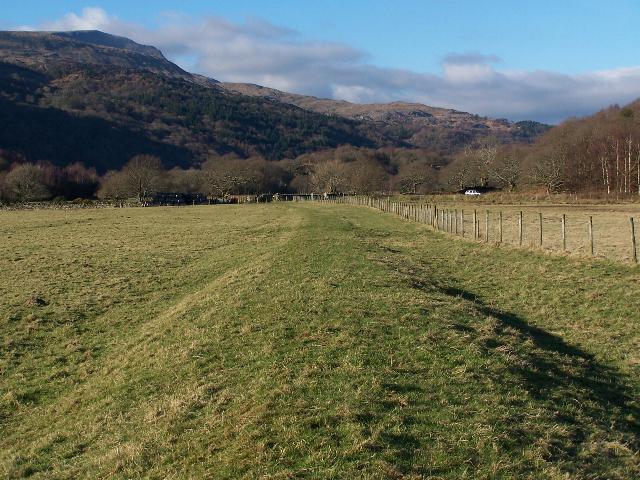
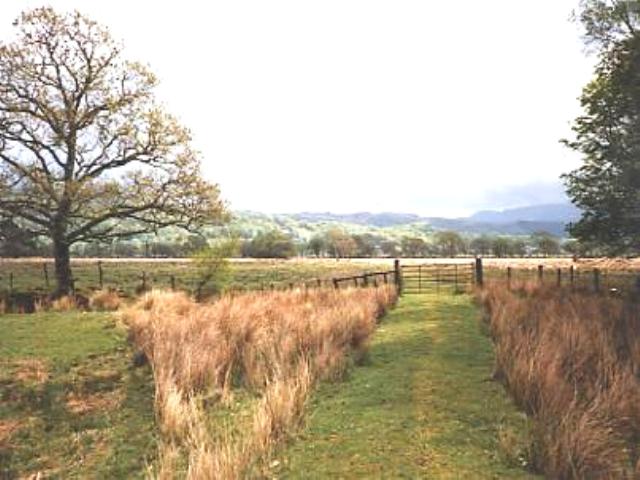
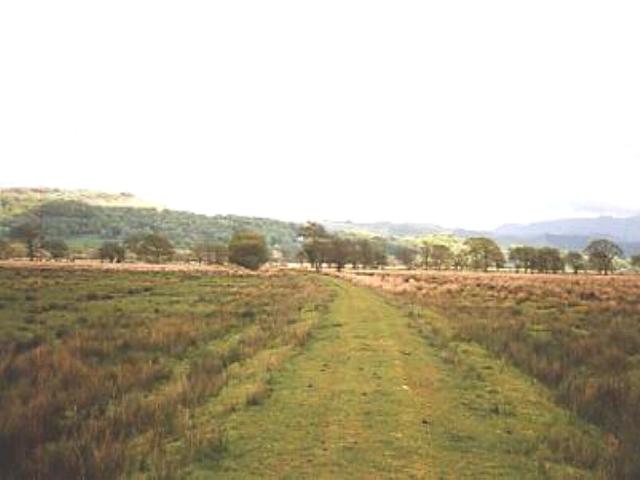
The railway now commences a long run to the south along the east bank of the Afon Glaslyn. Curves are very gentle on this section. The hillside is to the left along this section and a public bridleway/footpath runs along the east side of the line, tarmaced for some of its length. About halfway along the public footpath to Hafod-y-Llyn, the roadway transfers onto the trackbed and a new 'mitigation' farm track will be required, possibly along the east side, though this would then require frequent accommodation crossings to fields.
At LC103 (Ch. 27100) the alignment passes Hafod-y-Llyn Halt. A slight deviation to the west is planned here to make room for the access road to the west. The route now turns southeast through a gap in the ridge cut by the Afon Nanmor. Ynys Ferlas is to the right. The public footpath follows the railway closely.
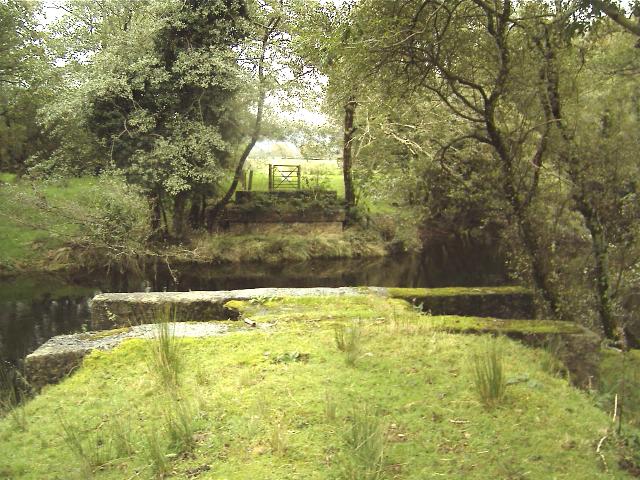
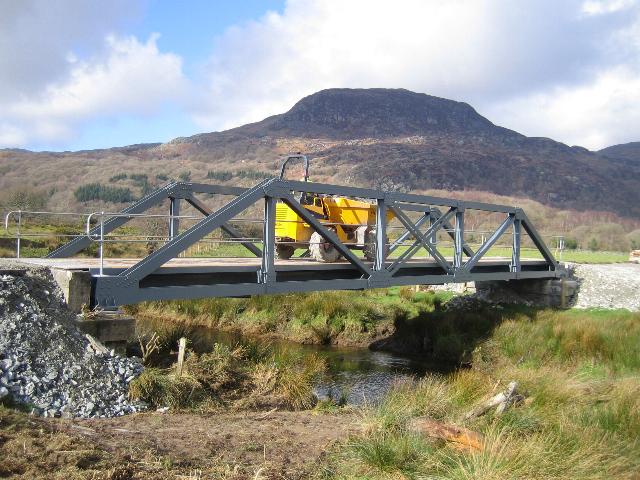
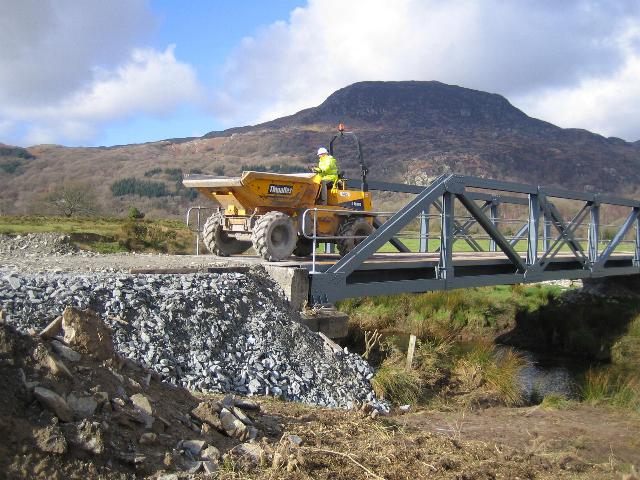
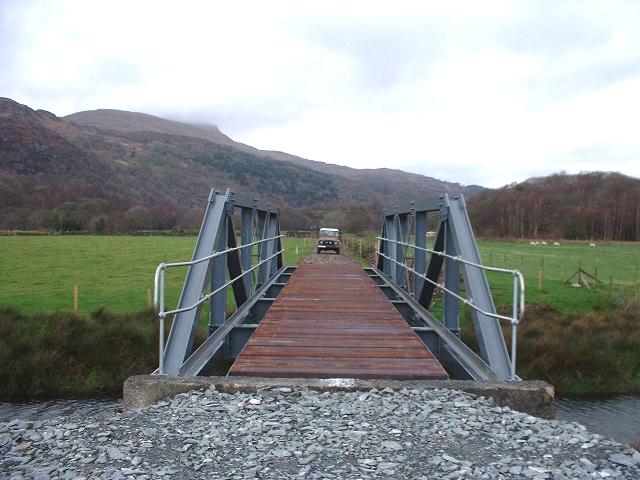
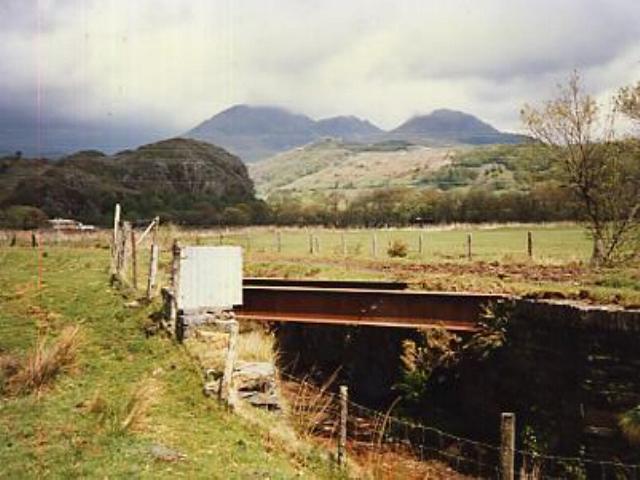
The Afon Nanmor bridge (UB196) follows at Ch. 27400. This bridge is one of three similar structures of which Bryn-y-felin bridge in the Aberglaslyn Pass was the best known example. The bridges were removed and cut up by the WHLR when it took possession of the route as they were dangerously rusted. The three bridges had apparently never been painted. A new bridge is to be provided.
The route continues in a south-easterly direction with the public footpath adjacent. At LC105 (Ch. 27800), the alignment finally leaves the footpath. The railway embankment continues onto the Afon Dylif bridge UB199 at Ch. 28050, the third and final girder bridge. This has also been removed since the FR took over, for safety reasons, as above.
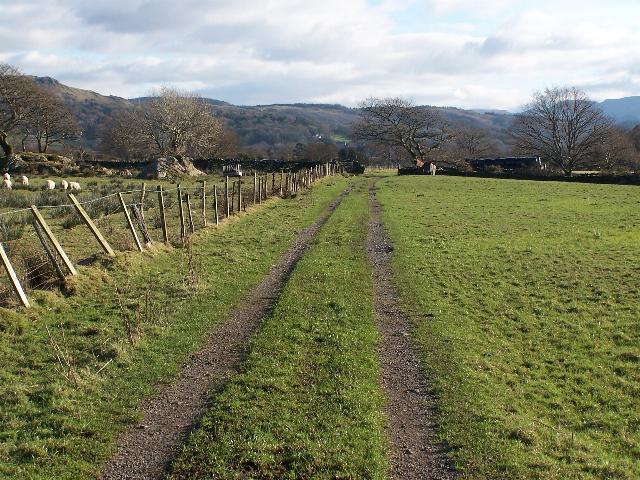
The alignment continues southeast from the bridge heading towards Croesor Junction on a shallow embankment. At Ch. 28700, the route takes a sharp 90 degree turn to the right into the site of Croesor Junction. The alignment of the former Croesor Tramway can be seen approaching from the left, joining the WHR alignment at Ch. 28900.
At Croesor Junction, there was a 140 yard passing loop south of the junction itself. It is not planned to re-instate the loop as a 200 metre long loop will be constructed at Pont Croesor. The railway now commences a long straight to the south west.
The route passes the site of Ynysfor Halt at LC110 (Ch. 29,400), an accommodation crossing. The waiting room was to the right just before the crossing. On the right, immediately after the crossing was a 40 foot siding adjacent to the Lodge. This was provided in 1924, probably for agricultural traffic.
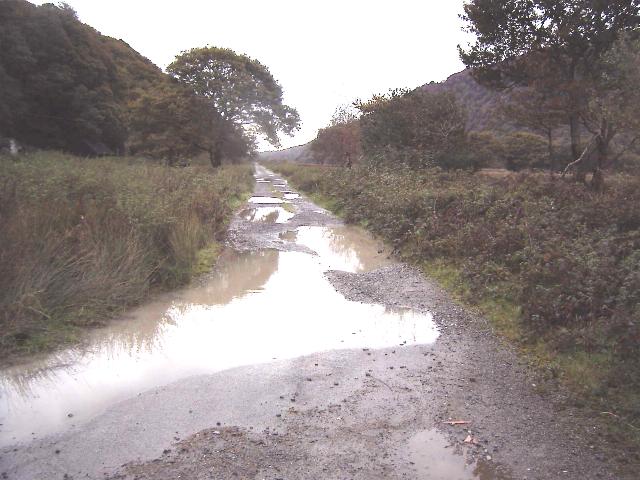
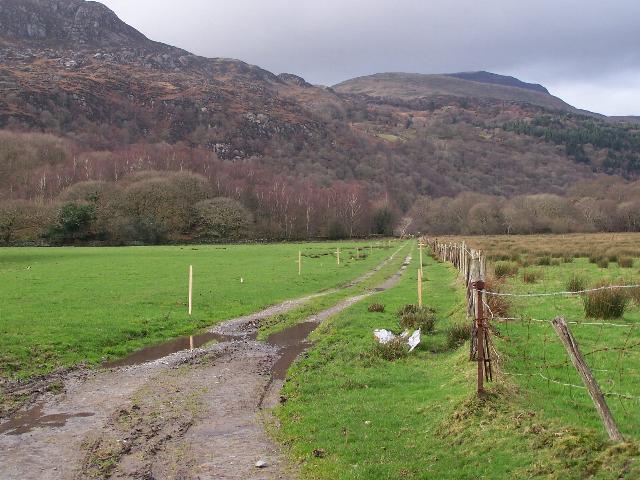
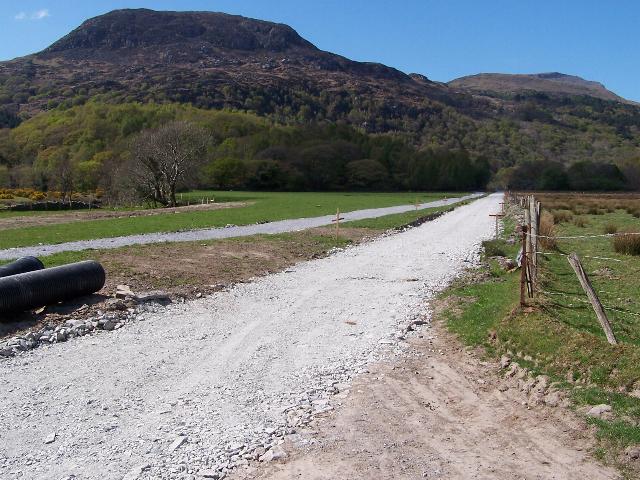
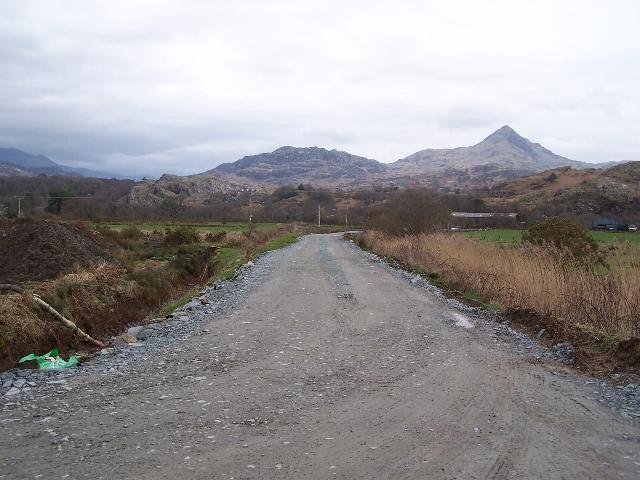
After Ch. 30000, the railway curves slightly to the right and comes into line with the B4410 which runs along the south side. At LC112 (Ch. 30130), the railway crosses a lane off the B4410. The route is overgrown with gorse from this point to Pont Croesor.The alignment runs straight along a shallow narrow sand-built bank along the north side of the B4410 and this may need strengthening.
At Ch. 30960, there is a public footpath crossing (LC113) at the northeast end of Pont Croesor. It gives access to the footpath from Ynys Ferlas that was met earlier crossing the line at LC105. To the right is the site of an original WHR water tank that was mounted on a pile of sleepers. It was formerly the tank used by the FR to supply seawater to Plas Tan-y-bwlch. Pont Croesor is the furthest point that tides reach in the Glaslyn Estuary and a small weir is present under the bridge.
The railway runs on the north side of the 60 metre long Pont Croesor (UB212) at Ch. 31000. The parallel road bridge was rebuilt with a cast concrete deck in the late 1990s on the original eight piers. The railway deck, which shared the same piers, was removed some time ago. It is intended to rebuild the railway piers and extend them to the north to allow for the wider loading gauge of modern WHR trains.
At the southwest end of the bridge is LC114 (Ch. 31050) where the B4410, on the railway's south side, turns sharp right. At this point the route joins the works to be completed by the WHR(P). There will be a points for a 200 metre long loop immediately after LC114.
Gradients
The formation drops at 1 in 40 through Nantmor Halt, then 1 in 50/70/200 down to the A4085 road bridge. The embankment to the floodplain beyond is taken at 1 in 40/70/400. There follows a 1 km level section before a short rise at 1 in 500 up to the Afon Nanmor bridge. The route is level across the bridge followed by a 1 in 180 down onto the floodplain again. The railway rises at 1 in 200 onto the Afon Dylif bridge, which is again level, before falling at 1 in 400 back to the floodplain.
The route is level through Croesor Junction but drops at 1 in 500 to the level of the B4410 at LC112. It runs level alongside the B4410, before dropping at 1 in 500 to Pont Croesor. The bridge itself is level. Southwest of the bridge the railway drops at 1 in 655.
Nantmor Halt
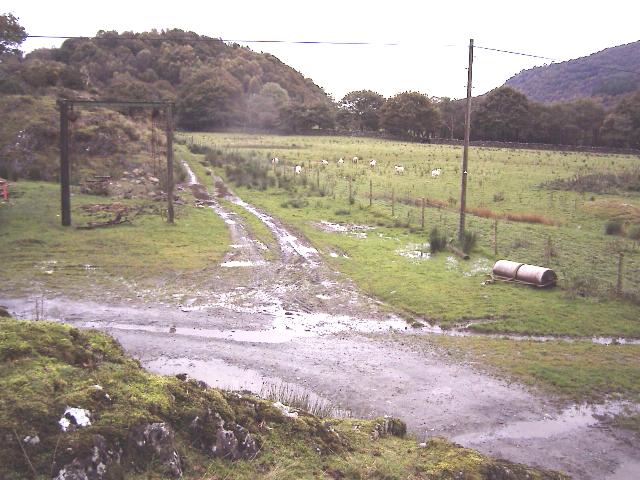
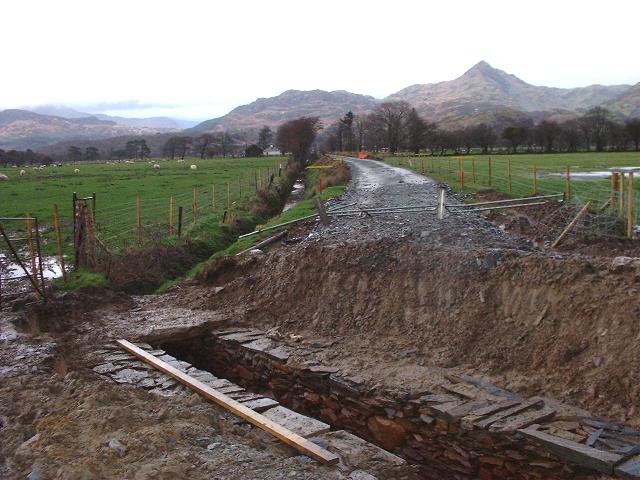
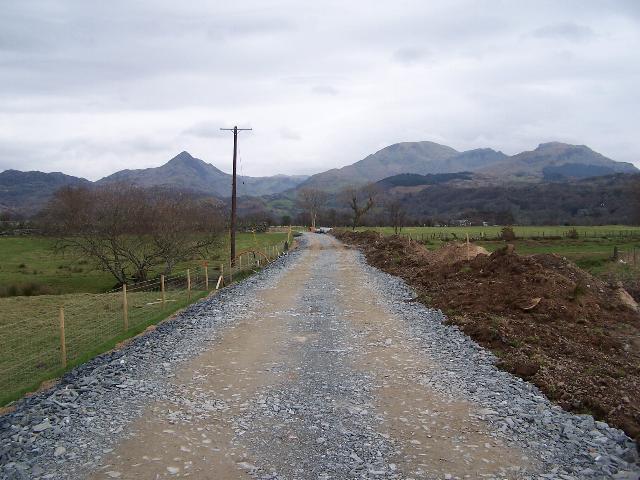
The halt lies just south of the village level crossing (LC92) at Ch.24900 and had a 4' siding. The WHRCL has applied for planning permission for Nantmor Halt now that residents have agreed they want the halt. By 19/6/07, James Cyf. had started the advance works on the narrow topped embankment south of Nantmor Halt at Ch.25050 once the rockwork had been finished. This has been reduced in height by about almost down to ground level and will be rebuilt using a reinforced earth technique to provide the standard formation width.


These southerly views (archive and 20/5/07) from LC92 shows the site of Nantmor Halt beyond the gate. The WHR has applied for planning permission for a halt here for local traffic and walkers wishing to walk the Aberglaslyn Pass to Beddgelert station. the second view shows water main concrete breakout from the Aberglaslyn Tunnels and the cut up blue plastic pipe. Click on the images to enlarge. These images are copyright B.W.Hughes. The first image is from a slide scanned using an Olympus ES10 & iPhoto Plus4. The second image is copyright B.W.Hughes and was taken on a Kodak DX6490 digital camera. Images post processed using iPhoto Plus4 and displayed at 96dpi.
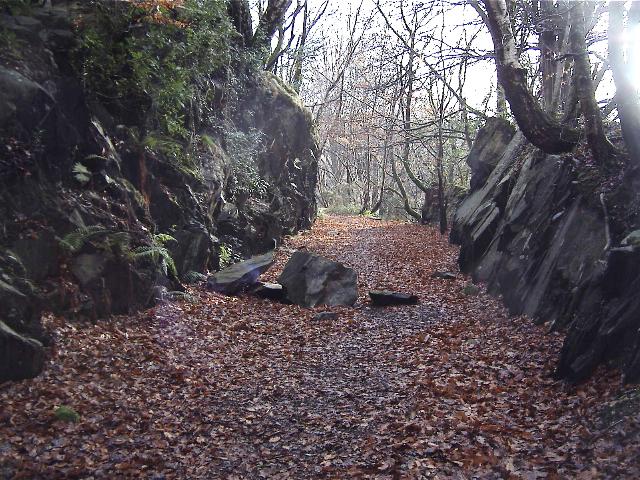
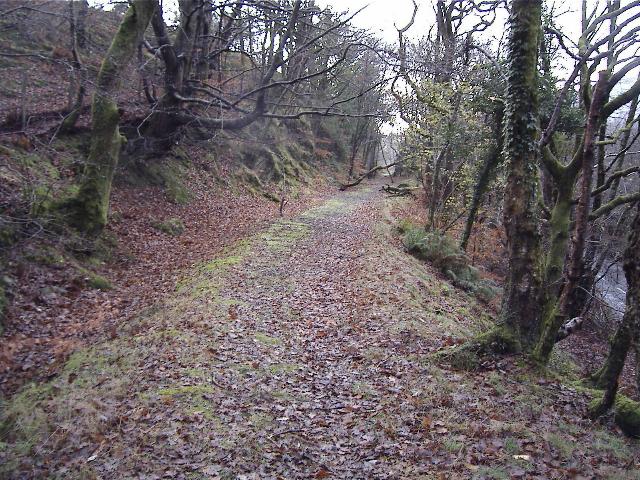
This southerly view (12/12/04) shows the cutting (Ch.25000approx.) immediately south of the site of Nantmor Halt. The cutting was completed to the wider PBSSR structure gauge The fallen rocks indicate the vertical rock face to the left will require some scaling. Click on the image to enlarge. This image is copyright B.W.Hughes and was taken on a Concord 3340z (3.1 Mega pixel) digital camera. Image post processed using iPhoto Plus4 image correction technology and displayed at 96dpi.

These southerly views (12/12/04 and 19/6/07) show the south end of the cutting (Ch.25050 approx.) south of the site of Nantmor Halt. The cutting was completed to the wider PBSSR structure gauge but the embankment beyond is clearly the later WHR gauge. The second view shows works to remove the embankment to ground level before rebuilding with reinforced earth techniques. Click on the images to enlarge. The first image is copyright B.W.Hughes and was taken on a Concord 3340z (3.1 Mega pixel) digital camera. The second image is copyright Alasdair Stewart (WHRCL) and was taken on a digital camera. Images post processed using iPhoto Plus4 image correction technology and displayed at 96dpi.

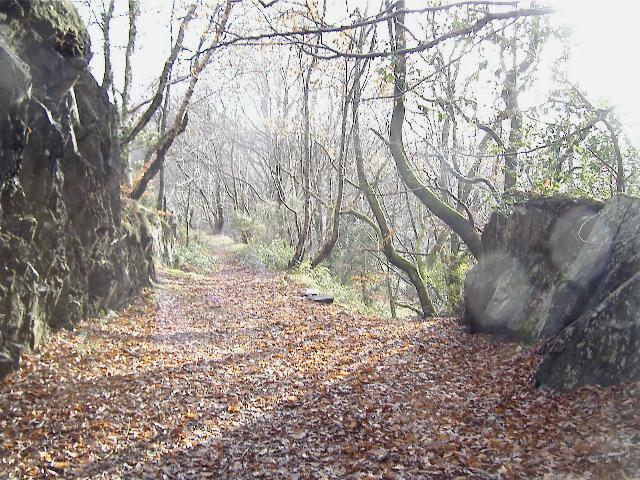
These northerly views (12/12/04 and19/6/07) show the south end of the cutting (Ch.25050 approx.) immediately south of the site of Nantmor Halt. the second image shows removal of the embankment as it was too narrow and unstable. the embankment is being rebuilt with reinforced earth techniques. Click on the images to enlarge. The first image is copyright B.W.Hughes and was taken on a Concord 3340z (3.1 Mega pixel) digital camera. The second image is copyright Alasdair Stewart (WHRCL) and was taken on a digital camera. Images post processed using iPhoto Plus4 image correction technology and displayed at 96dpi.
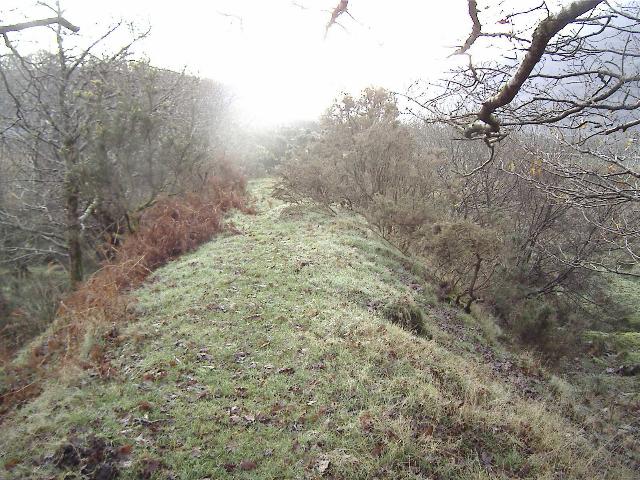
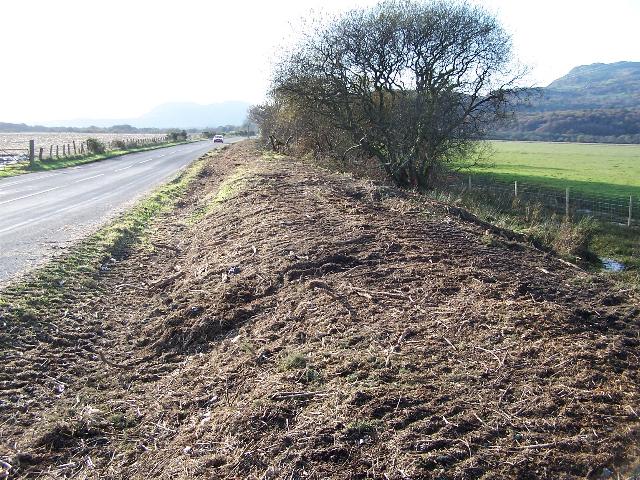
These southerly views (12/12/04 and 19/6/07) show a narrow embankment across a side valley. The land take was reduced by building up drystone walls 2/3m high at the base but these are now in a poor state of repair (see collapse to left) and will have to be rebuilt. The embankment will have to be widened here after removal as seen in the second image. Reinforced earth techniques will be used. Click on the images to enlarge. The first image is copyright B.W.Hughes and was taken on a Concord 3340z (3.1 Mega pixel) digital camera. The second image is copyright Alasdair Stewart (WHRCL) and was taken on a digital camera. Images post processed using iPhoto Plus4 image correction technology and displayed at 96dpi.
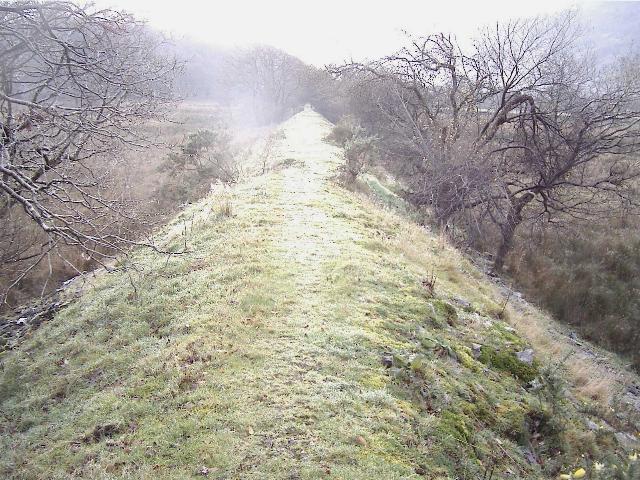
This southerly archive view shows the embankment on a PBSSR wall across a side valley at Ch.25100. The WHR formation was completed to a much narrower trackbed width than the PBSSR works suggest. The main road is to the right at the foot of the embankment. Click on the image to enlarge. This image is copyright B.W.Hughes. Slide scan technology utilised is Olympus ES10 & iPhoto Plus4. Slide displayed at 96dpi.
This southerly archive view shows the route curving sharply above the A4065 at UB181 at Ch.25150. This is one of the tightest curves on the railway. Click on the image to enlarge. This image is copyright B.W.Hughes. Slide scan technology utilised is Olympus ES10 & iPhoto Plus4. Slide displayed at 96dpi.
This southerly view (12/12/04) shows the embankment (Ch.25200)curving onto a rock cut ledge alongside and above the main road. Click on the image to enlarge. This image is copyright B.W.Hughes and was taken on a Concord 3340z (3.1 Mega pixel) digital camera. Image post processed using iPhoto Plus4 image correction technology and displayed at 96dpi.
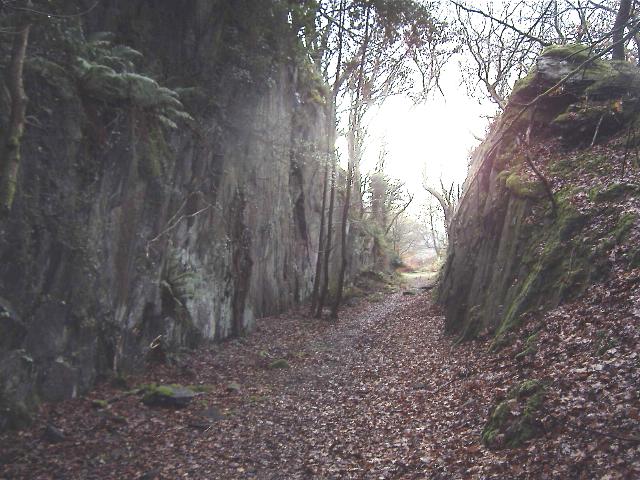
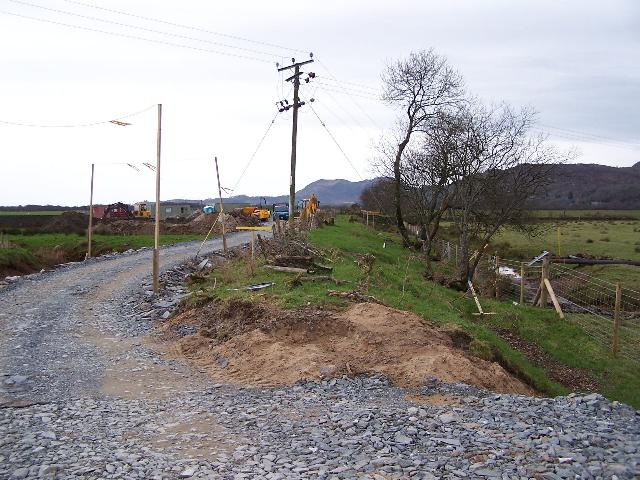
This southerly view (12/12/04 and 15/5/07) show the deep cutting (Ch.25250 approx.) alongside and above the main road approaching the road bridge. The second view shows the rockwork contractor scaling and rockbolting the deep cuttings south of Nantmor Halt, just north of UB182 across the A4085. this work had to be done before James Cyf. could advance the contract south of the halt. Click on the images to enlarge. The first image is copyright B.W.Hughes and was taken on a Concord 3340z (3.1 Mega pixel) digital camera. The second image is courtesy Alasdair Stewart (WHRCL) and was taken on a digital camera. Image post processed using iPhoto Plus4 and displayed at 96dpi.
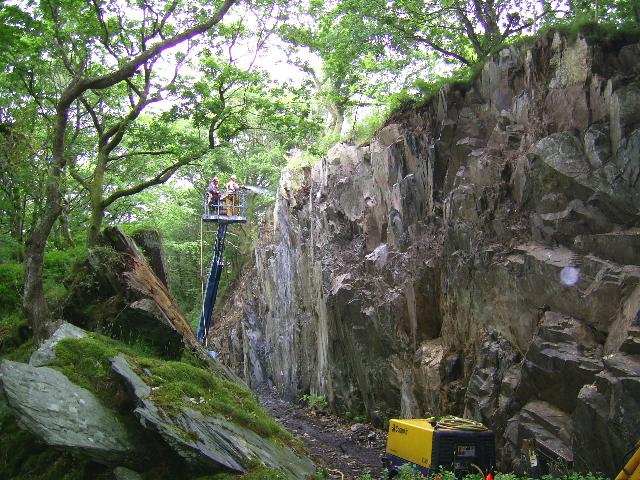
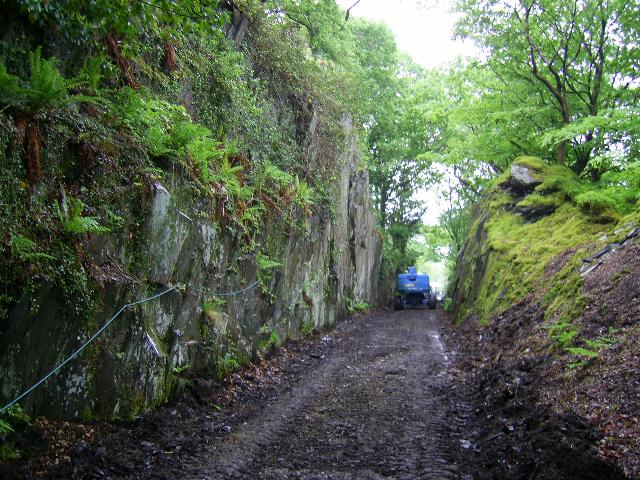
These northerly views (12/12/04 and 24/5/07) show the south end of the cutting (Ch.25300) approaching the main road bridge. These PBSSR cuttings around Nantmor are up to 10m deep and fallen boulders indicate the need for further scaling of the rock faces to ensure stability. The second view shows the scaling and rockbolting contract underway using a cherry-picker. Work was completed before James Cyf. went on site in June year to construct the trackbed between Nantmor Halt and the Afon Nanmor bridge, UB196. Click on the images to enlarge. The first image is copyright B.W.Hughes and was taken on a Concord 3340z (3.1 Mega pixel) digital camera. The second image is courtesy Alasdair Stewart (WHRCL) and was taken on a digital camera. Images post processed using iPhoto Plus4 and displayed at 96dpi.
This southerly view (12/12/04) shows the site of the original level crossing (Ch.25340) with the main road before the 1923 road bridge was completed. Click on the image to enlarge. This image is copyright B.W.Hughes and was taken on a Concord 3340z (3.1 Mega pixel) digital camera. Image post processed using iPhoto Plus4 image correction technology and displayed at 96dpi.
Just before the bridge over the main road at UB182 there is a stockpile of rail from the abortive works of the WHR('64 Co.) in the mid 1960s.
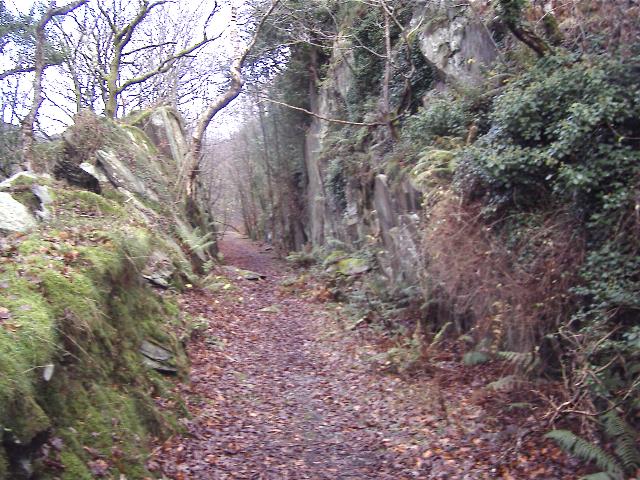
This southerly view (12/12/04) shows the cutting (Ch.25360 approx.) approaching the road bridge. Some rails are visible from the attempts by the '64Co. to lay track to Beddgelert. Click on the image to enlarge. This image is copyright B.W.Hughes and was taken on a Concord 3340z (3.1 Mega pixel) digital camera. Image post processed using iPhoto Plus4 image correction technology and displayed at 96dpi.
The fencing of the northern approaches to UB182 from Nantmor Level Crossing, the Nantmor road bridge was completed over the Spring/Summer of 2006 and a gate has been placed across the old road that crossed the alignment just north of the bridge. This access was no doubt used to remove the remains of the Cowlyd rail that had been placed there by the WHR(64) Co. years ago. A few pieces of rail were still present just north of UB182 prior to the erection of the bridge but had disappeared by 29/10/06. The new bridge deck was placed in position on 29/10/06 during a day long road closure.
This southerly view (15/10/06) shows the new gate on the old road just north of UB182 at Nantmor. Click on the image to enlarge. This image is copyright B.W.Hughes and was taken on a Kodak DX6490 digital camera. Image post processed using iPhoto Plus4 and displayed at 96dpi.
Nantmor road bridge UB182
This steel structure is built on re-inforced concrete abutments. The deck will be renewed as the bridge has rusted and is not able to take the modern WHR loadings. After some attention to the bearing concrete in mid-October 2006 on both abutments, the new deck of UB182 was craned into position, followed by fitting of walkways and railings, on 29/10/06 during road closure. The bridge deck was placed on its abutments in mid-afternoon. The subsided wing wall on the south side has also been concreted to the main abutment.

This southerly view (15/10/06) shows the work underway to alter the bearings of the abutments on UB182, the Nantmor Road bridge. Click on the image to enlarge. This image is copyright B.W.Hughes and was taken on a Kodak DX6490 digital camera. Image post processed using iPhoto Plus4 and displayed at 96dpi.
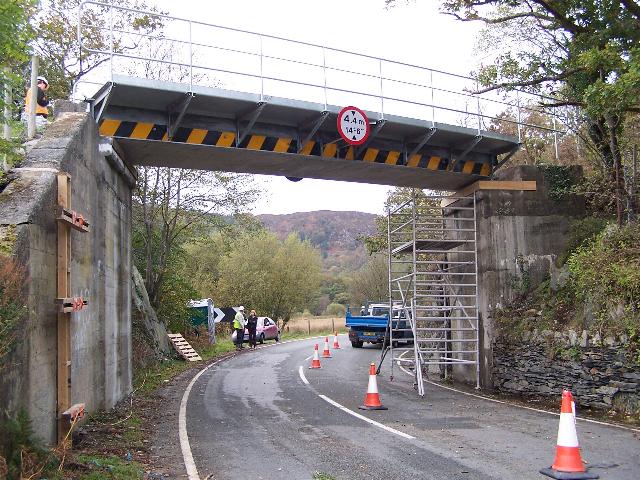
These westerly roadside views (29/4/01, 20/11/05 and 29/10/06) of UB182 shows the steel decked bridge across the A4065 just south of Nantmor Halt. Like other WHR bridges, there is no evidence that this bridge was ever painted and it has rusted badly over the years. It was removed on 6/11/05. Almost a year later the new bridge was replaced with one constructed in Brunswick's Peblig Mill at Caernarfon. The subsided wingwall (left) can be seen to be concreted to the main abutment founded on rock. Click on the image to enlarge. These images are copyright B.W.Hughes. Slide scan technology utilised is Olympus ES10 & iPhoto Plus4. Slide scanned at 200dpi. Second image was taken on a Kodak DX6490 digital camera. Image post processed using iPhoto Plus4 and displayed at 96dpi.
The bridge was removed on 6/11/05 and a new bridge was fabricated and installed in 2006. There is some evidence that the wing wall on the southeast side has subsided a little and separated from the main abutment at the expansion joint.
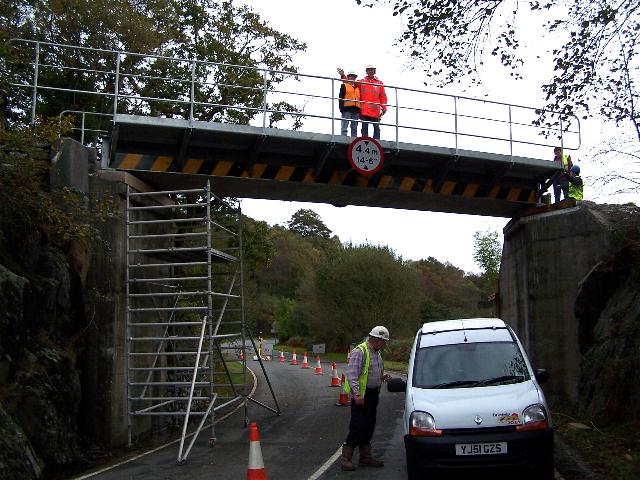
These easterly views (20/11/05 and 31/10/06) of UB182 show the two abutments set in a rock cutting. The second view shows the bridge engineer John Sreeves on the bridge which had just been lowered into position. Click on the image to enlarge. This image is copyright B.W.Hughes and was taken on a Kodak DX6490 digital camera. Image post processed using iPhoto Plus4 and displayed at 96dpi.
These southerly views (archive and 31/10/06) of UB182 show the skewed steel decked bridge across the A4065 just south of Nantmor Halt. The deck may have been timbered either side of the girders at one time. The second view shows the newly placed bridge deck. Click on the images to enlarge. These images are copyright B.W.Hughes. Slide scan technology utilised is Olympus ES10. Slide scanned at 200dpi. Second view taken on a Kodak DX6490 digital camera. Images post processed using iPhoto Plus4 and displayed at 96dpi.

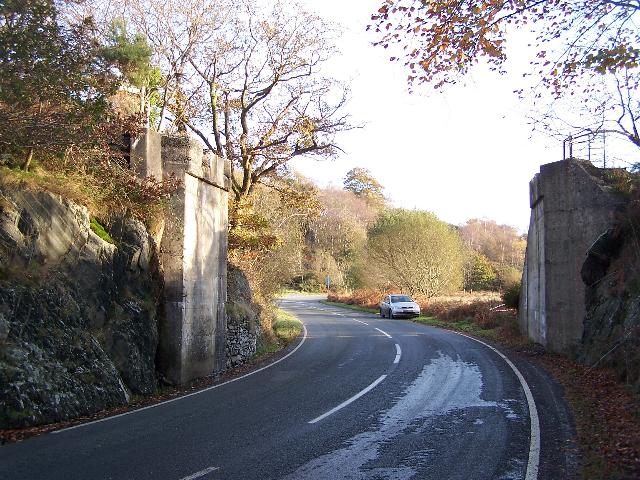
These northerly views (12/12/04 and 31/10/06) show the main road bridge from the south side (Ch.25420 approx.). The kissing gate has been bolted shut to stop access. In the later view the bridge has been placed in position. Click on the images to enlarge. These images are copyright B.W.Hughes and were taken on a Concord 3340z (3.1 Mega pixel) digital camera and a Kodak DX6490 digital camera. Images post processed using iPhoto Plus4 and displayed at 96dpi.
Nantmor Incline
As trains approach from the south, the Nantmor Incline will represent the first of the challenging gradients they face as they climb to Summit Cutting. The incline takes off at a challenging 1 in 40 from the floodplain.
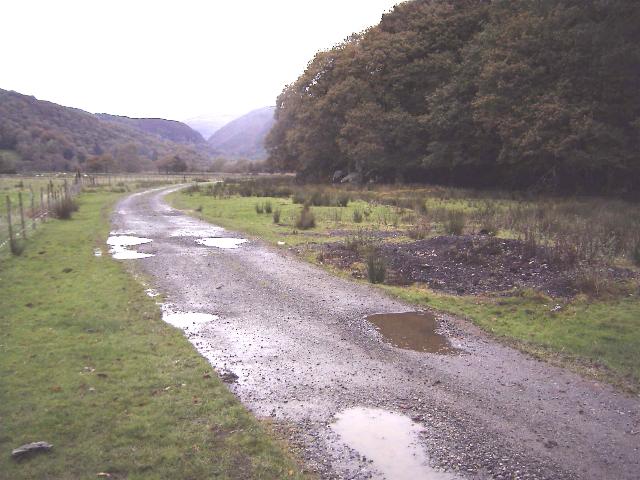
This southerly view (12/12/04) shows the embankment (Ch.25450 approx.) sloping down to the floodplain immediately south of the main road bridge at 1 in 40. Some widening may be necessary to meet modern day WHR formation width requirements. Click on the image to enlarge. This image is copyright B.W.Hughes and was taken on a Concord 3340z (3.1 Mega pixel) digital camera. Image post processed using iPhoto Plus4 image correction technology and displayed at 96dpi.

This westerly roadside view (29/4/01) shows the WHR descending from UB182 to the Glaslyn floodplain. The bank is as steep as 1 in 40 and marks the start of a long series of 1 in 40 sections through the Aberglaslyn Pass, Beddgelert and up to the summit near Pitt's Head. Click on the image to enlarge. This image is copyright B.W.Hughes. Slide scan technology utilised is Olympus ES10 & iPhoto Plus4. Slide scanned at 200dpi.
This southerly view (12/12/04) shows the end of the embankment ( Ch. 25500 approx.) south of the road bridge. The railway formation continues about 1m above the floodplain. Click on the image to enlarge. This image is copyright B.W.Hughes and was taken on a Concord 3340z (3.1 Mega pixel) digital camera. Image post processed using iPhoto Plus4 image correction technology and displayed at 96dpi.

This northerly view (12/12/04) shows the level section across the floodplain at the foot of the incline and the sheep creep UB185 at Ch.25700 approx.. Many of these trees will have to be cut back or removed. Click on the image to enlarge. This image is copyright B.W.Hughes and was taken on a Concord 3340z (3.1 Mega pixel) digital camera. Image post processed using iPhoto Plus4 image correction technology and displayed at 96dpi.

This northerly view (12/12/04) shows the shattered remains of one of two cast iron poles near the base of the Nantmor incline. The function of these poles in unclear as the WHR had no signalling but a similar pole can be found near the Afon Nanmor bridge (see below). Similar remains have been found in the Beddgelert Forest. It is likely they were originally purchased for electrification and were used for the telegraph wire. Click on the image to enlarge. This image is copyright B.W.Hughes and was taken on a Concord 3340z (3.1 Mega pixel) digital camera. Image post processed using iPhoto Plus4 image correction technology and displayed at 96dpi.
This northerly view (12/12/04) shows the shattered remains of the second of two cast iron poles near the base of the Nantmor incline. A similar pole can be found near the Afon Nanmor bridge (see below). Click on the image to enlarge. This image is copyright B.W.Hughes and was taken on a Concord 3340z (3.1 Mega pixel) digital camera. Image post processed using iPhoto Plus4 image correction technology and displayed at 96dpi.
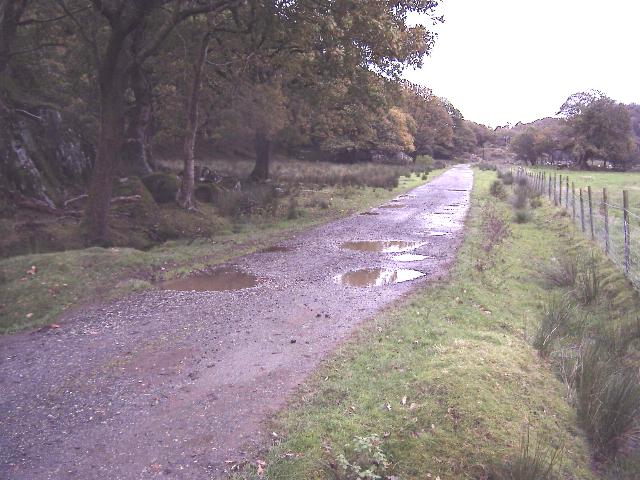
This southerly view (12/12/04) shows the first of the three stiles at Ch.25700 approx. on the level section between the main road bridge and the Hafod-y-Llyn section. Many of these trackside trees will require cutting back or removal to create room for the structure gauge. Click on the image to enlarge. This image is copyright B.W.Hughes and was taken on a Concord 3340z (3.1 Mega pixel) digital camera. Image post processed using iPhoto Plus4 image correction technology and displayed at 96dpi.
This southerly view (12/12/04) shows the final section of the flat trackbed at the base of the Nantmor incline at Ch.25750 approx. approaching the Hafod-y-Llyn stile. Click on the image to enlarge. This image is copyright B.W.Hughes and was taken on a Concord 3340z (3.1 Mega pixel) digital camera. Image post processed using iPhoto Plus4 image correction technology and displayed at 96dpi.
Hafod-y-Llyn
This new section covers the alignment from the Nantmor Incline to the Afon Nanmor bridge. The route is remarkably straight on this section and high speed running is likely given the excellent visibility at all the farm accommodation crossings.

This northerly view (20/10/04) shows the stile at the foot of the Nantmor incline at Ch.25840 approx. The new stile implies someone still thinks there is a footpath along the railway! A public bridleway (unsignposted tarmaced gated lane) runs alongside the trackbed south from this point accessed from the sharp bend on the A4085 Aberglaslyn Bridge to Penrhyndeudraeth road. Click on the image to enlarge. This image is copyright B.W.Hughes and was taken on a Concord 3340z (3.1 Mega pixel) digital camera. Image post processed using iPhoto Plus4 image correction technology and displayed at 96dpi.
River bank works at Ch.25900
The formation at Ch.25900 at the foot of the Nantmor Incline, where the Afon Glaslyn has eroded the trackbed, has been strengthened with rock. Work had to be done before the fish spawning season and taking due care with an otter holt nearby. The main work on this section south from Nantmor is due in the Autumn when James Cyf. has completed work on the Aberglaslyn Pass section between Bryn-y-felin and Nantmor Halt due to start around Easter.
This southerly view (17/3/07) shows the contractor has completed the infill with rocks at Ch.25900 where the Afon Glaslyn had undermined the railway since its closure. Click on the image to enlarge. This image is courtesy/copyright John Ewing and was taken on a digital camera. Image post processed using iPhoto Plus4 and displayed at 96dpi.
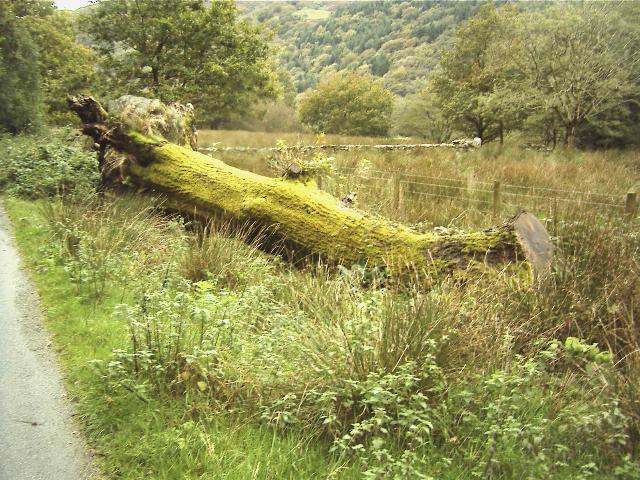
This southerly view (20/10/04) shows one of the fallen tree trunks which block the formation at Ch.25900 approx. It appear these fell in a storm blocking the bridleway which is also the access road to Hafod-y-Llyn and have simply been pushed aside. The railway alignment occupies the space between the road and the fence. Click on the image to enlarge. This image is copyright B.W.Hughes and was taken on a Concord 3340z (3.1 Mega pixel) digital camera. Image post processed using iPhoto Plus4 image correction technology and displayed at 96dpi.
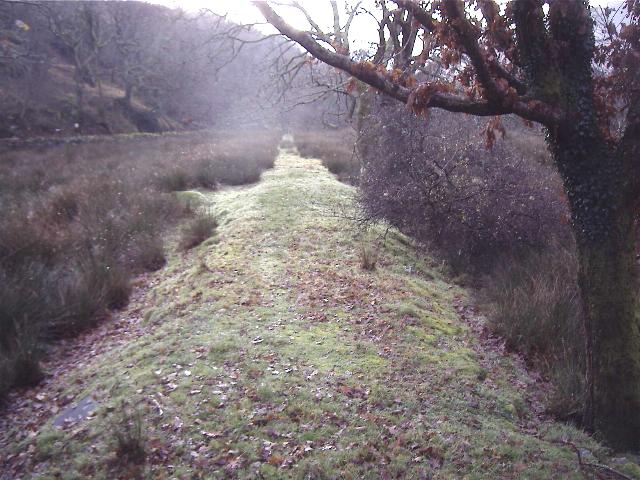
This southerly view (20/10/04) shows a rare section of undisturbed trackbed at Ch.26000 approx. The sleeper impressions can still be seen! Much of the alignment in this area has been turned into an agricultural access road. Click on the image to enlarge. This image is copyright B.W.Hughes and was taken on a Concord 3340z (3.1 Mega pixel) digital camera. Image post processed using iPhoto Plus4 image correction technology and displayed at 96dpi.
This northerly view (20/10/04) shows the end of the unoccupied trackbed at Ch.26160 approx. following the fence line to the left. An original stone culvert can be seen that will require rebuilding. From here south the trackbed has been used as an agricultural access to Hafod-y-Llyn farm. Click on the image to enlarge. This image is copyright B.W.Hughes and was taken on a Concord 3340z (3.1 Mega pixel) digital camera. Image post processed using iPhoto Plus4 image correction technology and displayed at 96dpi.
These southerly view (20/10/04 and 28/6/07) show the Hafod-y-Llyn access (public bridleway) at Ch.26160 approx. on the line of the railway. A new access road will be built on the east side, between the railway and the old sea cliff to the left. The second view shows the newly constructed parallel bridleway on the left hand side of the railway formation south of LC96. Click on the images to enlarge. The first image is copyright B.W.Hughes and was taken on a Concord 3340z (3.1 Mega pixel) digital camera. The second image is courtesy Alasdair Stewart (WHRCL) and was taken on a digital camera. Images post processed using iPhoto Plus4 and displayed at 96dpi.


These northerly views (20/10/04 and 12/7/07) shows the long straight from Hafod-y-Llyn to the Nantmor incline from TWA Ch.26500 approx. The public bridleway is being diverted onto a new alignment between the railway and the old sea cliffs to the east (right). The second view shows construction of the diverted bridleway. The railway will be constructed on its original alignment to the left once the bridleway that was occupying the formation has been completed on its new alignment. Click on the images to enlarge. The first image is copyright B.W.Hughes and was taken on a Concord 3340z (3.1 Mega pixel) digital camera. The second image is courtesy Alasdair Stewart (WHRCL) and was taken on a digital camera. Images post processed using iPhoto Plus4 and displayed at 96dpi.
This southerly view (20/10/04) shows the end of the 500m long straight approaching Hafod-y-Llyn from Ch.26700 approx. The public bridleway/farm access track will be diverted onto a new alignment between the railway and the old sea cliffs to the east (left) with numerous accommodation crossings (LC95-104) for field access on this section to the Afon Nanmor bridge. Click on the image to enlarge. This image is copyright B.W.Hughes and was taken on a Concord 3340z (3.1 Mega pixel) digital camera. Image post processed using iPhoto Plus4 image correction technology and displayed at 96dpi.
This northerly view (20/10/04) shows the curve at the end of the long straight from the Nantmor incline at Ch.26900 approx. The public bridleway will be diverted onto a new alignment between the railway and the old sea cliffs to the east (right). In the background can be seen the Aberglaslyn Pass. Click on the image to enlarge. This image is copyright B.W.Hughes and was taken on a Concord 3340z (3.1 Mega pixel) digital camera. Image post processed using iPhoto Plus4 image correction technology and displayed at 96dpi.
This southerly view (20/10/04) shows the short straight approaching the site of Hafod-y-Llyn Halt from Ch.26900 approx. The public bridleway will be diverted onto a new alignment between the railway and the old sea cliffs to the east (left). Click on the image to enlarge. This image is copyright B.W.Hughes and was taken on a Concord 3340z (3.1 Mega pixel) digital camera. Image post processed using iPhoto Plus4 image correction technology and displayed at 96dpi.
This southerly view (20/10/04) shows the approaches to the former Hafod-y-Llyn Halt from Ch.27000 approx. The railway will be diverted onto a new alignment to the right of the track to avoid rockwork at the site of Hafod-y-Llyn Halt. This will allow the farm track/public bridleway to remain on the east (left) side of the railway. Click on the image to enlarge. This image is copyright B.W.Hughes and was taken on a Concord 3340z (3.1 Mega pixel) digital camera. Image post processed using iPhoto Plus4 image correction technology and displayed at 96dpi.
This northerly view (20/10/04) shows the view from the site of Hafod-y-Llyn Halt at Ch.27100 approx. The railway will be diverted onto a new alignment between the public bridleway and the fence to the west (left) to avoid rockwork. Click on the image to enlarge. This image is copyright B.W.Hughes and was taken on a Concord 3340z (3.1 Mega pixel) digital camera. Image post processed using iPhoto Plus4 image correction technology and displayed at 96dpi.
This southerly view (20/10/04) shows the site of Hafod-y-Llyn Halt at Ch.27100 approx. The railway will be diverted onto a new alignment between the farm track/public bridleway and the fence to the west (right) to avoid rockwork. The public footpath will be diverted to the west (right) side of the railway from this point onwards. Click on the image to enlarge. This image is copyright B.W.Hughes and was taken on a Concord 3340z (3.1 Mega pixel) digital camera. Image post processed using iPhoto Plus4 image correction technology and displayed at 96dpi.
This northerly view (20/10/04) shows the sharp curve south of the site of Hafod-y-Llyn Halt at Ch.27300 approx. The public footpath will be diverted onto a new alignment to the west (left). Click on the image to enlarge. This image is copyright B.W.Hughes and was taken on a Concord 3340z (3.1 Mega pixel) digital camera. Image post processed using iPhoto Plus4 image correction technology and displayed at 96dpi.
This southerly view (20/10/04) shows the short straight from Hafod-y-Llyn to the site of the Afon Nanmor bridge in the trees from Ch.27300 approx. The public footpath will be diverted onto a new alignment to the west (right). Click on the image to enlarge. This image is copyright B.W.Hughes and was taken on a Concord 3340z (3.1 Mega pixel) digital camera. Image post processed using iPhoto Plus4 image correction technology and displayed at 96dpi.
This northerly view (20/10/04) shows the short straight from the Nanmor bridge towards Hafod-y-Llyn from Ch.27400 approx. The public bridleway will be diverted onto a new alignment to the west (left). Click on the image to enlarge. This image is copyright B.W.Hughes and was taken on a Concord 3340z (3.1 Mega pixel) digital camera. Image post processed using iPhoto Plus4 image correction technology and displayed at 96dpi.
Afon Nanmor Bridge
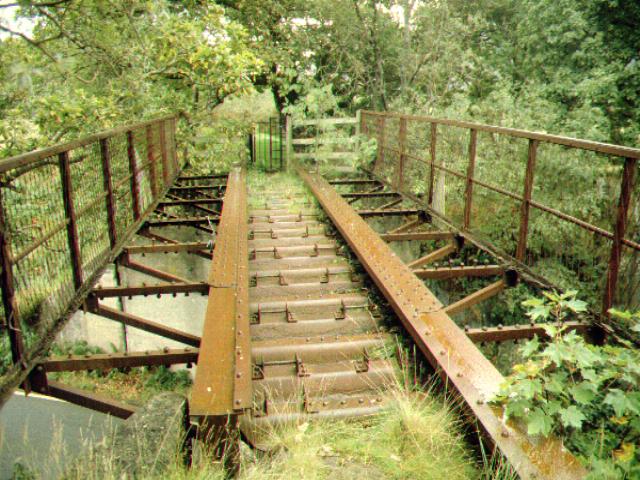
The Afon Nanmor bridge was removed shortly after the FR took possession of the route in 1996. The bridge had never been painted in its 80 year life and was in danger of collapse through corrosion. The bridge will be replaced and a new footpath walkway will be added on the south side, possibly cantilevered off the railway girders as at Plas-y-nant.
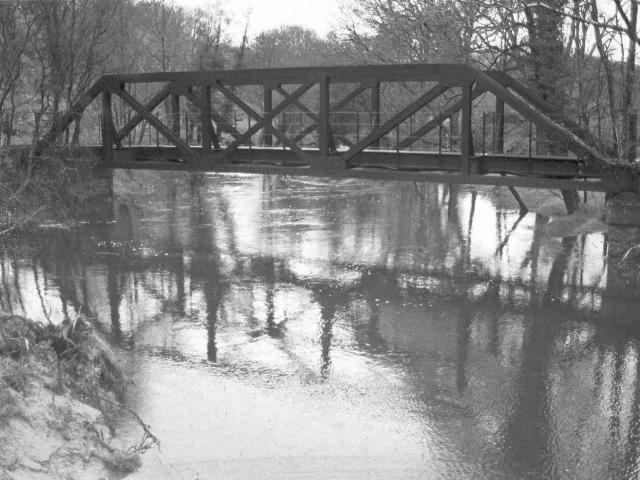
This southerly view (26/1/88) shows Afon Nanmor bridge. There was a wooden footbridge on the deck. Click on the image to enlarge. This image is courtesy/ copyright David Allan. Image taken on an SLR camera. Image post processed using iPhoto Plus4 and displayed at 96dpi.

This easterly view (26/1/88) shows the footpath over the Afon Nanmor bridge with trees growing through the girders. All that remains is the gate at the end of the bridge! Click on the image to enlarge. This image is courtesy/ copyright David Allan. Image taken on an SLR camera. Image post processed using iPhoto Plus4 and displayed at 96dpi.
The footpath deck of the Afon Nanmor bridge was in concrete with metal hand rail posts and 4 strand wire hand/guardrails. The concrete had been cast on an arched corrugated iron shutter supported from the bottom beam flange with timber and all left in-situ.
This southerly view (20/10/04) shows the two abutments of the Afon Nanmor bridge at Ch.27400 approx. The public footpath will be diverted onto a cantilevered structure on the south (far) side of the new bridge. Click on the image to enlarge. This image is copyright B.W.Hughes and was taken on a Concord 3340z (3.1 Mega pixel) digital camera. Image post processed using iPhoto Plus4 image correction technology and displayed at 96dpi.

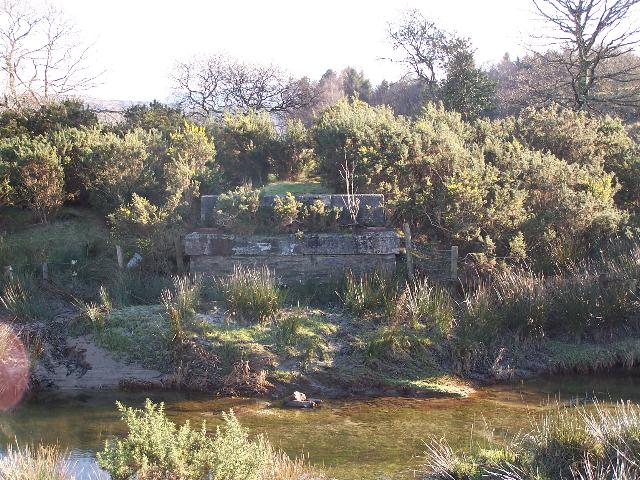
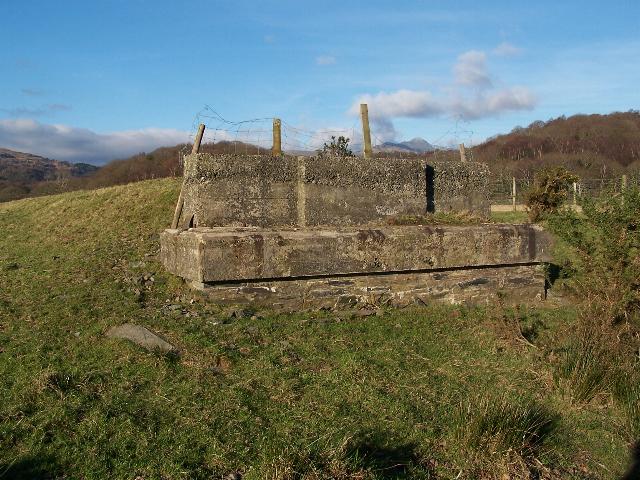
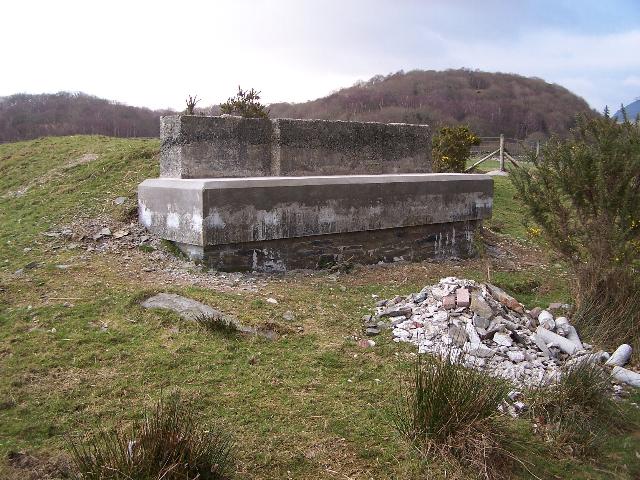
This northerly view (20/10/04) shows a section of the old bridge retained at Ch.27400 for historical purposes. The section has been left on the north west bank of the river. The I girders collected water and were never painted so the structures became dangerous as they rusted and had to be demolished for insurance purposes when the FR took over. Click on the image to enlarge. This image is copyright B.W.Hughes and was taken on a Concord 3340z (3.1 Mega pixel) digital camera. Image post processed using iPhoto Plus4 image correction technology and displayed at 96dpi.
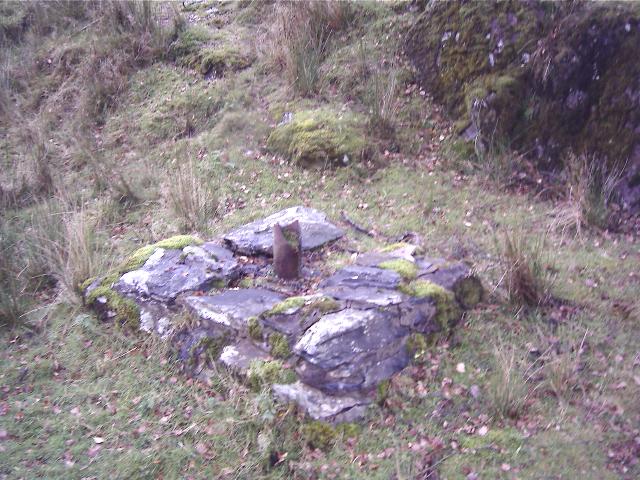
This northerly view (20/10/04) shows the a former post on the north west corner of the bridge approaches. The cast iron post has been shattered, presumably when the line was dismantled in the 1940s war scrap effort. It matches two similar posts at the foot of the Nantmor incline and those found near Rhyd Ddu. They are part of the telegraph system but may have been purchased for the trolley wire. Click on the image to enlarge. This image is copyright B.W.Hughes and was taken on a Concord 3340z (3.1 Mega pixel) digital camera. Image post processed using iPhoto Plus4 image correction technology and displayed at 96dpi.
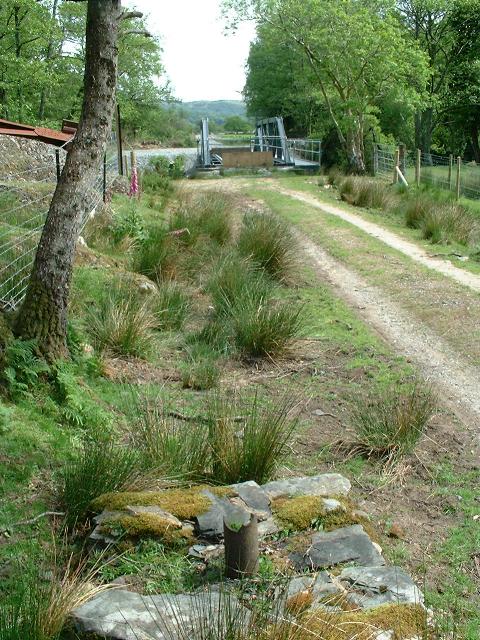
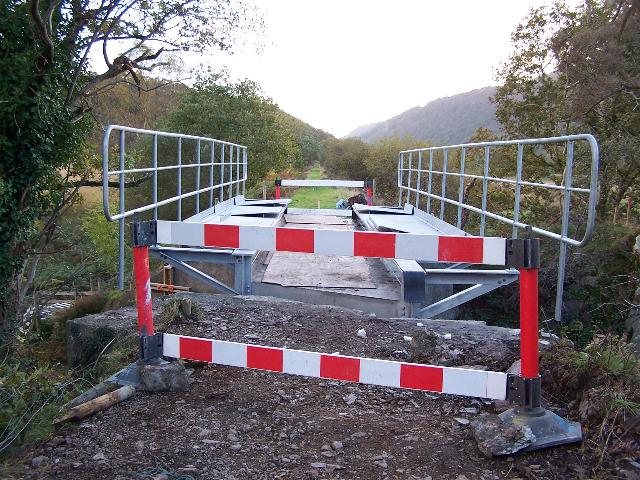
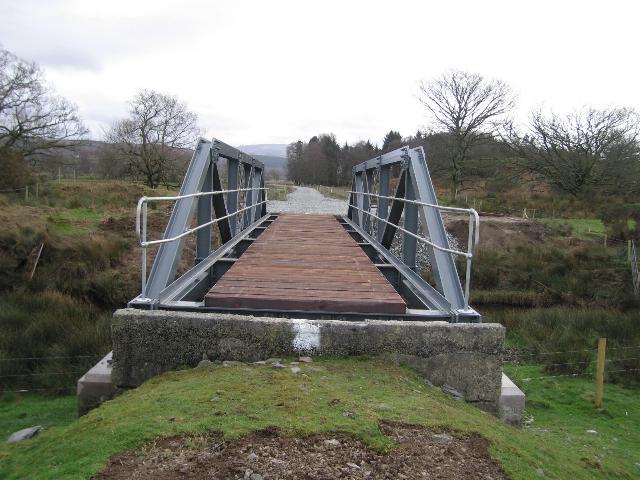
This southerly view (20/5/07) shows UB196, the Afon Nanmor bridge, from the north, with the as yet unopened public footpath cantilevered off the south side of the bridge. The stump of one of the original cast iron trolley wire poles (later used as a WHR telephone pole) can be seen in the left foreground. Unusually, this stump is set in a concreted stone base, presumably due to the rock being so near the surface at this location. Click on the image to enlarge. This image is courtesy/copyright John Ewing and was taken on a Fuji Finepix 1400 digital camera. Image post processed using iPhoto Plus4 and displayed at 96dpi.
This southerly view (20/10/04) shows alignment continuing across the Afon Nanmor bridge from Ch.27400 approx. The public bridleway will be diverted onto a new alignment to the right before leaving the railway just before the Afon Dylif bridge at Ch.28000. The gate on the far abutment marks the continuing line of the footpath, currently on the formation and inaccessible from Hafod-y-Llyn. Click on the image to enlarge. This image is copyright B.W.Hughes and was taken on a Concord 3340z (3.1 Mega pixel) digital camera. Image post processed using iPhoto Plus4 image correction technology and displayed at 96dpi.
Afon Nanmor bridge
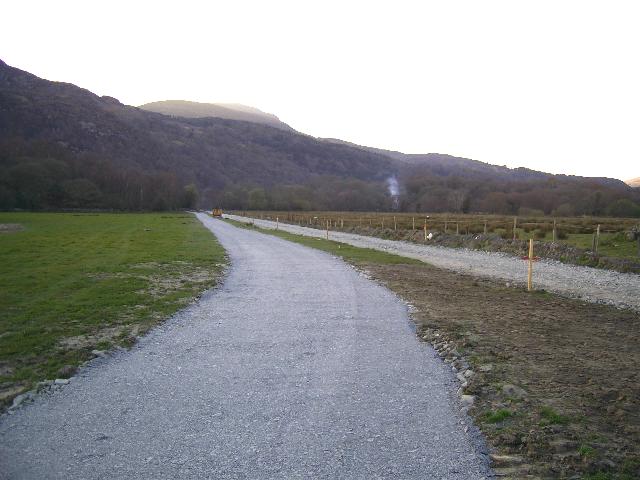
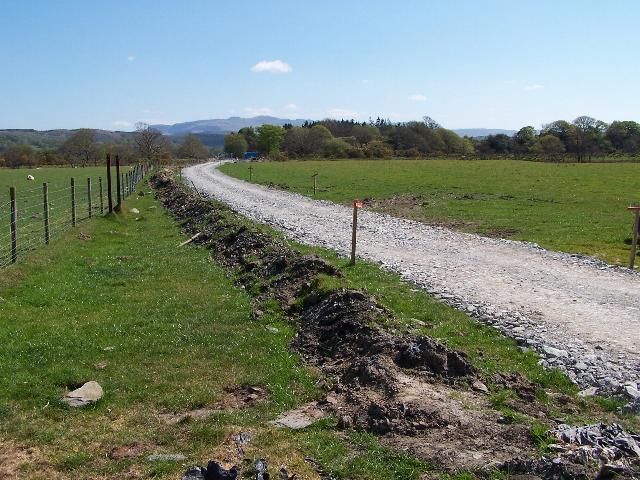
The trackbed north of the recently installed Afon Dylif Bridge is being built up, firmed up and extended past the site of Hafod Garregog Halt to UB196. An access track between the halt and UB196 on the trackbed for local residents has existed for some time. Eventually a parallel access track will have to be constructed between LC105 and UB196 on the west side for local residents. The existing track between Hafod Garregog and Afon Nanmor has not been upgraded as it is considered that it is adequate for the crane and the truck with the trusses. The trusses will travel flat but both in the same load this time.
There is plenty of room at the bridge site but the area in hemmed in by trees. Sadly, there has had to be a good deal of mature tree clearance on the east of the bridge launch site south of the river but there was little choice because of the tight nature of site. There are public footpaths on both sides of the river too. Another obstacle is the depth of the Afon Nanmor at this point. The Afon Dylif was a welly job but the Afon Nanmor is metres deep and so crews will need to be established each side of the river for the initial operation to place the two trusses. UB208 at Ch.29710 has also been excavated and this blocks the route for the trusses until it is finished.
This northerly view (28/2/07) shows contractors clearing trees at the south abutment of UB196, the Afon Nanmor bridge. The trackbed in the foreground has yet to be cleared and hardened up for the crane and truss delivery articulated lorry which will be positioned at this location. Click on the image to enlarge. This image is courtesy/copyright John Ewing and was taken on a digital camera. Image post processed using iPhoto Plus4 and displayed at 96dpi.
The trackbed north of UB199, the Afon Dylif bridge, was hardened up and levelled as far as the site of Hafod Garregog Halt to allow the lorry carrying the trusses (and the crane to lift them) to pass safely. Between there and UB196, the existing farm track was deemed sufficiently firm to allow passage of these vehicles.
The public footpath footway cantilevered out from the south side of the bridge will not be open to traffic for a while after the bridge is completed. This is because the footpath approaches will need to be made up to a suitable level. The north side access will be finished as part of a later contract and the south side will be completed sometime after the crane has finished its job. The public footpath (Nantmor to Pont Croesor) will be closed at the Afon Nanmor bridge for the duration of the Osprey season to prevent pedestrian access from the north side into the "exclusion zone".
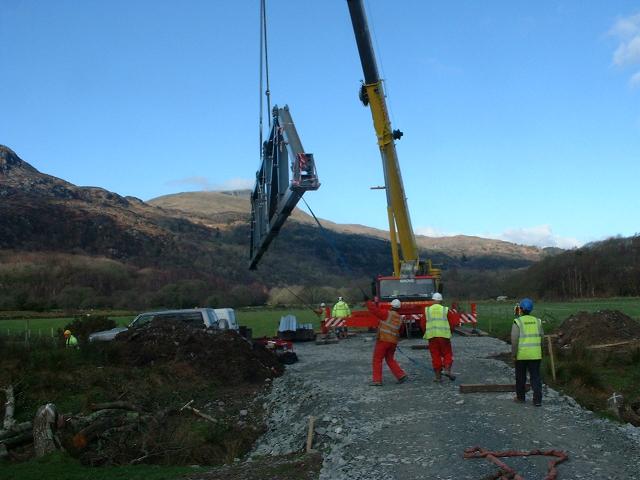
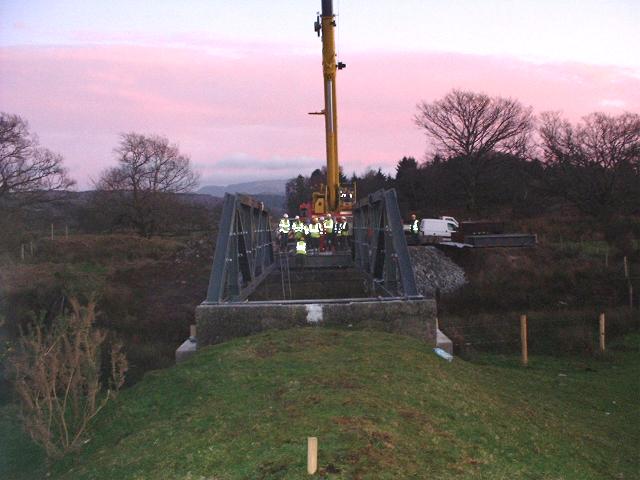
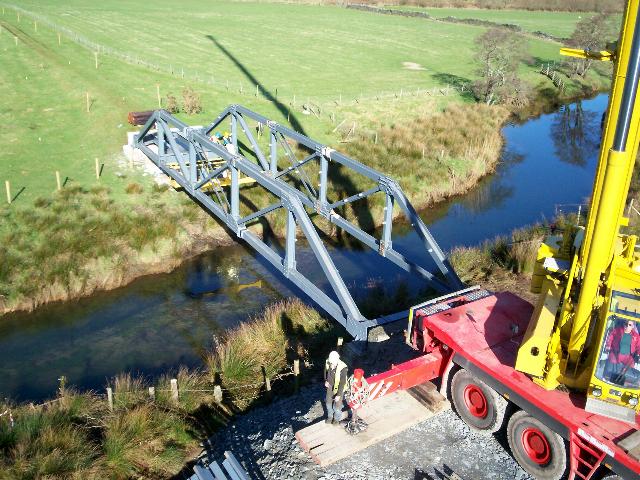
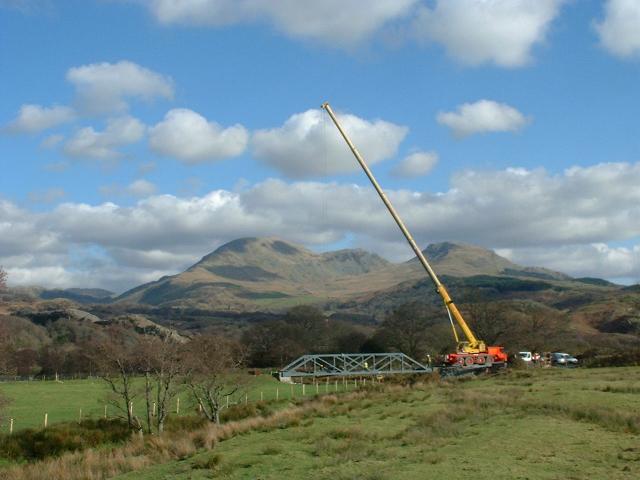
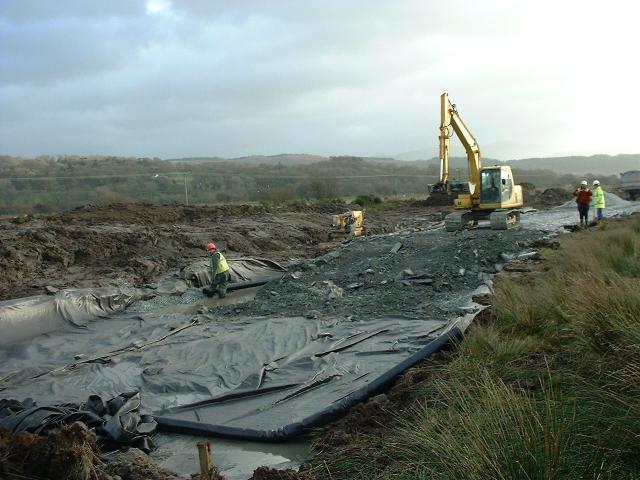
Work throughout 17/3/07 saw the Afon Nanmor bridge placed by the end of the day, just in advance of blizzard conditions due on Sunday that would have prevented work! The first activity was to load the trusses in Brunswick Iron Work's Peblig Mill, Caernarfon. Both were carried on the same lorry but the south truss was uppermost as it carried the walkway extension for the public footpath. The crane went across Afon Dylif bridge first, going in reverse as there was no place to turn it beyond this point. It was essential that the crane should be positioned with the turret at the back i.e. as near as possible to the Nanmor abutments in order to have sufficient reach.
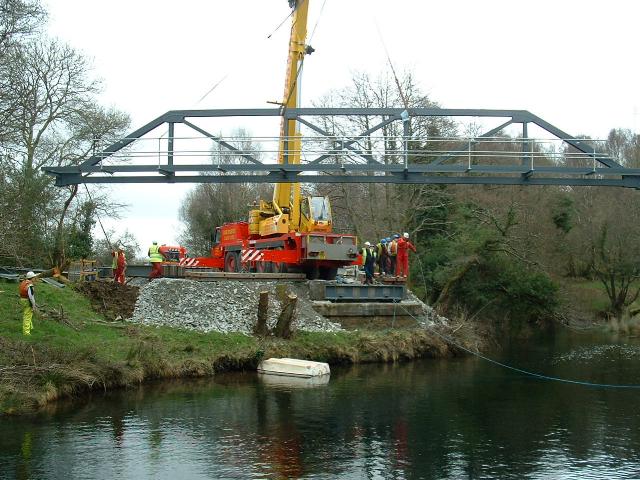
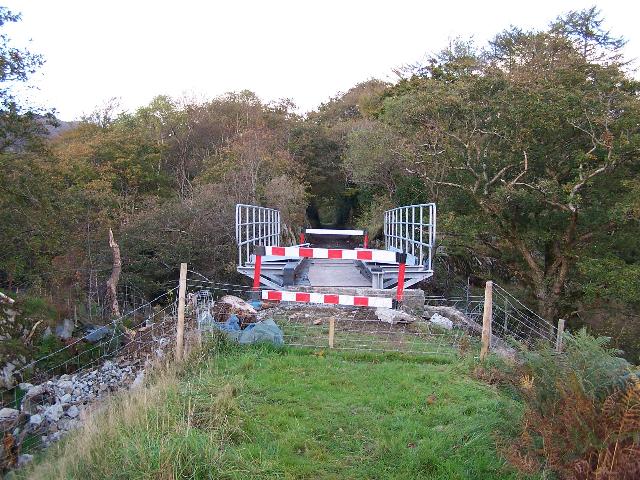
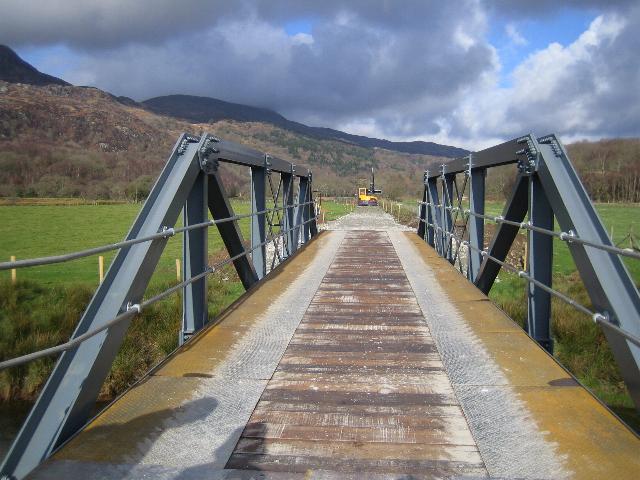
This southerly view (17/3/07) shows the south truss being rotated over the Afon Nanmor. This truss carries the public footpath walkway cantilevered off the south side. However, the walkway will not be open for some time. Click on the image to enlarge. This image is courtesy/copyright John Sreeves and was taken on a digital camera. Image post processed using iPhoto Plus4 and displayed at 96dpi.
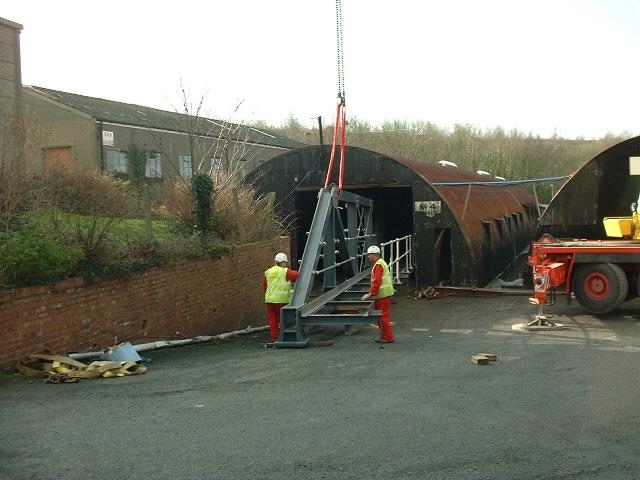
This view (17/3/07) shows the south truss, complete with walkway, emerging from Brunswick Ironworks Peblig Mill works. Click on the image to enlarge. This image is courtesy/copyright John Ewing and was taken on a digital camera. Image post processed using iPhoto Plus4 and displayed at 96dpi.
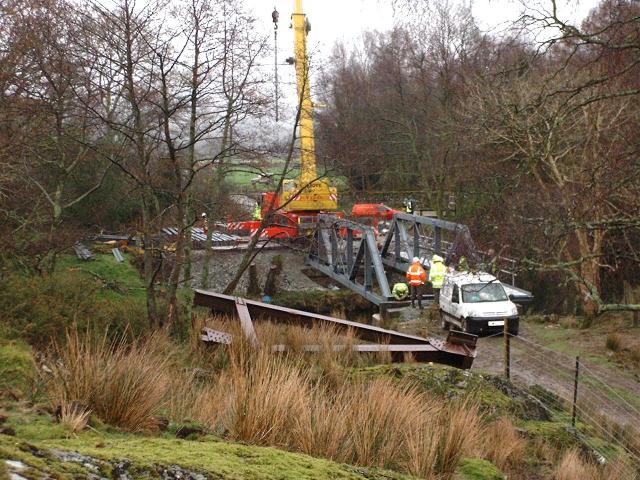
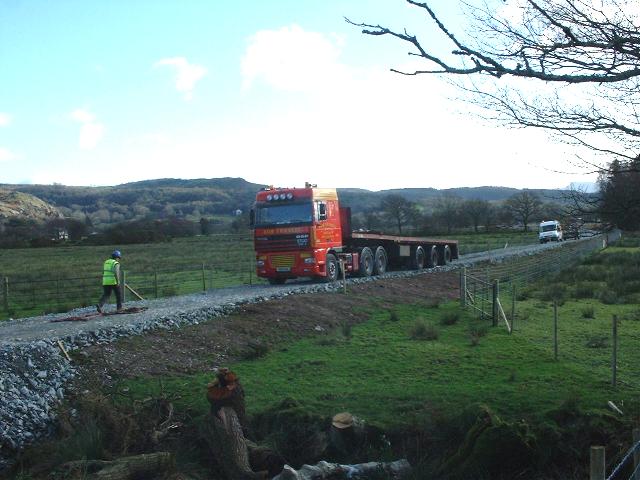
The lorry carrying the truss panels for the Afon Nanmor Bridge on the extended flat bed trailer arrived via the B4410 and the trackbed from Ynysfor. It went across UB199 at walking pace with about 200mm space to spare either side! With the trusses in place by the end of Saturday, work on Sunday concentrated on placing all the cross members and the decking was completed by the end of the day. Access to the public footbridge will have to wait the build up of ramps at a later stage.


These northerly views (both 17/3/07) show the crane reversing over UB199 followed by the trusses, with the walkway uppermost. The trackbed north of the bridge was still not fenced at this date. Click on the images to enlarge. These images are courtesy/copyright John Sreeves and was taken on a digital camera. Images post processed using iPhoto Plus4 and displayed at 96dpi.

This northerly view (17/3/07) shows the south truss, complete with walkway, being craned over the Afon Nanmor. At this stage it needed to be twisted around. Click on the image to enlarge. This image is courtesy/copyright John Ewing and was taken on a digital camera. Image post processed using iPhoto Plus4 and displayed at 96dpi.
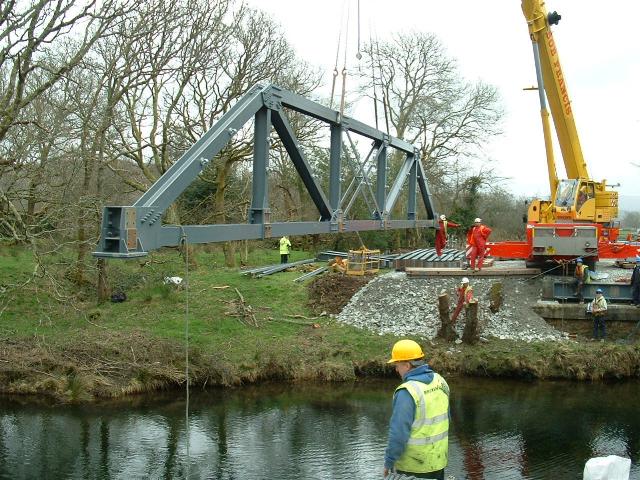
This southerly view (17/3/07) shows the north truss being craned over the Afon Nanmor. Click on the image to enlarge. This image is courtesy/copyright John Sreeves and was taken on a digital camera. Image post processed using iPhoto Plus4 and displayed at 96dpi.
This southerly view (17/3/07) shows the second truss in place at the end of the day. The final piece of former truss was never collected from the site when it was cut up in the 1990s and is visible in the foreground. Click on the image to enlarge. This image is courtesy/copyright John Ewing and was taken on a digital camera. Image post processed using iPhoto Plus4 and displayed at 96dpi.
Afon Nanmor to Afon Dylif bridges
The railway runs level and straight across a field to the site of Hafod Garregog Halt. The formation is hardly raised above the flood plain and will need some work on ditches either side and to raise it above potential flooding. The farm track to Ynys Ferlas will be moved to the south side of the trackbed.
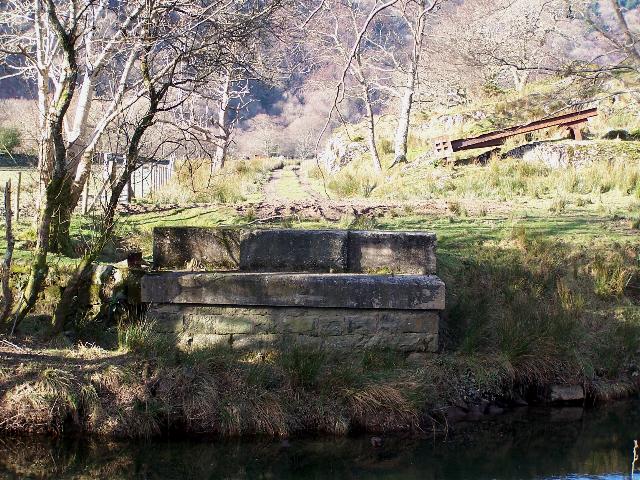
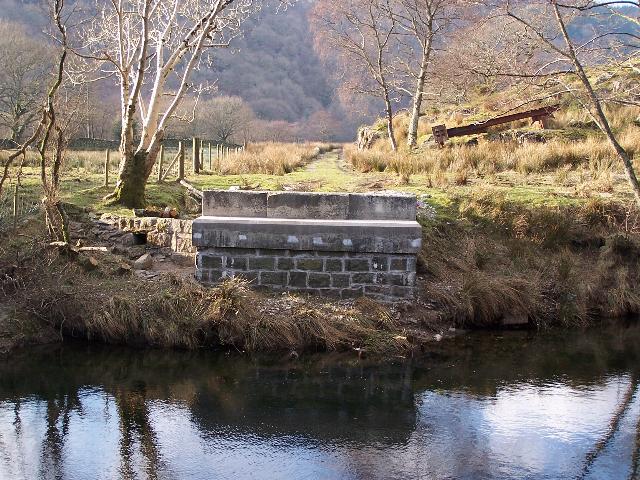
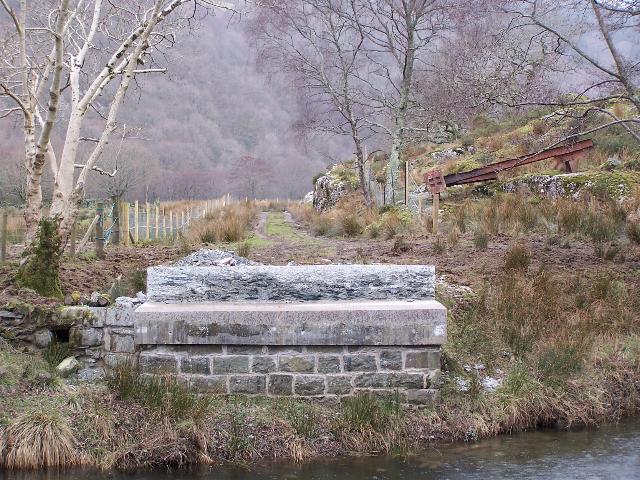
These westerly views (29/1/05 and 22/2/06) show the west bank of the Afon Nanmor bridge. The river appears to be 2-3 metres deep. The remains of a cut section of the bridge are visible on the far bank. This is being retained to show the type of river bridge previously used at this location. The second view shows the abutment has been raised slightly to provide drainage across the bridge, unlike the original which rusted badly. The abutment has also been re-pointed and some tree clearance has been undertaken. The third view shows the ballast retaining wall has been cut back and the alignment has been fenced north from the bridge. Click on the images to enlarge. These images are copyright B.W.Hughes and were captured on a Kodak DX6490 digital camera. Images post processed using Iphoto+4 and displayed at 96dpi.
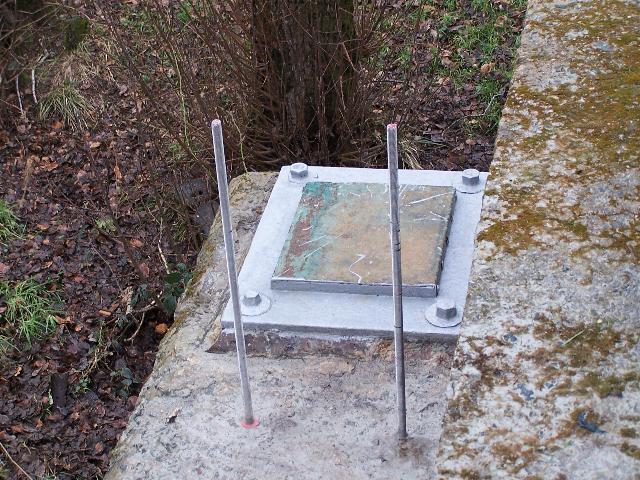
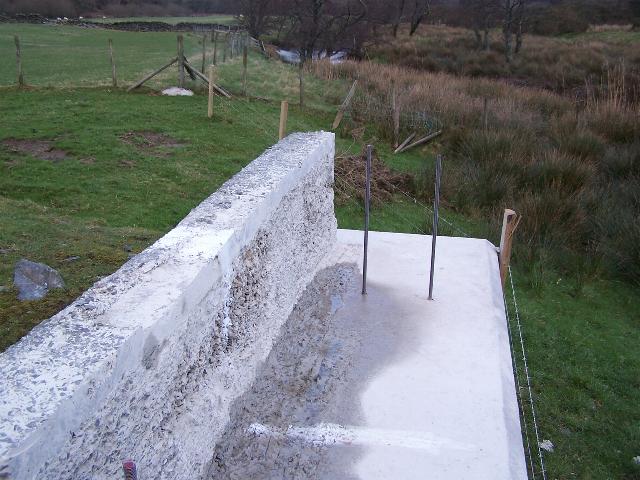
This northerly view (11/2/07) shows the refurbished phosphor bronze bearing pad on the southern abutment of UB196, the Afon Nanmor bridge. Guide bolts have also been placed to help align the girders during the upcoming placement of the bridge. Click on the image to enlarge. This image is copyright B.W.Hughes and was taken on a Kodak DX6490 digital camera. Image post processed using iPhoto Plus4 and displayed at 96dpi.
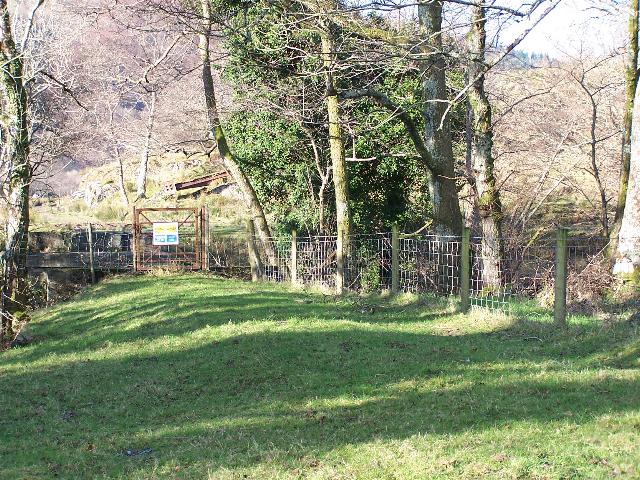
This westerly view (29/1/05) shows the gate on the east abutment of three Afon Nanmor bridge. Click on the image to enlarge. This image is copyright B.W.Hughes and was captured on a Kodak DX6490 digital camera. Image post processed using Iphoto+4 and displayed at 96dpi.
This easterly view (29/1/05) from the Afon Nanmor bridge shows the Ynys Ferlas farm track joining from the right. This will need to be moved off the trackbed to the right (south). Click on the image to enlarge. This image is copyright B.W.Hughes and was captured on a Kodak DX6490 digital camera. Image post processed using Iphoto+4 and displayed at 96dpi.
In early 2006, the Environment Agency completed some ditching in this area to reduce flooding.
This westerly view (29/1/05) shows the trackbed with the Ynys Ferlas farm track on top midway between Hafod Garregog Halt and the Afon Nanmor bridge. Work is required to raise the formation in this low-lying floodplain and provide sidelong ditches. Click on the image to enlarge. This image is copyright B.W.Hughes and was captured on a Kodak DX6490 digital camera. Image post processed using Iphoto+4 and displayed at 96dpi.
This easterly view (29/1/05) approaching Hafod Garregog Halt shows the flat nature of the land in this area. Click on the image to enlarge. This image is copyright B.W.Hughes and was captured on a Kodak DX6490 digital camera. Image post processed using Iphoto+4 and displayed at 96dpi.
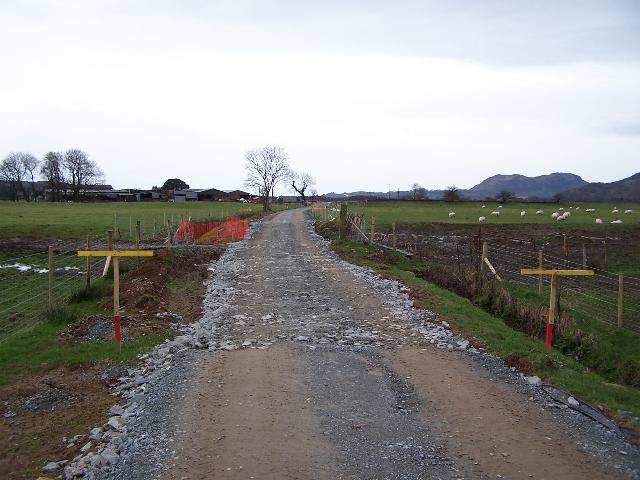
This westerly views (21/1/07 and 18/4/07) show the trackbed with the Ynys Ferlas farm track on top from LC105 at Hafod Garregog Halt. The trackbed is marked out with surveyors' poles. the second view shows the farm track diverted to the south on the left and the trackbed made up. Click on the images to enlarge. This images are copyright B.W.Hughes and were captured on a Kodak DX6490 digital camera. Images post processed using Iphoto+4 and displayed at 96dpi.
This northerly view (4/4/07) shows the completion of the parallel farm track and public footpath at LC105. The railway is to the right. This was required as the farm track was using the railway alignment for some 400m from LC105 to UB197. James Cyf. will return to this section when the Ospreys have flown in the Autumn, hopefully having completed the Aberglaslyn Pass section. Click on the image to enlarge. This image is courtesy Alasdair Stewart (WHRCL) and was taken on a digital camera. Image post processed using iPhoto Plus4 and displayed at 96dpi.
This easterly view (29/1/05) shows LC105 at Hafod Garregog with the halt just beyond the gateway through which the trackbed passes. At this point the trackbed curves slightly to the right before crossing the next field. Click on the image to enlarge. This image is copyright B.W.Hughes and was captured on a Kodak DX6490 digital camera. Image post processed using Iphoto+4 and displayed at 96dpi.
These easterly views (21/1/07 and18/4/07) show the trackbed marked out with surveyors' poles east from LC105 at Hafod Garregog Halt towards the Afon Dylif bridge. The second view shows the trackbed constructed. Click on the images to enlarge. These images are copyright B.W.Hughes and were captured on a Kodak DX6490 digital camera. Images post processed using Iphoto+4 and displayed at 96dpi.
This westerly view (29/1/05) shows Hafod Garregog Halt with LC105 beyond. The track went through the gateway and is wider here to accommodate at platform to the right. The steel posts of the former name-board for the halt can be seen in the fence. Click on the image to enlarge. This image is copyright B.W.Hughes and was captured on a Kodak DX6490 digital camera. Image post processed using Iphoto+4 and displayed at 96dpi.
This northerly view (29/1/05) at Hafod Garregog Halt shows the two steel posts that previously supported the halt's name-board. Click on the image to enlarge. This image is copyright B.W.Hughes and was captured on a Kodak DX6490 digital camera. Image post processed using Iphoto+4 and displayed at 96dpi.
This westerly view (29/1/05) shows Hafod Garregog Halt from the east. Click on the image to enlarge. This image is copyright B.W.Hughes and was captured on a Kodak DX6490 digital camera. Image post processed using Iphoto+4 and displayed at 96dpi.
This easterly view (29/1/05) shows the barely discernable trackbed curving and rising onto the Afon Dylif bridge. Click on the image to enlarge. This image is copyright B.W.Hughes and was captured on a Kodak DX6490 digital camera. Image post processed using Iphoto+4 and displayed at 96dpi.
This westerly view (29/1/05) from the Afon Dylif bridge abutment shows the trackbed barely discernable approaching Hafod Garregog Halt. Click on the image to enlarge. This image is copyright B.W.Hughes and was captured on a Kodak DX6490 digital camera. Image post processed using Iphoto+4 and displayed at 96dpi.
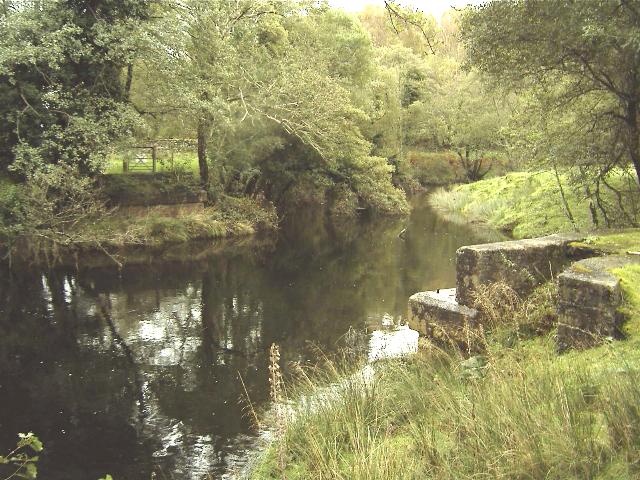
Afon Dylif bridge (UB199)

This easterly view (29/1/05 and 11/2/07) show the Afon Dylif bridge east abutment. In contrast to the Afon Nanmor, this stream looks easily fordable with water just a foot deep. The second view shows the trackbed has reached the bridge and the bearing pads have been refurbished. Click on the image to enlarge. This image is copyright B.W.Hughes and was captured on a Kodak DX6490 digital camera. Image post processed using Iphoto+4 and displayed at 96dpi.
These westerly views (29/1/05 and 22/2/06) of the west abutment show it is set back from the river. This allowed all three truss bridges to be the same size. The second view shows the addition of new concrete to the abutment to raise it slightly. This will allow the bridge to drain, unlike the original that rusted badly. There is also some evidence of concrete core investigation having taken place. The third view shows the ballast wall has been cut back and positioning bolts placed. Click on the images to enlarge. These images are copyright B.W.Hughes and were captured on a Kodak DX6490 digital camera. Images post processed using Iphoto+4 and displayed at 96dpi.
This bridge, like the Afon Nanmor and Bryn-y-felin bridges, was demolished due to its dangerously rusted condition shortly after the FR took over in 1996. The only public access is via a 1.5km (1mile) public bridleway from the A4085 (opposite the Nanmor Valley C road) through Hafod Garregog towards Ynys Ferlas, which joins the railway alignment near the Afon Dylif footbridge and continues across the fields to Pont Croesor. The footpath beyond the footbridge is subject to disturbance orders when the Osprey season begins and a hide has been erected near the footbridge.
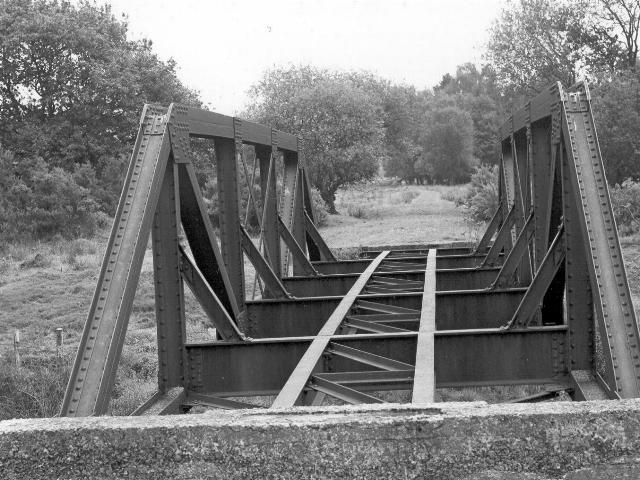
This easterly view (26/1/88) shows the Afon Dylif bridge, since demolished. The public footpath leaves the trackbed before this point and so the bridge did not carry a footpath deck. The trackbed bears left after the bridge and heads towards Croesor Junction, about 1 km distant. Click on the image to enlarge. This image is courtesy/ copyright David Allan. Image taken on an SLR camera. Image post processed using iPhoto Plus4 and displayed at 96dpi.
UB199 progress
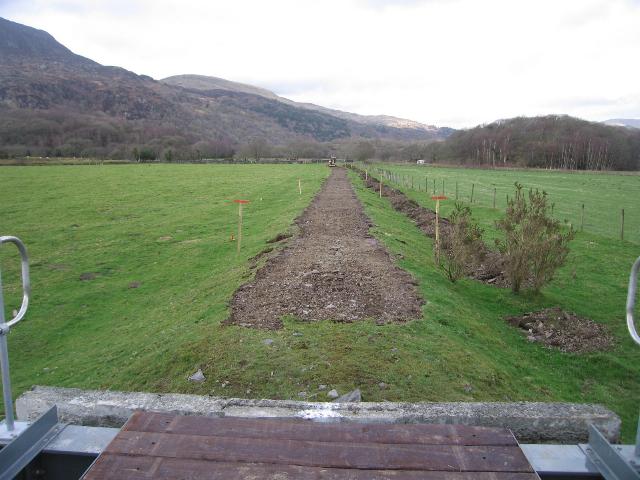
Good progress has been made with UB199, over the Afon Dylif, with James Cyf. even working on Sunday 4/3/07! UB199 has seen the walkway space filled using temporary road beams with plates have been fixed on top. This has allowed dumpers to take fill from stockpiles on the Croesor Junction Deviation to level the foundation between UB199 and the site of Hafod Garregog Halt at LC105 in anticipation of completing UB196 before the end of March.
These northerly views (all 4/3/07) at UB199 show that temporary deck plates have been fitted in the walkway spaces to allow dumpers to cross. The embankment has been built up on both sides to allow access by the crane and the lorry carrying the trusses for UB196 across the Afon Nanmor. Click on the images to enlarge. These images are courtesy/copyright Owen Duncan (WHRCL) and were taken on a digital camera. Images post processed using iPhoto Plus4 and displayed at 96dpi.
There were second thoughts about getting the wide wheelbase crane over UB199 to UB196. The walkways have thus not been fitted either side of the timber deck as the space has been left to allow the fitting of temporary hanging waybeams (already completed at Brunswick's Caernarfon works) to be placed either side, spanning between the transom beams. These were used later at Bryn-y-felin to allow plant to access the Aberglaslyn Pass works from the north end. The trackbed north of the bridge had still not been built up on 28/2/07 and there was a step off the bridge as a result.
This northerly view (28/2/07) shows WHRCL Landrover just north of UB199, the Afon Dylif bridge, now with completed deck. The walkways between the deck and the trusses have not been fitted. The trackbed the far side of the bridge still had a step up onto the bridge on this date. Click on the image to enlarge. This image is courtesy/copyright John Ewing and was taken on a digital camera. Image post processed using iPhoto Plus4 and displayed at 96dpi.
Afon Dylif bridge to Croesor Junction
This section covers the length from the Afon Dylif bridge to the site of Croesor Junction. There is no public access to this section.
This easterly view (21/1/07) shows surveyors' posts marking out the trackbed beyond the Afon Dylif bridge have reached the Afon Nanmor bridge by the trees in the distance. The trackbed must be hardened up for delivery and erection of the two sets of bridge trusses by the Spring. Click on the image to enlarge. This image is copyright B.W.Hughes and was taken on a Kodak DX6490 digital camera. Image post processed using iPhoto Plus4 and displayed at 96dpi.
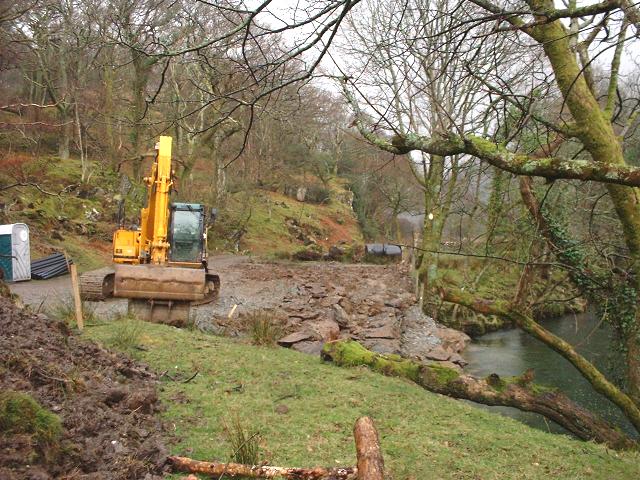
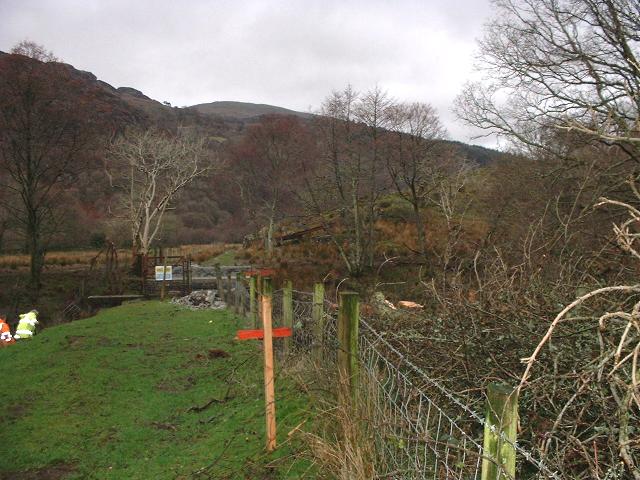
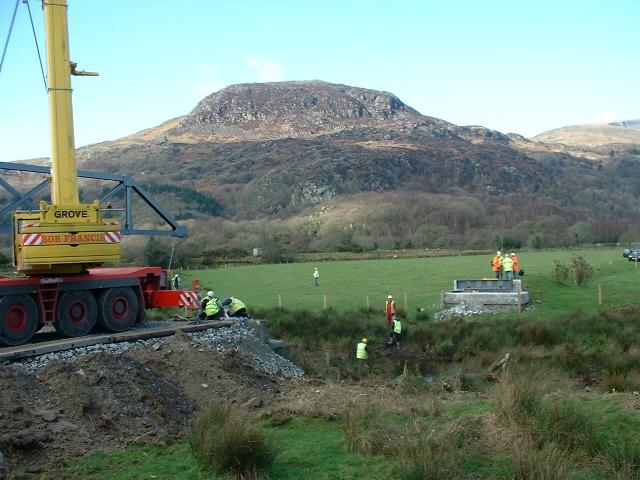
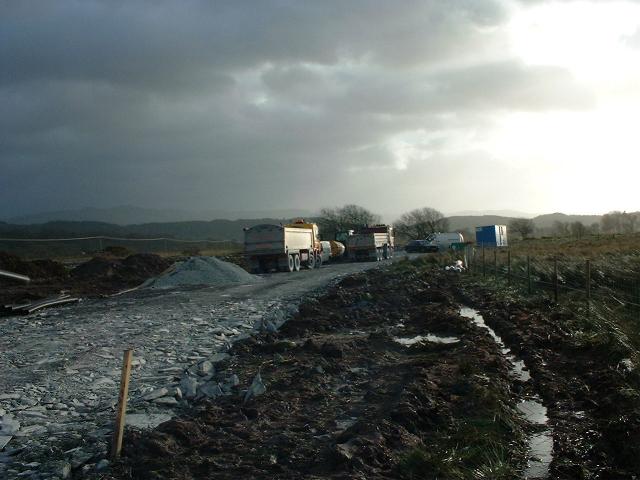
The main trusses of the Afon Dylif bridge were placed on the abutments during sunshine on 17/2/07. The lorry delivered the trusses, one at a time, from Caernarfon (Peblig Mill) laying flat on the deck of the transporter rather than vertical as for the Bryn-y-felin bridge. Access was from the Ynysfor LC112 worksite as James Cyf. had completed the trackbed and the Croesor Junction Deviation. The first truss to be placed was the easterly (upstream) truss and light was failing when the second truss was placed.
These southerly and westerly views (both17/2/07) show the bridge trusses being delivered via Ynysfor and passing along the Croesor Junction Deviation. The first view shows the recently completed start of the Deviation while in the second view UB205 is visible in the foreground. Click on the image to enlarge. This image is courtesy/copyright John Ewing and was taken on a digital camera. Image post processed using iPhoto Plus4 and displayed at 96dpi.

This northerly view (17/2/07) shows the unloading of the truss across near the Afon Dylif (UB199). Click on the image to enlarge. This image is courtesy/copyright John Ewing and was taken on a digital camera. Image post processed using iPhoto Plus4 and displayed at 96dpi.

These northerly views (all 17/2/07) show the placing of the first truss across the Afon Dylif (UB199). In the second view, the first cross-member can be seen placed on the abutment on the north bank. Click on the image to enlarge. This image is courtesy/copyright John Ewing and was taken on a digital camera. Image post processed using iPhoto Plus4 and displayed at 96dpi.

This northerly view (17/2/07) shows the placing of the second truss across the Afon Dylif (UB199) as light fades. Click on the image to enlarge. This image is courtesy/copyright John Ewing and was taken on a digital camera. Image post processed using iPhoto Plus4 and displayed at 96dpi.
This southerly view (17/2/07) shows the lorry reversing from Afon Dylif (UB199). The extensible trailer was closed up and the rear steering wheels made this a little easier than it could have been! Click on the image to enlarge. This image is courtesy/copyright John Ewing and was taken on a digital camera. Image post processed using iPhoto Plus4 and displayed at 96dpi.
This southerly view (17/2/07) shows the two trusses placed across the Afon Dylif (UB199) and closed up to the cross-members at both ends. The remaining cross members will be craned in soon and the bridge bolted down. A temporary deck will allow the lorry and crane to take the next bridge across for the Afon Nanmor bridge construction. Click on the image to enlarge. This image is courtesy/copyright John Ewing and was taken on a digital camera. Image post processed using iPhoto Plus4 and displayed at 96dpi.
Nothing has been done to the trackbed north of the bridge other than marking out pegs for the alignment and fence lines. As soon as the Afon Dylif bridge receives its temporary deck, no doubt the trackbed will receive the same attention as that south of the Afon Dylif bridge as it is needed for prompt access to erect the Afon Nanmor bridge UB196, in a similar operation before the Ospreys return in the late Spring!
By 19/2/07, almost all the steelwork was in place and the handrails were being fitted to UB199 over the Afon Dylif. Progress had also been made with the sleeper deck, work on which started from the north end. As soon as the bridge is complete, contractor James Cyf. will go over the bridge with excavators and dumpers and construct the formation to the Afon Nanmor bridge (UB196). Some thought is going into getting the crane across to erect UB196 due to its wide wheel arrangement. It is possible rails may be placed on the side walkways and steel plate over them to spread the weight.
This northerly view (17/2/07) shows UB199 being erected towards the end of a long day. Click on the image to enlarge. This image is copyright John Sreeves and was taken on a Kodak DX6490 digital camera. Image post processed using iPhoto Plus4 and displayed at 96dpi.
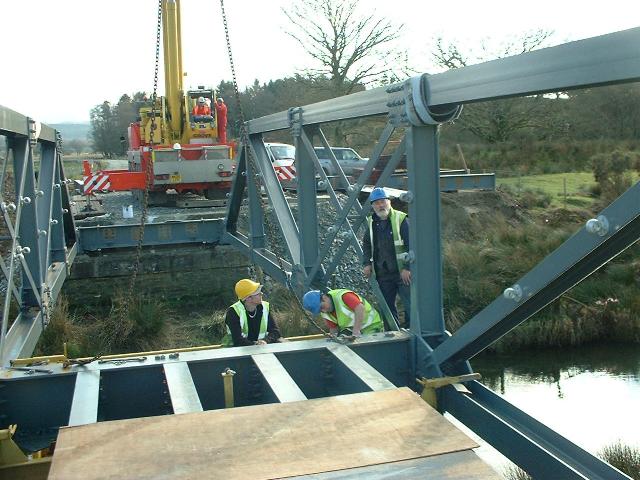
These southerly and easterly views (both 18/2/07) show the fitting of the transoms (deck crossbeams) between the two main trusses on UB199. Click on the image to enlarge. This image is courtesy/copyright John Ewing and was taken on a digital camera. Image post processed using iPhoto Plus4 and displayed at 96dpi.

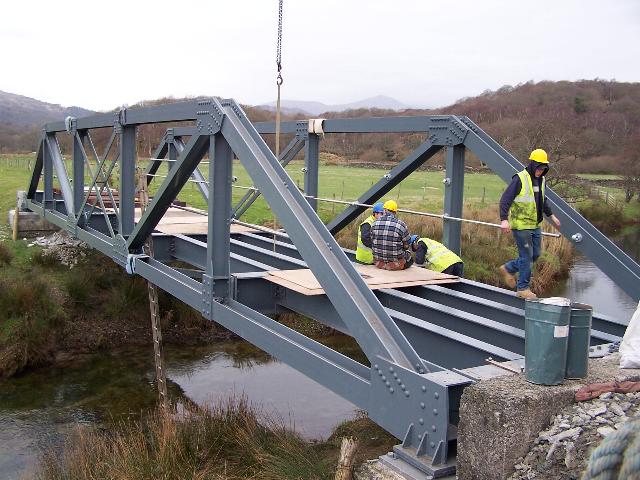
These northerly views (both 19/2/07) shows UB199 being finished off rapidly during an official site visit. All four transoms and waybeams are in place and a lateral diagonal brace was being fitted under the central span. Sleepers were already piled ready for fitting at the north end of the bridge. Click on the images to enlarge. These images are is copyright B.W.Hughes and were taken on a Kodak DX6490 digital camera. Images post processed using iPhoto Plus4 and displayed at 96dpi.
Construction progress 21/2/07
The Dylif bridge is now fully timbered. An excavator has arrived via LC105 and has cleared the formation down to the old ballast level from LC105, the old Hafod Garregog Halt public footpath as far as the Afon Dylif bridge. The formation must be built up a little and made wider just north of the bridge to allow the construction vehicles to exit the bridge and complete the formation to the Afon Nanmor bridge to allow its erection by the end of March.
These northerly views (both 21/2/07) show progress with UB199 over the Afon Dylif and the trackbed north of there. The bridge has been fully timbered and an excavator has scraped the trackbed as far as LC105 at Hafod Garregog Halt. Click on the images to enlarge. These images are courtesy/copyright John Peduzzi and were taken on a digital camera. Images post processed using iPhoto Plus4 and displayed at 96dpi.
The formation off the bridge must be built up by about 50cm as there is currently a pronounced step off the bridge.
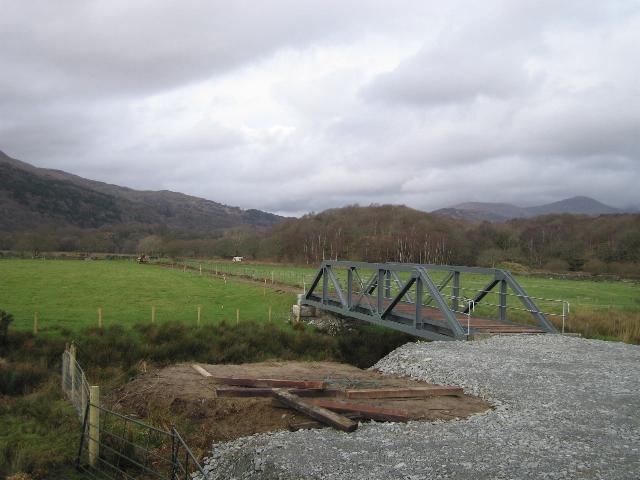
This southerly view (21/2/07) shows the completed UB199 over the Afon Dylif with wooden sleepered deck and hand rails. The walkway space either side of the sleepers will require a filler such as rails and deck plate to allow the crane with its wider wheelbase to pass over for construction of the Afon Nanmor bridge in March. Click on the image to enlarge. This image is courtesy/copyright John Peduzzi and was taken on a digital camera. Image post processed using iPhoto Plus4 and displayed at 96dpi.

This westerly view (21/2/07) shows the completed UB199 over the Afon Dylif. Click on the image to enlarge. This image is courtesy/copyright John Peduzzi and was taken on a digital camera. Image post processed using iPhoto Plus4 and displayed at 96dpi.

These southerly views (1995? and 21/1/07) show the alignment south from the Afon Dylif bridge at Ch.28100 approx. The second view shows the trackbed cleared and surveyors' poles erected. Click on the image to enlarge. The first image is courtesy/copyright Mike Hart and was taken on an SLR camera. The second image is copyright B.W.Hughes and was taken on a Kodak DX6490 digital camera. Images post processed using iPhoto Plus4 image correction technology and displayed at 96dpi.
This southerly view (1995?) shows the alignment south from Ynys Fach curve at Ch.28200 approx. Click on the image to enlarge. This image is courtesy/copyright Mike Hart and was taken on an SLR camera. Image post processed using iPhoto Plus4 image correction technology and displayed at 96dpi.
This northerly view (21/1/07) shows surveyors' posts marking out the trackbed from UB201 towards the Afon Dylif bridge. Click on the image to enlarge. This image is copyright B.W.Hughes and was taken on a Kodak DX6490 digital camera. Image post processed using iPhoto Plus4 and displayed at 96dpi.
This southerly view (1995?) shows the alignment near LC107 at Ch.28250 approx. with the hills around Penrhyndeudraeth visible in the background. Click on the image to enlarge. This image is courtesy/copyright Mike Hart and was taken on an SLR camera. Image post processed using iPhoto Plus4 image correction technology and displayed at 96dpi.
These southerly views (1995? and 21/1/07) show the alignment at LC107 at Ch.28300 approx. This is the end of the Ynys Fach curve and the railway now runs straight for 200m until the Croesor Junction curve. The second view shows clearance and fencing underway. Click on the images to enlarge. The first image is courtesy/copyright Mike Hart and was taken on an SLR camera. The second image is copyright B.W.Hughes and was taken on a Kodak DX6490 digital camera. Image post processed using iPhoto Plus4 image correction technology and displayed at 96dpi.
This southerly view (1995?) shows the alignment approaching Croesor Junction near LC108 at Ch.28500 approx. There is a sharp turn to the right at the end of this straight section. Click on the image to enlarge. This image is courtesy/copyright Mike Hart and was taken on an SLR camera. Image post processed using iPhoto Plus4 image correction technology and displayed at 96dpi.

This southerly view (1995?) shows the alignment starting the sharp 120m radius curve at Croesor Junction from Ch.28600 approx. Click on the image to enlarge. This image is courtesy/copyright Mike Hart and was taken on an SLR camera. Image post processed using iPhoto Plus4 image correction technology and displayed at 96dpi.
Croesor Junction
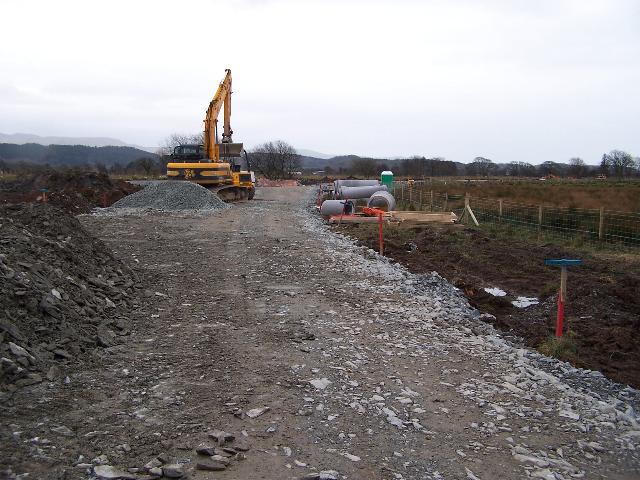
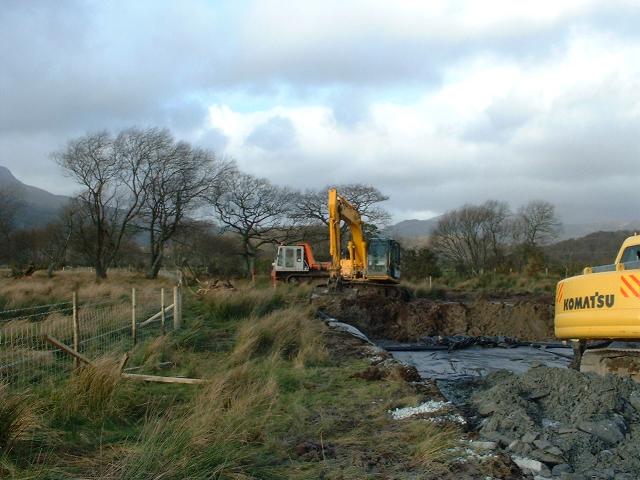
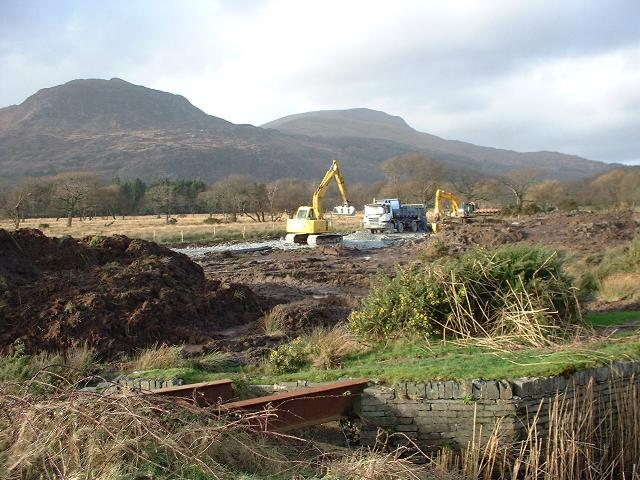
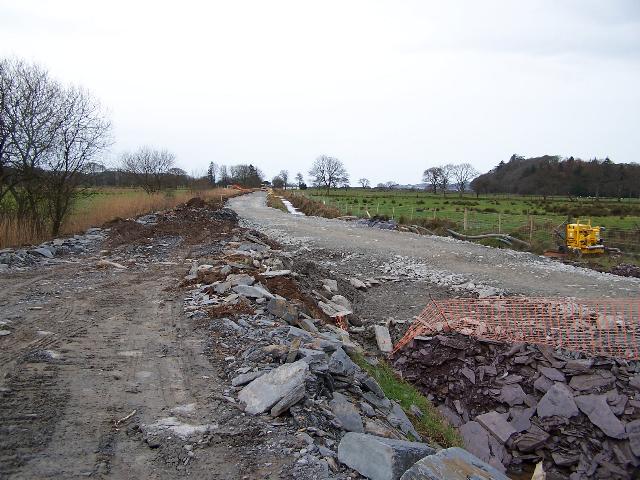
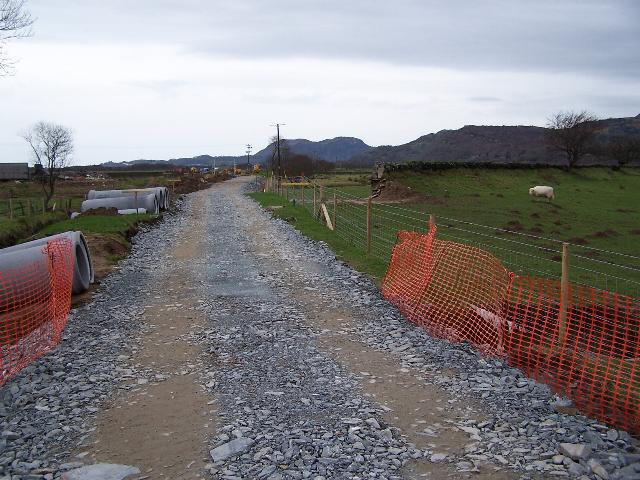
Croesor Junction is the point where the WHR converges with the Croesor Tramway. The railway swings in a sharp curve from east to south. Work started in earnest at the Croesor Junction location in early January 2007. A deviation is being constructed to ease the curve to allow 25mph running. James Cyf.'s clearance and construction work has reached and passed Croesor Junction. The deviation easing the curve to the south west has been cleared and clearance continues towards UB200, the Afon Dylif bridge. Slate waste is being imported along the old Croesor Tramway from Carreg Hylldrem.
This easterly view (19/2/07) shows the old formation at the start of the Croesor Junction Deviation, which veers off to the right. Click on the image to enlarge. This image is copyright B.W.Hughes and was taken on a Kodak DX6490 digital camera. Image post processed using iPhoto Plus4 and displayed at 96dpi.
This southerly view (19/2/07) shows the northern end of the Croesor Junction Deviation with the line curving to the left. Click on the image to enlarge. This image is copyright B.W.Hughes and was taken on a Kodak DX6490 digital camera. Image post processed using iPhoto Plus4 and displayed at 96dpi.
This westerly view (18/1/07) shows the limit of progress near Ch.28600. It appears that about 2m of estuarine soil is being excavated and replaced with slate waste on geotextile. At this point the Pont Croesor deviation has almost converged with the original trackbed as can be seen from the new curving fence line on the left. Click on the image to enlarge. This image is courtesy/copyright John Ewing and was taken on a digital camera. Image post processed using iPhoto Plus4 and displayed at 96dpi.
This southerly view (18/1/07) shows the south end of Croesor Junction where the new deviation eases the curve near Ch.28600. The old formation is the line of gorse behind the muddy bank to the left. The estuarine mud is being excavated to a depth of about 2m and slate waste fill is being added on a geotextile layer to prevent mud infiltration. Click on the image to enlarge. This image is courtesy/copyright John Ewing and was taken on a digital camera. Image post processed using iPhoto Plus4 and displayed at 96dpi.
This southerly view (18/1/07) shows the deviation curving into the south end of Croesor Junction to rejoin the old Croesor Tramway near Ch.28900. The distant line of trees on the right marks the Gatws Bach private road. The former junction was near the electricity poles in the distance. Click on the image to enlarge. This image is courtesy/copyright John Ewing and was taken on a digital camera. Image post processed using iPhoto Plus4 and displayed at 96dpi.

This southerly view (1995?) shows the alignment curving into Croesor Junction at Ch.28750 approx. The former Croesor Tramway joins from the left. Click on the image to enlarge. This image is courtesy/copyright Mike Hart and was taken on an SLR camera. Image post processed using iPhoto Plus4 image correction technology and displayed at 96dpi.

This southerly view (1995?) shows the alignment approaching the culvert and junction at Ch.28800 approx. There has been considerable growth of gorse in this region in the last 10 years and a clearance gang was due to visit in the Autumn to allow proper surveying to take place with a view to easing this sharp curve within the limits of deviation and preferably on existing embankments. Click on the image to enlarge. This image is courtesy/copyright Mike Hart and was taken on an SLR camera. Image post processed using iPhoto Plus4 image correction technology and displayed at 96dpi.
This southerly view (1995?) shows the alignment south from the Afon Dylif bridge at Ch.28100 approx. Click on the image to enlarge. This image is courtesy/copyright Mike Hart and was taken on an SLR camera. Image post processed using iPhoto Plus4 image correction technology and displayed at 96dpi.

This northerly view (1995?) shows the alignment north from the site of the junction at Ch.28900 approx. Cnicht is visible in the background. The Croesor Tramway continues straight on the right hand side of the ditch and the WHR bears left over the girders. Click on the image to enlarge. This image is courtesy/copyright Mike Hart and was taken on an SLR camera. Image post processed using iPhoto Plus4 image correction technology and displayed at 96dpi.
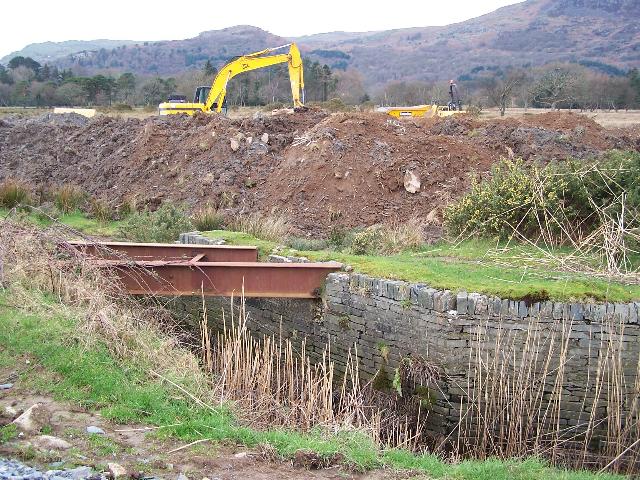
This westerly view (18/1/07 and 19/2/07) shows the former bridge at the north end of Croesor Junction where the WHR deviates west from the original Croesor Tramway. In the distance, Jones Cyf. is making excellent progress with the new deviation which eases the curve for 25mph running. In the second view the area between the Deviation and the old alignment has been used for storing spare soil. Click on the images to enlarge. The first image is courtesy/copyright John Ewing and was taken on a digital camera. The second image is copyright B.W.Hughes and was taken on a Kodak DX6490 digital camera. Images post processed using iPhoto Plus4 and displayed at 96dpi.
This northerly view (1995?) shows the alignment through Croesor Junction at Ch.28850 approx. as viewed from the Croesor Tramway, just south of the junction, with Carreg Hylldrem in the distance. Click on the image to enlarge. This image is courtesy/copyright Mike Hart and was taken on an SLR camera. Image post processed using iPhoto Plus4 image correction technology and displayed at 96dpi.
This northerly view (19/2/07) shows the old Croesor Tramway alignment just south of the former junction where the tramway bends to the right. The tramway from the farm at Garreg Hylldrem is being used to import material and for the crane to erect the bridges. Click on the image to enlarge. This image is copyright B.W.Hughes and was taken on a Kodak DX6490 digital camera. Image post processed using iPhoto Plus4 and displayed at 96dpi.
This northerly view (19/2/07) shows the middle of the Croesor Junction Deviation with the line curving to the left to rejoin the old route towards the Afon Dylif. Click on the image to enlarge. This image is copyright B.W.Hughes and was taken on a Kodak DX6490 digital camera. Image post processed using iPhoto Plus4 and displayed at 96dpi.
This southerly view (1995?) shows the alignment through Croesor Junction at Ch.28900 approx. The formation is double width and there was a passing loop here. The ditch to the right will be culverted for a short distance so the curve can be eased to provide higher speeds through this sharply curved location. Click on the image to enlarge. This image is courtesy/copyright Mike Hart and was taken on an SLR camera. Image post processed using iPhoto Plus4 image correction technology and displayed at 96dpi.
This northerly view (18/1/07) shows the temporary access culvert at the south end of Croesor Junction where the new deviation eases the curve near Ch.28900. The old Croesor Tramway trackbed to Carreg Hylldrem is being used to import slate waste. The former junction was near the electricity poles in the distance. Click on the image to enlarge. This image is courtesy/copyright John Ewing and was taken on a digital camera. Image post processed using iPhoto Plus4 and displayed at 96dpi.
The southern part of the Deviation was completed on 14/2/07, just days before the trusses were brought in along that route.

This northerly view (19/2/07) shows the southern end of the Croesor Junction Deviation with the line curving to the left. Click on the image to enlarge. This image is copyright B.W.Hughes and was taken on a Kodak DX6490 digital camera. Image post processed using iPhoto Plus4 and displayed at 96dpi.
This southerly view (19/2/07) from the old formation shows the southern end of the Croesor Junction Deviation with the line curving in from the right. This section was finished just three days before the Afon Dylif trusses were delivered via Ynysfor! Click on the image to enlarge. This image is copyright B.W.Hughes and was taken on a Kodak DX6490 digital camera. Image post processed using iPhoto Plus4 and displayed at 96dpi.
This northerly view (19/2/07) shows the start of the Croesor Junction Deviation in the distance as the line curves to the left. Click on the image to enlarge. This image is copyright B.W.Hughes and was taken on a Kodak DX6490 digital camera. Image post processed using iPhoto Plus4 and displayed at 96dpi.
These southerly views (1995? and 19/2/07) show the alignment at the south end of Croesor Junction at Ch.29000 approx. looking towards Ynysfor Halt. Click on the images to enlarge. The first image is courtesy/copyright Mike Hart and was taken on an SLR camera. The second image is copyright B.W.Hughes and was taken on a Kodak DX6490 digital camera. Images post processed using iPhoto Plus4 and displayed at 96dpi.
Croesor Junction to LC112
This section includes the site of Ynysfor Halt (Ch.29400). There is no public access to this section of route until LC112 alongside the B4410.
This easterly view (12/12/04) shows the house 'Gatws Bach' at the site of Ynysfor halt taken from the Ynysfor public lane. The railway is on the shallow bank with trees just to the right of the house and crosses a private track from Ynysfor to Llanfrothen immediately north of the house. Click on the image to enlarge. This image is copyright B.W.Hughes and was taken on a Concord 3340z (3.1 Mega pixel) digital camera. Image post processed using iPhoto Plus4 image correction technology and displayed at 96dpi.
An official sits visit on 19/2/07 allowed your webmaster to inspect the site of Ynysfor Halt at LC110 (Ch.29400) for the first time. Although this halt is reputed to have had a 40 foot siding and possibly even a Quarrymans' coach body, there was little sign of anything other than the basic formation at this location. The Environment Commission has cleared the lineside ditches on this section but the water and cut tree trunks are coloured red, possibly from minerals.
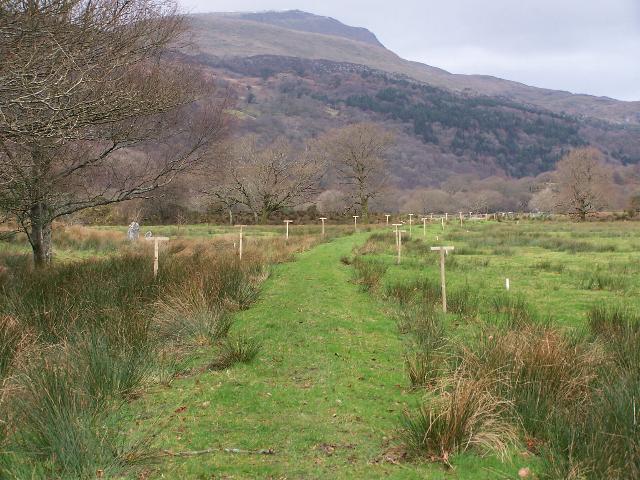
This section has seen the use of a road-stone base rather than slate fines, which have proved to be of variable quality for ensuring a binding surface that allows run off under the ballast layer rather than penetration. On this relatively straight section level posts have been erected at 20m intervals rather than the usual 10m.
This northerly view (19/2/07) shows LC110 at Gatws Bach, the site of Ynysfor Halt (Ch.29400). Croesor Junction Deviation begins just 500m north of here at the end of the straight section. Click on the image to enlarge. This image is copyright B.W.Hughes and was taken on a Kodak DX6490 digital camera. Image post processed using iPhoto Plus4 and displayed at 96dpi.

This southerly view (19/2/07) shows LC110 at Gatws Bach, the site of Ynysfor Halt (Ch.29400). The private road does not continue to the left to Llanfrothen. Click on the image to enlarge. This image is copyright B.W.Hughes and was taken on a Kodak DX6490 digital camera. Image post processed using iPhoto Plus4 and displayed at 96dpi.
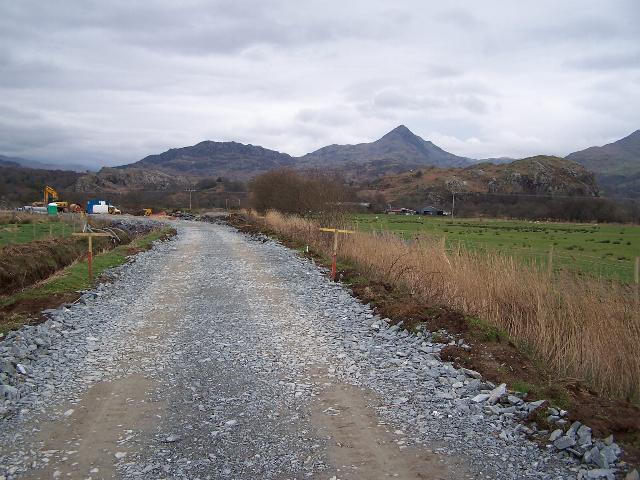
These northerly views (19/2/07 and 28/2/07) show the view from TWA Ch.29700 approx. James Cyf. has excavated UB208, just south of LC111. This original Croesor Tramway culvert appears to have drystone walls and will probably require at least a concrete deck slab. The spiky summit of Cnicht (689m) is visible to the right overlooking the Croesor valley. Click on the images to enlarge. The first image is copyright B.W.Hughes and was taken on a Kodak DX6490 digital camera. The second image is courtesy/copyright John Ewing and was taken on a digital camera. Images post processed using iPhoto Plus4 and displayed at 96dpi.
This southerly view (19/2/07) shows LC111 (Ch.29720). The 262m Moel-y-Gest overlooking Porthmadog is visible to the right. Croesor Junction Deviation begins just 500m north of here at the end of the straight section. Click on the image to enlarge. This image is copyright B.W.Hughes and was taken on a Kodak DX6490 digital camera. Image post processed using iPhoto Plus4 and displayed at 96dpi.
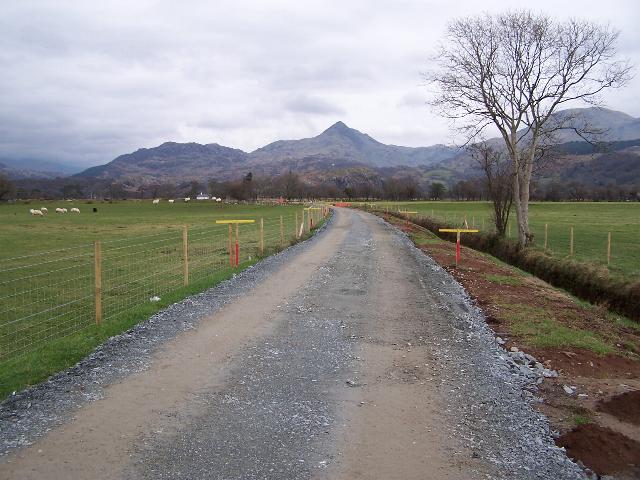
This northerly view (19/2/07) shows the route aiming at Cnicht (Ch.29920). Croesor Junction Deviation begins just 500m north of here at the end of the straight section. Click on the image to enlarge. This image is copyright B.W.Hughes and was taken on a Kodak DX6490 digital camera. Image post processed using iPhoto Plus4 and displayed at 96dpi.
This southerly view (19/2/07) shows the route penetrating the former seawall (Ch.29920). On this date the rolled fines surface was still to be completed on some sections. Click on the image to enlarge. This image is copyright B.W.Hughes and was taken on a Kodak DX6490 digital camera. Image post processed using iPhoto Plus4 and displayed at 96dpi.
This northerly view (19/2/07) from Ch.30000 shows this section consists of gentle curves. The new electricity pole to the left shows the diversion of the cable route which was to be ducted under the railway at this point. Click on the image to enlarge. This image is copyright B.W.Hughes and was taken on a Kodak DX6490 digital camera. Image post processed using iPhoto Plus4 and displayed at 96dpi.
This southerly view (19/2/07) show the unimproved route from Ch.30000. The sand embankment of the former Croesor Tramway section goes straight past James Cyf's compound to LC112. The electricity route was being diverted that day. Click on the image to enlarge. This image is copyright B.W.Hughes and was taken on a Kodak DX6490 digital camera. Image post processed using iPhoto Plus4 and displayed at 96dpi.
LC112 to Pont Croesor
The railway moves away from the road at UB182 and does not return until LC112 on the B4410, east of Pont Croesor. Until the bridge was rebuilt in the 1990s, the WHR's wooden sleepers were still present under the tarmac at LC114 at the west end of the bridge.
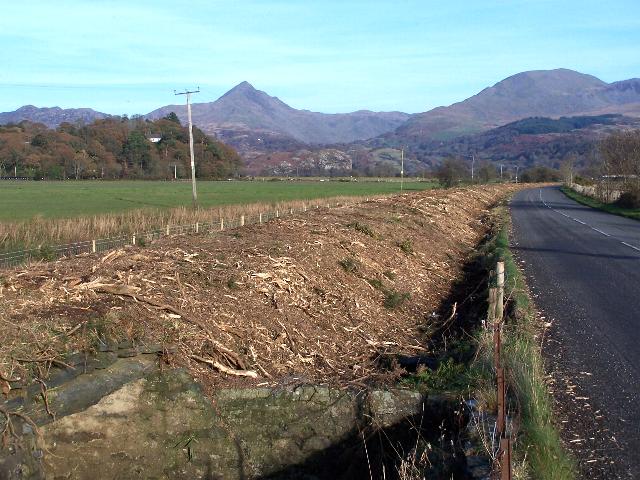
This northerly roadside view (20/2/01) shows the trackbed towards Croesor Junction. The embankment here is made from estuarine sand and looks to be too narrow for the modern WHR formation. It may require widening and strengthening. Click on the image to enlarge. This image is copyright B.W.Hughes. Slide scan technology utilised is Olympus ES10 & iPhoto Plus4. Slide scanned at 200dpi.

These northerly roadside views (12/12/04, 20/11/05, 29/10/06 and 10/12/06) show the trackbed at LC112 (Ch.30140 approx.) has become more overgrown in the 3 years since the previous view and the farmer's fence has moved onto the trackbed. The third view shows clearance underway in preparation for the placement of the Afon Dylif and Nanmor bridges by this route during winter 2006/7. Fencing has been completed on the west side. The fourth view shows James Cyf's compound established. Click on the images to enlarge. These images are copyright B.W.Hughes. The first was taken on a Concord 3340z (3.1 Mega pixel) digital camera and the second and third on a Kodak DX6490 digital camera. Images post processed using iPhoto Plus4 image correction technology and displayed at 96dpi.
This northerly view (21/1/07) shows trackbed alongside James Cyf's compound at LC112. In the distance the cleared trackbed can be seen. Click on the image to enlarge. This image is copyright B.W.Hughes and was taken on a Kodak DX6490 digital camera. Image post processed using iPhoto Plus4 and displayed at 96dpi.
This northerly view (21/1/07) shows the hardened trackbed north from LC112. The trackbed must be hardened up for delivery and erection of the two sets of bridge trusses by the Spring. Click on the image to enlarge. This image is copyright B.W.Hughes and was taken on a Kodak DX6490 digital camera. Image post processed using iPhoto Plus4 and displayed at 96dpi.
This southerly roadside view (20/11/05) at LC112 (with the B4410 to the left) shows the recently cleared trackbed. Some trees and scrub remain to be cleared at the northwest side of this roadside length. Click on the image to enlarge. This image is copyright B.W.Hughes and was taken on a Kodak DX6490 digital camera. Image post processed using iPhoto Plus4 and displayed at 96dpi.
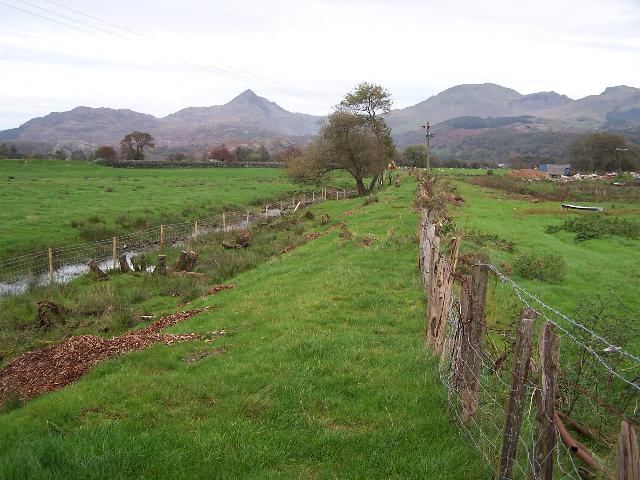
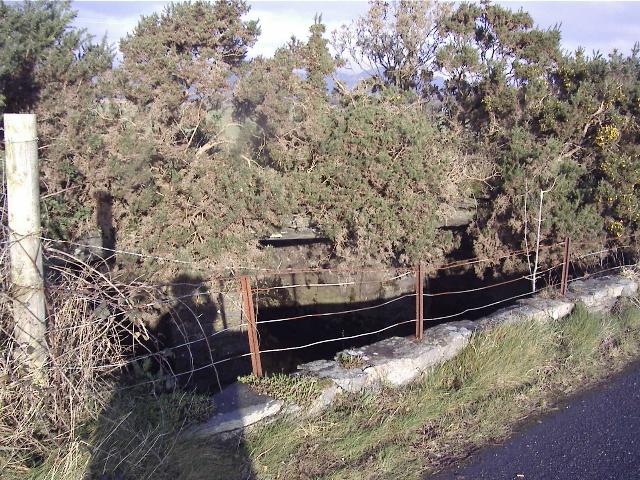
This northerly view (20/11/05) at UB209, just north of Pont Croesor, shows the cleared formation with Cnicht in the background. The gorse bushes have been mulched to clad the embankment, which appears to have a rock core, at least in places. Click on the image to enlarge. This image is copyright B.W.Hughes and was taken on a Kodak DX6490 digital camera. Image post processed using iPhoto Plus4 and displayed at 96dpi.
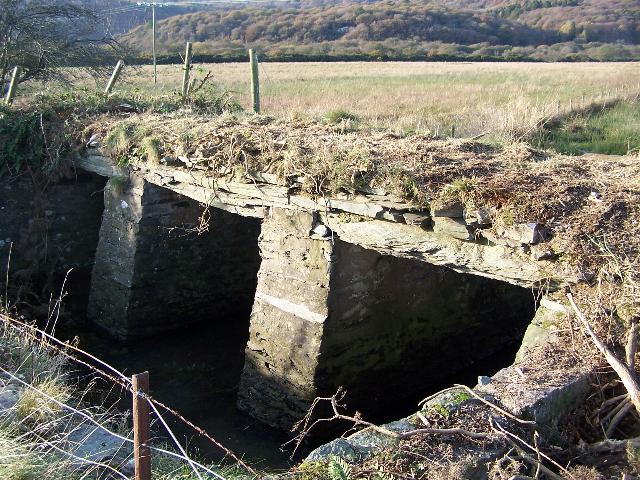
This westerly view (20/11/05) at UB209, just north of Pont Croesor, shows the original slate slab construction of UB209. This flood relief channel appears to have remained unaltered when the WHR works upgraded the former Croesor Tramway in 1922. Click on the image to enlarge. This image is copyright B.W.Hughes and was taken on a Kodak DX6490 digital camera. Image post processed using iPhoto Plus4 and displayed at 96dpi.
This northerly view (12/12/04) shows the remains of the flood channel overspill bridge at UB209 which retains its slate slab spans. This is on the roadside section approaching Pont Croesor at Ch.30750 approx. Click on the image to enlarge. This image is copyright B.W.Hughes and was taken on a Concord 3340z (3.1 Mega pixel) digital camera. Image post processed using iPhoto Plus4 image correction technology and displayed at 96dpi.
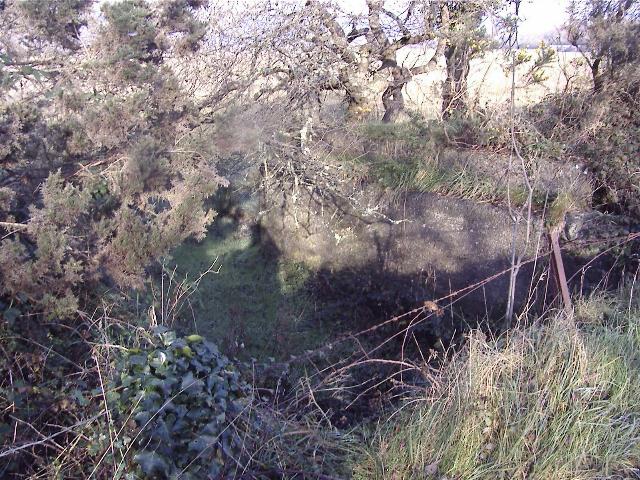
This northerly view (12/12/04) shows the abutments of the missing bridge UB210 at Ch30880 approx.. This is on the roadside section close to Pont Croesor. Click on the image to enlarge. This image is copyright B.W.Hughes and was taken on a Concord 3340z (3.1 Mega pixel) digital camera. Image post processed using iPhoto Plus4 image correction technology and displayed at 96dpi.
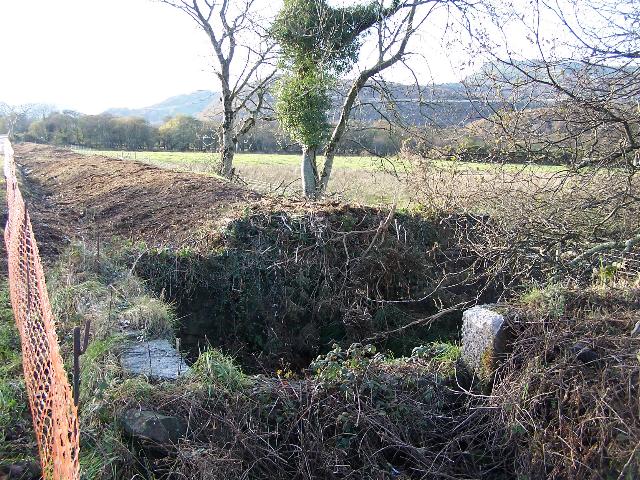
This southerly view (20/11/05) at UB210, just north of Pont Croesor, shows the cleared formation with the line of trees alongside the Afon Glaslyn in the background. Some scrub and a few small trees remain to be cleared from this site. Click on the image to enlarge. This image is copyright B.W.Hughes and was taken on a Kodak DX6490 digital camera. Image post processed using iPhoto Plus4 and displayed at 96dpi.
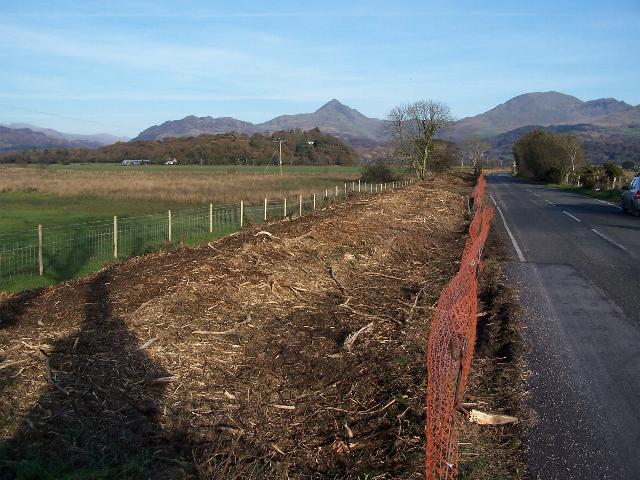
This northerly roadside view (20/11/05) at Pont Croesor, shows the cleared formation with Cnicht in the background. The gorse bushes have been mulched to clad the embankment, which appears to have a rock core, at least in places. Click on the image to enlarge. This image is copyright B.W.Hughes and was taken on a Kodak DX6490 digital camera. Image post processed using iPhoto Plus4 and displayed at 96dpi.
Pont Croesor
The roadway bridge was improved in the late 1990s and the sleepers formerly visible in the tarmac at the level crossing at the south end were removed. Further alterations to the level crossing area were underway on 19/2/07.
A water tower stood at the northwest corner of the bridge in WHR times, raising water from the Afon Glaslyn. It consisted of a tank wagon body on a pile of sleepers.
This westerly view (1977) shows an archive scene at Pont Croesor. The former water tank wagon used to stand on a pile of sleepers at the north end of the bridge to replenish thirsty locos. Click on the image to enlarge. This image is courtesy/copyright Humphrey Davies and was scanned from a slide. Image post processed using iPhoto Plus4 and displayed at 96dpi.
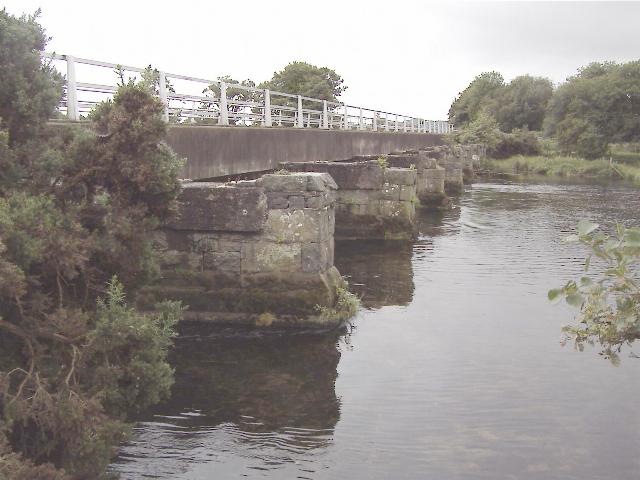
This southerly view (12/9/04) from the north end of the bridge shows the bridge piers that supported the trackbed towards Porthmadog. The area became the centre of an RSPB Osprey viewpoint from Summer 2004 which might limit work to the Winter seasons when they have flown south. Click on the image to enlarge. This image is copyright B.W.Hughes. Slide scan technology utilised is Olympus ES10 & iPhoto Plus4. Slide scanned at 200dpi.
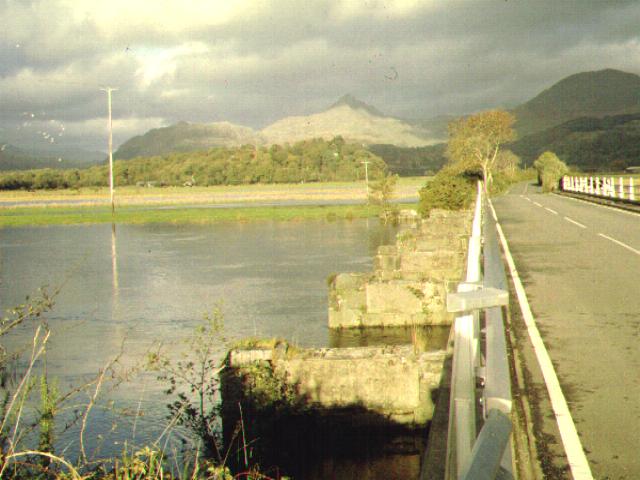
This dramatic northerly roadside view (27/10/01) shows the north west side of Pont Croesor with the sharp profile of Cnicht in the background. The former WHR water tank stood on a pile of sleepers on the far bank of the Afon Glaslyn, to the left of the trackbed. The roadway to the right was rebuilt in the 1990s with a new re-inforced concrete deck and steel parapets. The railway piers are visible to the left as an extension of the roadway piers, although the railway deck has long since gone. The piers will need to be strengthened and lengthened to the left to take the full width of the modern WHR rolling stock. A new deck will be formed to match the concrete of the rebuilt road bridge. Click on the image to enlarge. This image is copyright B.W.Hughes. Slide scan technology utilised is Olympus ES10 & iPhoto Plus4. Slide scanned at 200dpi.
This southerly view (1977) shows an archive scene at Pont Croesor. GCC tarmaced over the sleepers of the crossing which subsequently rotted. This feature disappeared when the bridge was rebuilt and the road resurfaced in the late 1990s. Click on the image to enlarge. This image is courtesy/copyright Humphrey Davies and was scanned from a slide. Image post processed using iPhoto Plus4 and displayed at 96dpi.
Pont Croesor plans
On 7/6/07 the WHRCL announced that an order has been placed with Brunswick Ironworks of Caernarfon for the completion of the 8 spans for Pont Croesor, the longest WHR bridge, alongside the B4410 at Ch.31000. This is another example of work being placed with the local community wherever possible to benefit the local economy. Brunswick also manufactured the three 75 foot long truss bridges which take the WHR over the Afon Glaslyn at Bryn-y-felin, the Afon Nanmor and Afon Dylif river bridges and the bridge over the A4085 Llanfrothen road near Nantmor. Pont Croesor is the last major steel structure on the line to Porthmadog. The bridge spans, and all the other bridges listed above, were designed by volunteer bridge engineer John Sreeves. The I beams have been in stock at Brunswick's Peblig Mill Works for some months. Fabrication of Pont Croesor The erection of Pont Croesor is not Osprey dependent as it is right on the periphery of the exclusion zone.
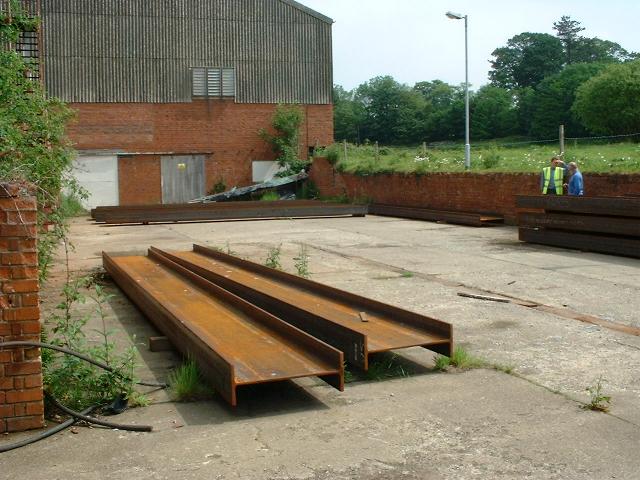
This view (4/6/07) shows all 16 'I' section girders in store at Brunswick's Peblig Mill Works, Caernarfon. Click on the image to enlarge. This image is courtesy/copyright John Ewing and was taken on a Fuji Finepix 1400 digital camera. Image post processed using iPhoto Plus4 and displayed at 96dpi.
Full details of the bridge are repeated below courtesy John Sreeves, the WHRCL bridge engineer, who has kindly provided this commentary and plan.
'Pont Croesor is located just over two miles north east of Porthmadog, or 1 miles beyond the WHR(P)’s current limit of operation at Traeth Mawr. It is an eight span viaduct carrying the railway and B4410 Prenteg to Llanfrothen road over the River Glaslyn. This major river crossing warrants its own place name on the Ordnance Survey map as it provides a convenient route for road users wishing to avoid Porthmadog. When reconstructed, Pont Croesor will become the longest bridge on either the FR or WHR with an overall length of 65.25m between abutments.
The original bridge was built in 1864 to enable the Croesor Tramway to carry slate from quarries at Croesor to wharves in Porthmadog. Little is known of the form of construction other than that which can be gleaned from the description given in a report by Major G C Spring in 1921. This stated that there were eight 25’ wooden girder spans on slate rubble piers, which were ‘decidedly faulty, having been damaged by floodwater and require repointing’. An 1891 map shows footpaths linking to either end of the bridge, which had become roads by 1916; it is not known to what extent the bridge was widened to accommodate the road, or whether part of the width was in shared use. The 1921 report stated that the County Council had the reconstruction of the bridge under consideration, and it is probable that a major rebuild of the road deck and piers was carried out in 1922 at the same time as when the rail deck was replaced.
The abutments and piers are solidly built in masonry, with a hardened invert provided as scour protection. The river bed level is 0.2m below ordnance datum at the upstream side, and slopes down steeply under the road bridge. OS maps show the bridge as the highest point to which ordinary tides flow, but the actual water level downstream is influenced by the timing of the tide gates opening at the river mouth in Porthmadog. During heavy rainfall, water backs up and can be very deep in this area; in summer the depth over the apron reduces to just a few inches.
A drawing showing the proposed 1922 railway bridge deck has survived, but is not entirely accurate; eight equal spans of 24’ square are indicated (7.315m), whereas the actual spans vary between 7.210m and 7.565m and are set at a 10 degree skew. Each span consisted of a pair of 20” x 7½” x 89lbs/yard steel beams at 37” centres (0.940m), braced with three 3” x 3” x ⅜” angles arranged zigzag in plan. The beams ends were linked together by transverse 9” x 3” channels. Direct fastening to the pier-top concrete plinths was achieved by 1⅛” holding down bolts with holes elongated at one end to allow for expansion. Sleepers were 9” x 4½” x 4’6” long at 1’ 10¾” spacing; every third sleeper was held down by ⅞” hook bolts which also passed through 6” x 6” timber guard rails positioned above the sleeper ends. No handrails or walkway were shown, so any derailment would have led to a difficult recovery operation, although presumably the close proximity of the road bridge directly alongside would have allowed access.
While most of the Welsh Highland Railway was dismantled in 1941, the section between Porthmadog and Croesor was retained in order not to prejudice reopening after the war of the quarries that had no road access. However the quarries did not reopen and the lower section of track was lifted in 1948/49. The steel bridge deck was demolished at the same time, this being the only bridge to be removed on the whole railway. If the girders had survived, they would have been too light to carry our heavier locomotives, and in all likelihood too corroded for further use.
In 1994, Gwynedd County Council upgraded the road bridge by a scheme that retained much of the original concrete outline, but the edge beam on the railway side was widened outwards by 300mm to accommodate a new aluminium parapet. A distance of 1505mm remains between the face of the coping and the track centreline, which is sufficient for the track to be reinstated exactly on its original alignment without the need for ‘S’ bends at either end. The new deck will be deeper than that which existed previously while retaining the same soffit level. As a consequence the rails will be higher than before and thus unaffected by the slight encroachment of the new concrete coping. The highway parapet is set back and tapers away from the railway resulting in a clearance of 568mm at the tops of the 960mm high parapet posts, but in case it may not be possible to fully open some outward-opening carriage doors on the highway side, a walkway will be provided on the upstream side to allow for emergency detrainment.
Options involving a concrete deck to support ballasted track were investigated in pursuit of reduced long term maintenance. However such a deck, being wider, would have required extended piers or a temporarily supported cantilever edge. An increase in rail level arising from the use of ballasted track would have necessitated adjustment to the road levels at the adjacent level crossing, causing a longer road closure. Furthermore the much heavier deck would have cost more and taken longer to construct on site. An alternative composite ‘U’ form similar to that proposed at Nantmor Road Bridge would have addressed these issues and was designed in detail. Unfortunately this would have involved breaking out a lot of pier masonry and casting new concrete plinths to accommodate the beams at wider centres, and was thus deemed to be more costly and time consuming for negligible benefit.
The design finally chosen for the replacement bridge deck closely follows that of the 1922 version, but the twin steel beams will be 770mm deep instead of 508mm as a result of the much heavier loading to be carried. Transverse and diagonal bracing will be similar to before, but sleepers will be placed shoulder to shoulder to form a continuous mat following the practice established on Phase 3 bridges. Flanking walkways and a handrail on the upstream side only are required to comply with current standards. The piers will be repaired by repointing where necessary, and the existing concrete plinths reused with new holes drilled for holding down bolts. Irregularities in the pier spacing prevent us making all of the beams the same length. Nevertheless, in order to rationalise the fabrication work, the sixth span from the north will have beams 8.405m long and the remainder will be 8.230m long with the bearings offset very slightly from the pier centrelines. All steelwork will be galvanised to achieve long-term corrosion protection and pre-assembled deck panels will be light enough to be lifted by a crane positioned on the adjacent road bridge without damaging the highway.
Design checking work has been carried out by Halcrow Cardiff office; tenders will be invited later this year and it is anticipated that the bridge will be in place during 2007.
John Sreeves
Bridge Design Engineer WHRCL'
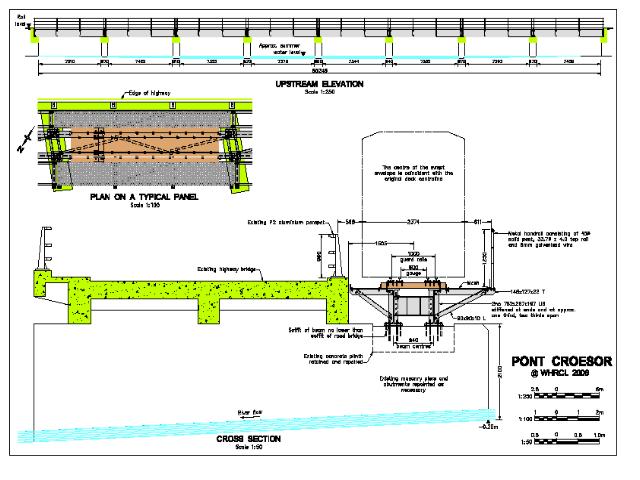
Click on the plan for the full pdf file.
Click here to visit the Pont Croesor-Porthmadog page
Click here to return to Stop Press page
Site Development
If you have suggestions for development of this site, please contact me by email from the address on the Stop Press page.
Page Version 4.17 Dated 16/7/07